


 Tiếng Việt
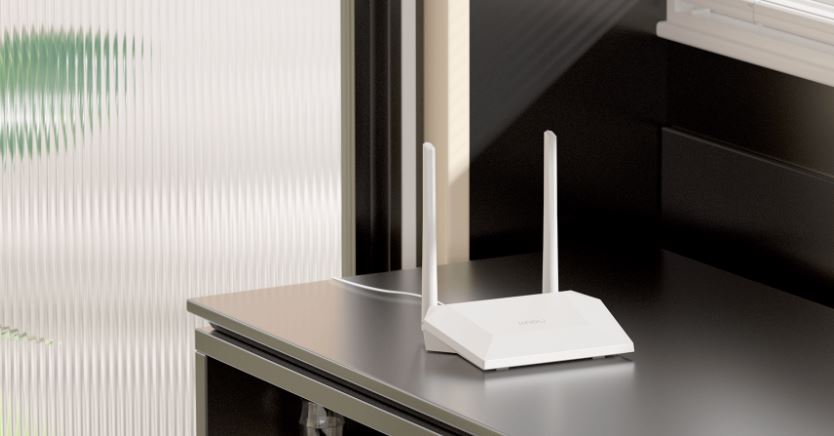
Router IMOU HR300, N300: are two WiFi Router models launched by IMOU in 2023. With a compact design and many outstanding functions, this will be the optimal choice. best for your family. In this article, I will guide you how to use and install coe versions on these two Router lines.
I. Instructions for using Router IMOU N300
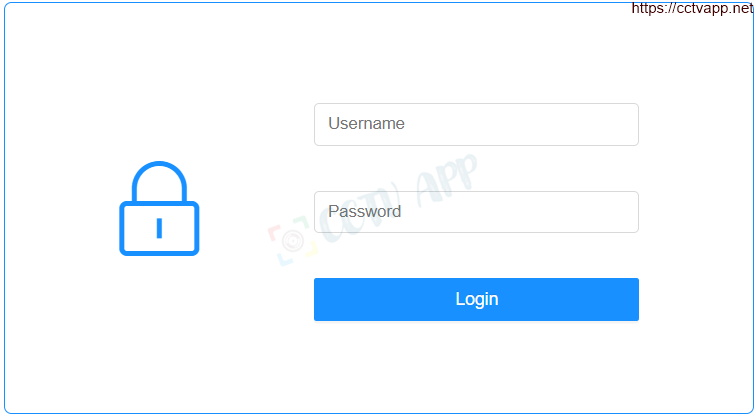
First, log in to your modem by opening your web browser and typing: http://192.168.10.1 (default) or. It will appear the modem interface and ask to log in.
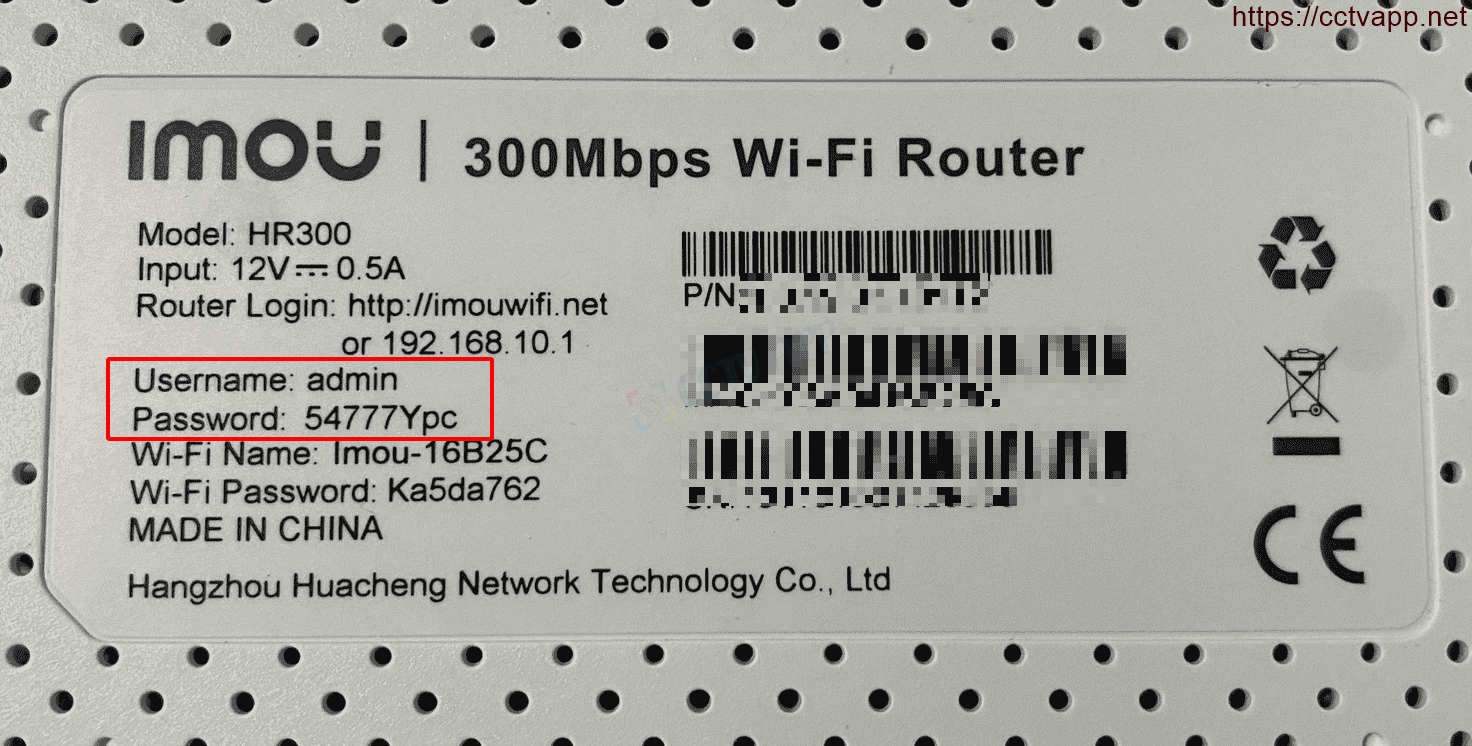
The default account and password of this router is usually written on the label below the router. Router IMOU N300 has a default account and password of: admin
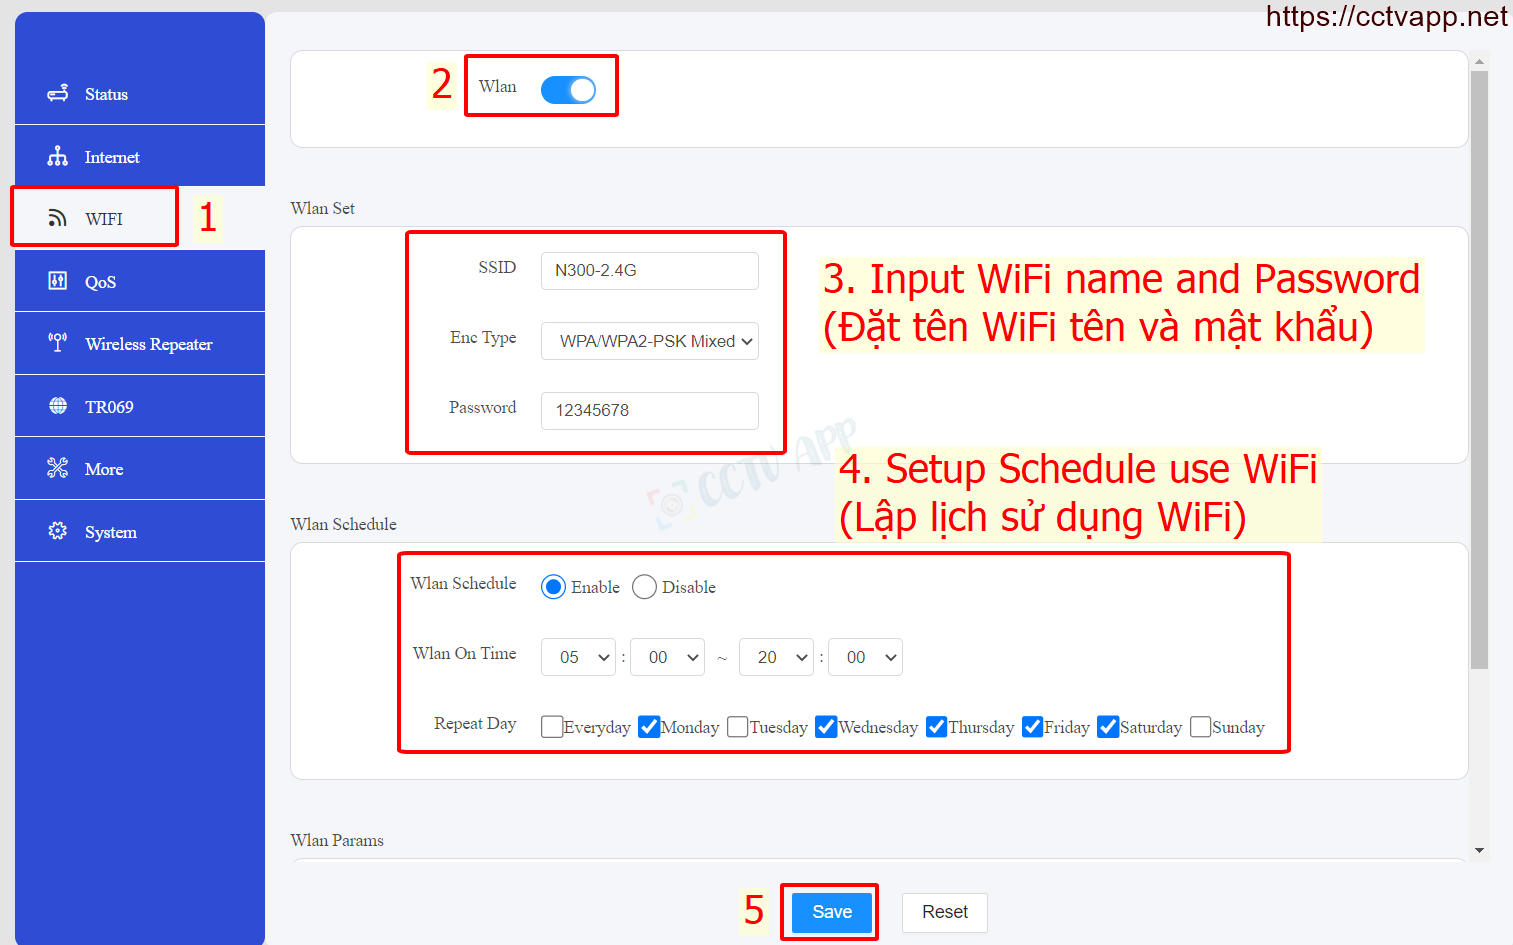
Then set the following parameters:
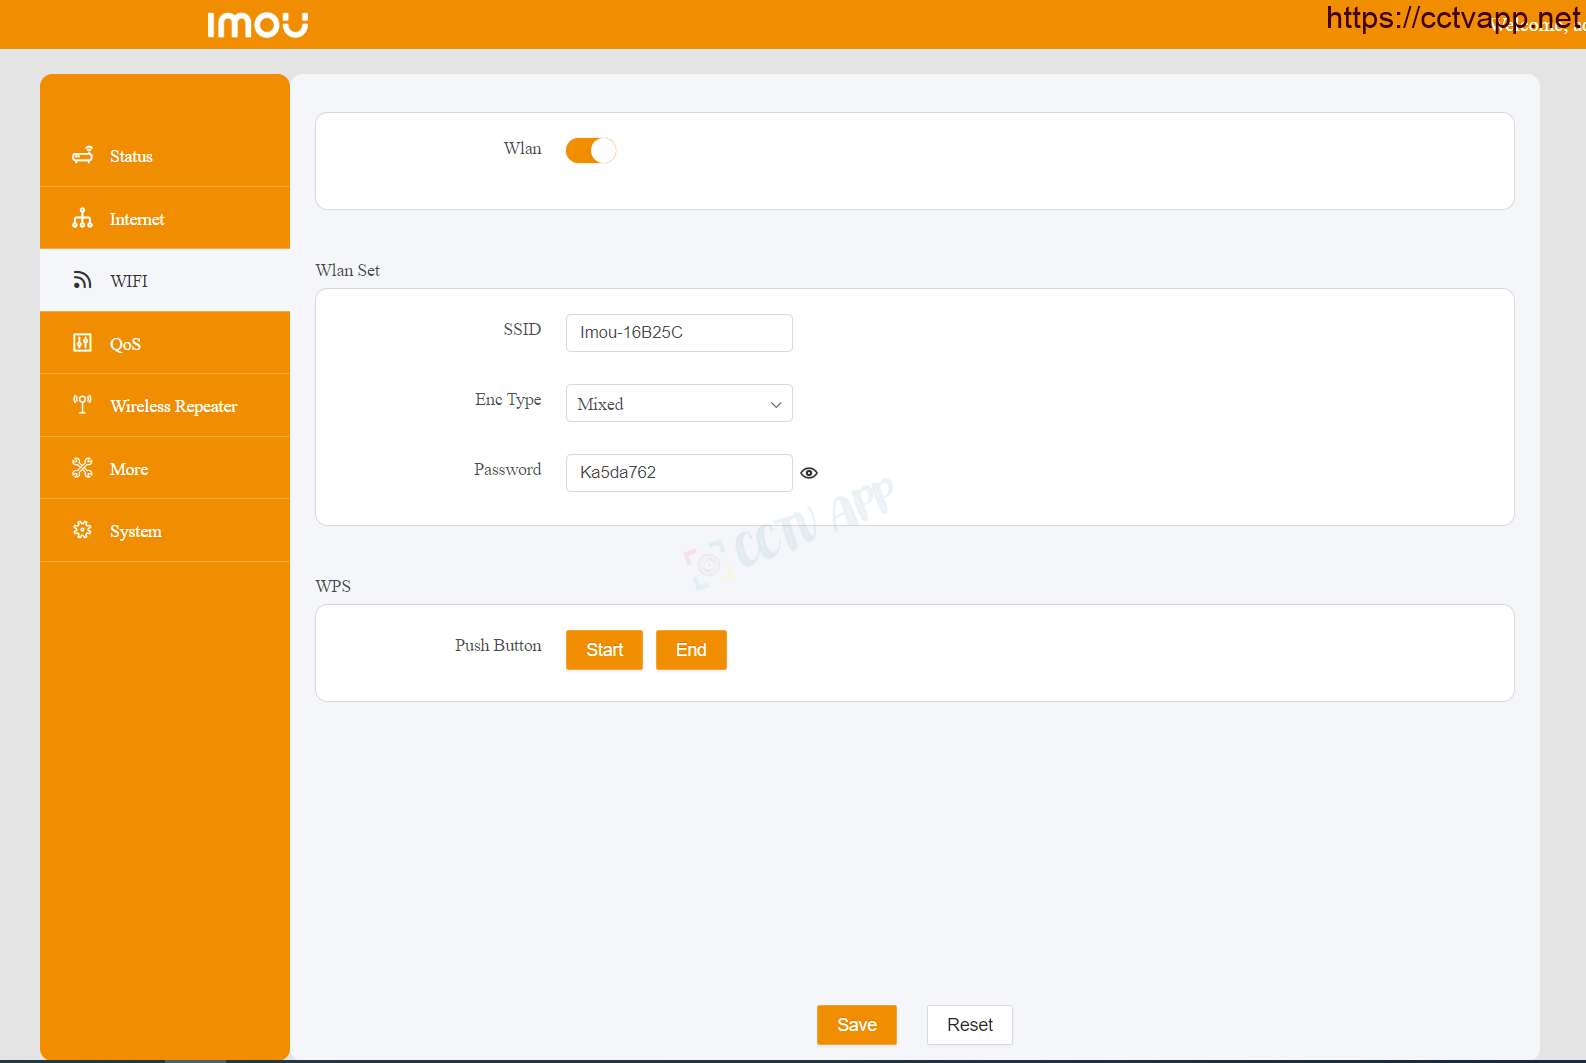
- Step 1: Select WiFi
- Step 2: Enable Wlan
- Step 3: Set WiFi name and password
- Step 4: Set up WiFi usage schedule
- Step 5: Save the settings
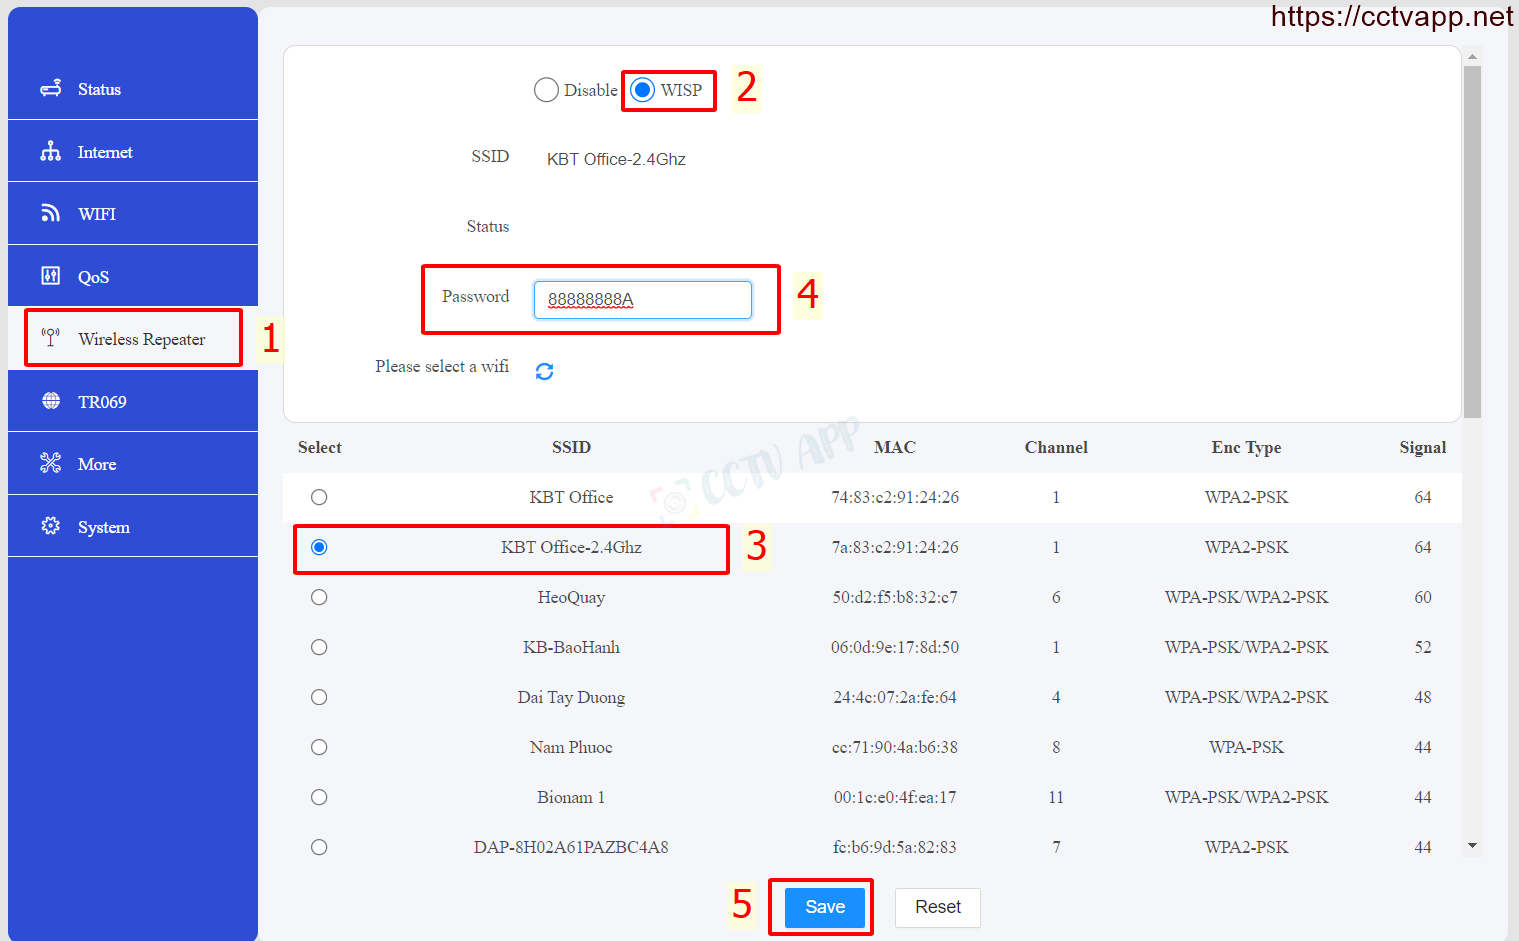
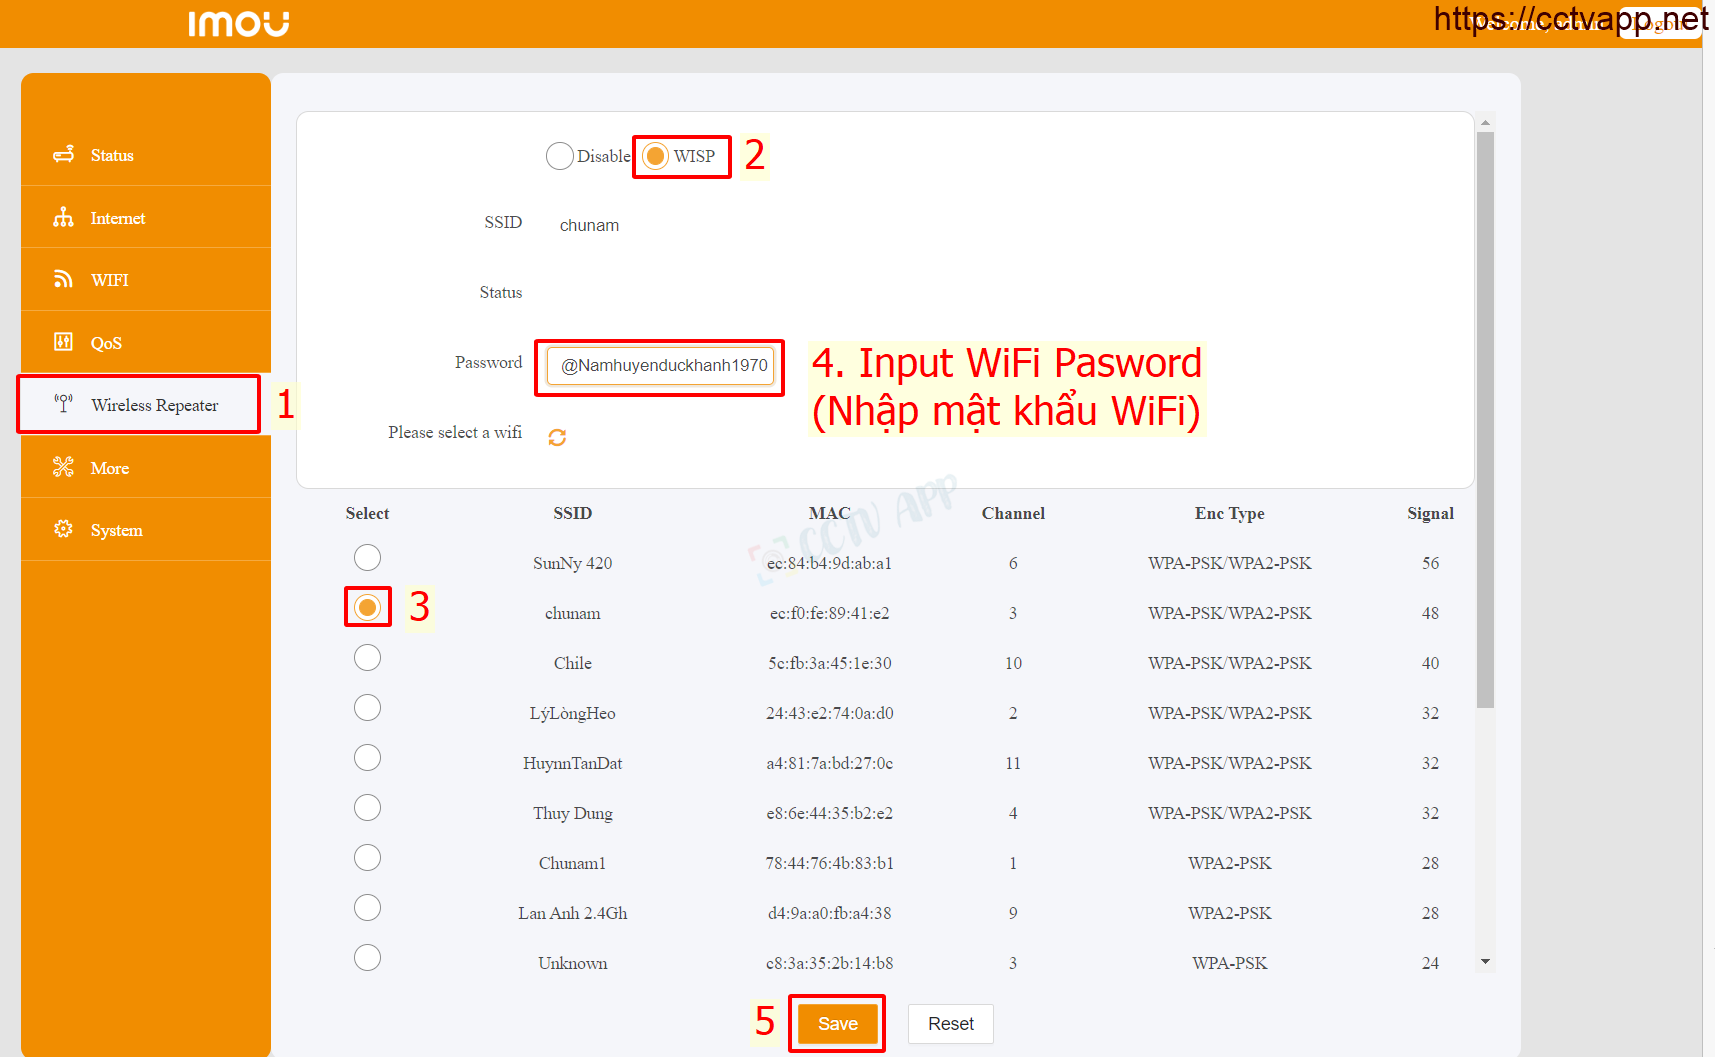
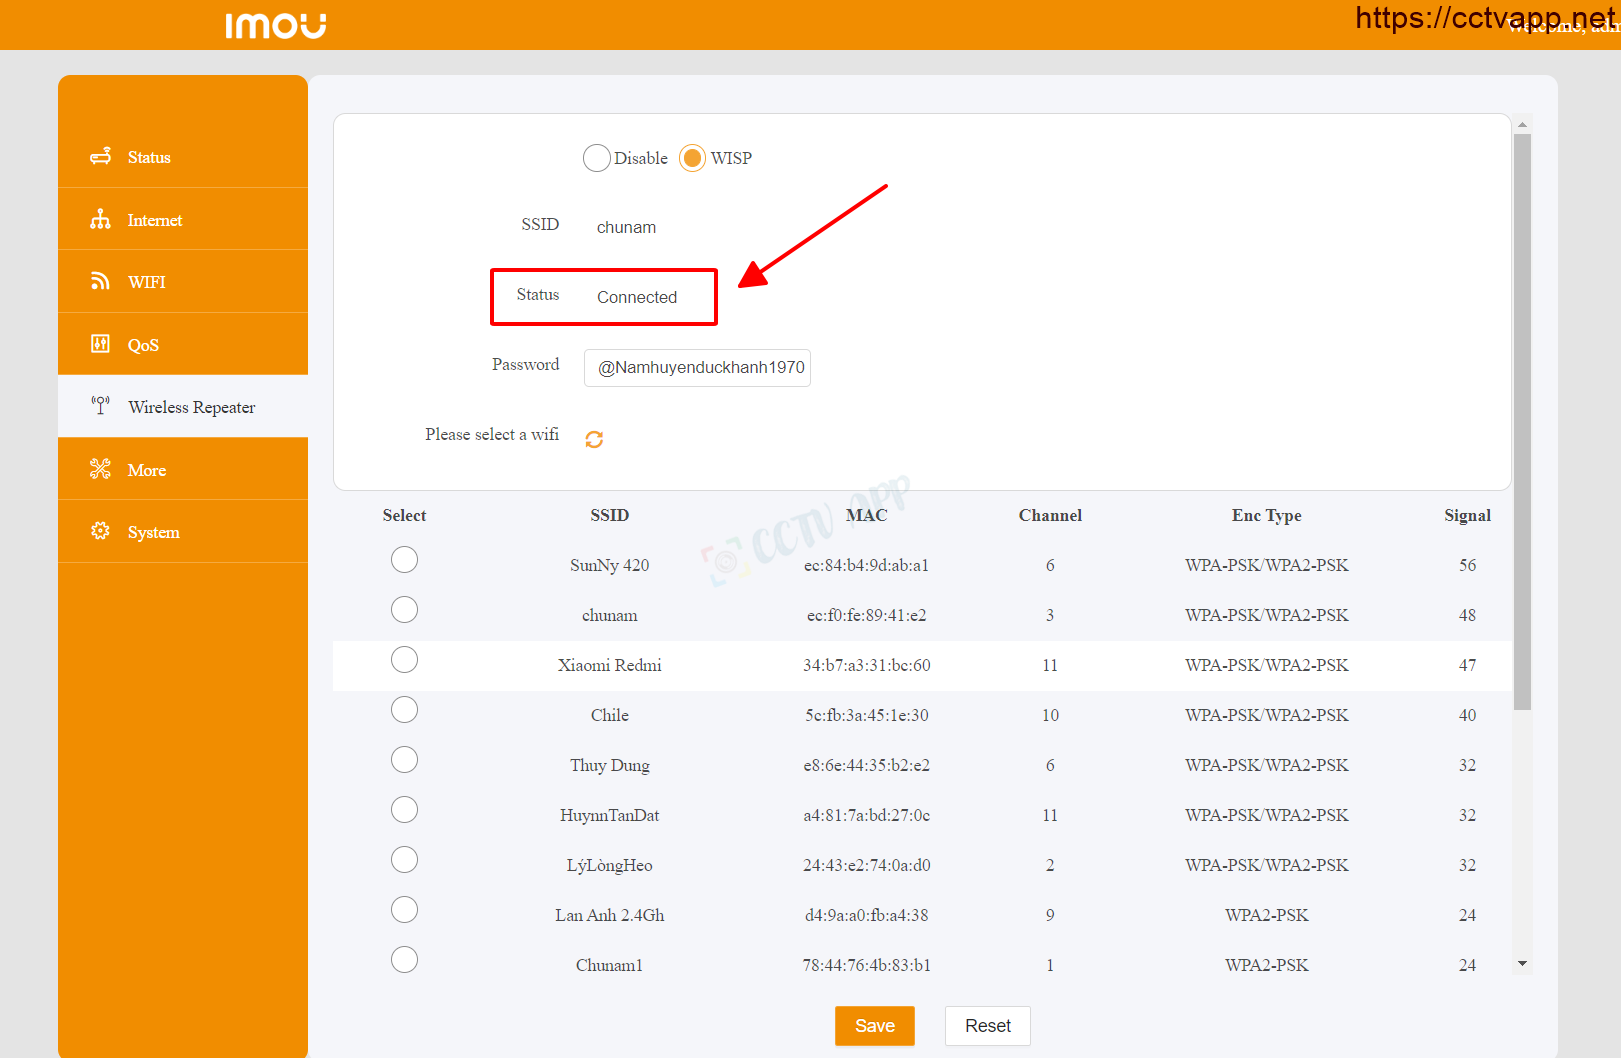
Instructions for configuring WiFi Repeater on IMOU N300.
Manipulate as instructed below. After setting up on the Router, the device needs to be rebooted to work.
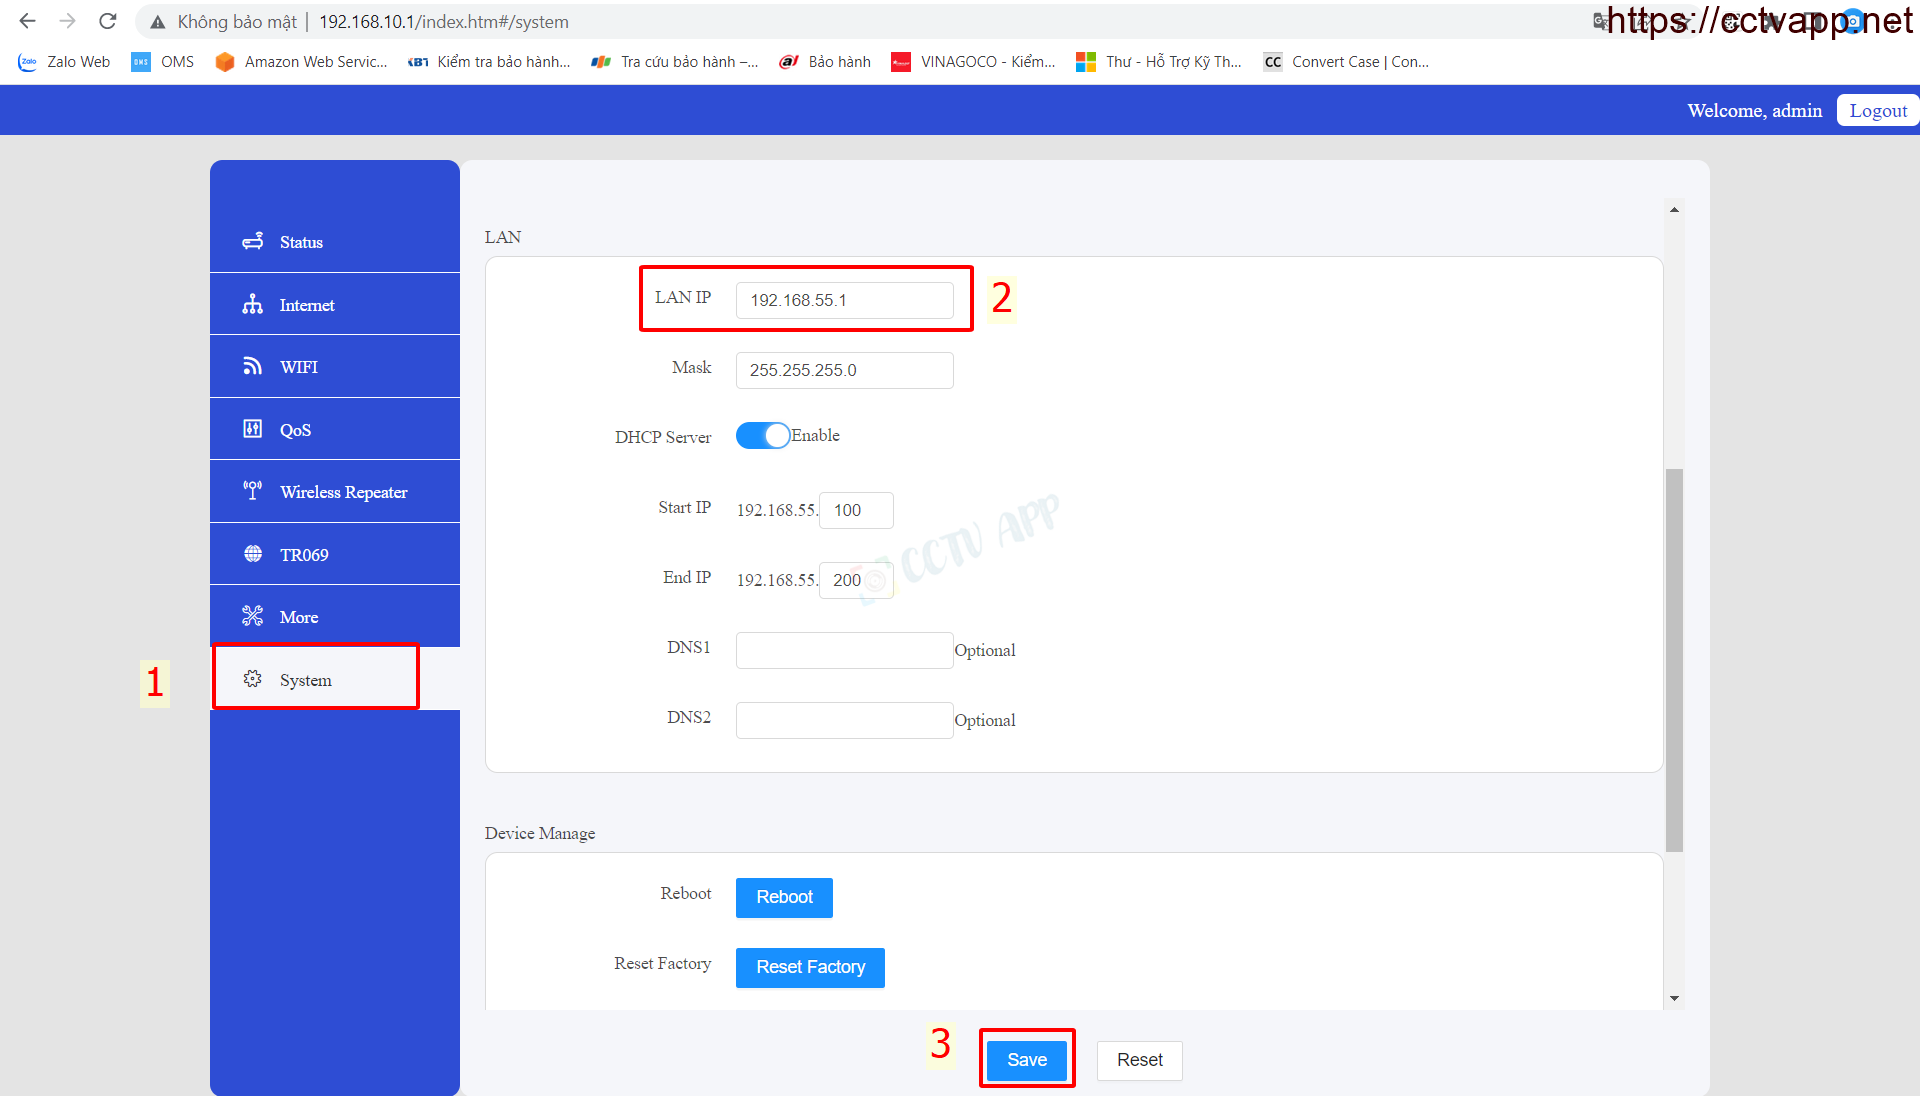
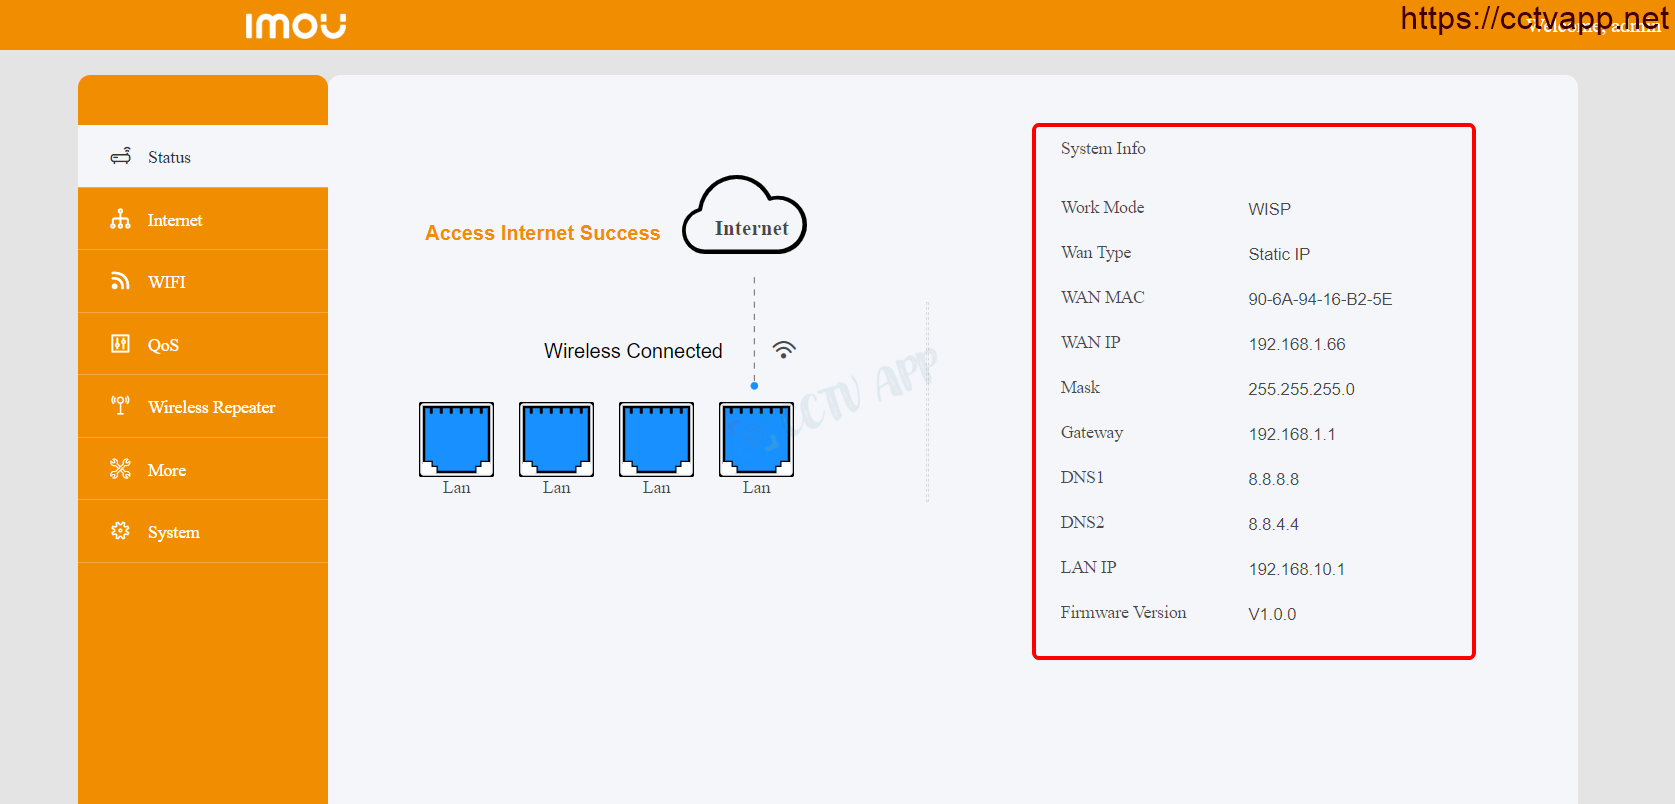
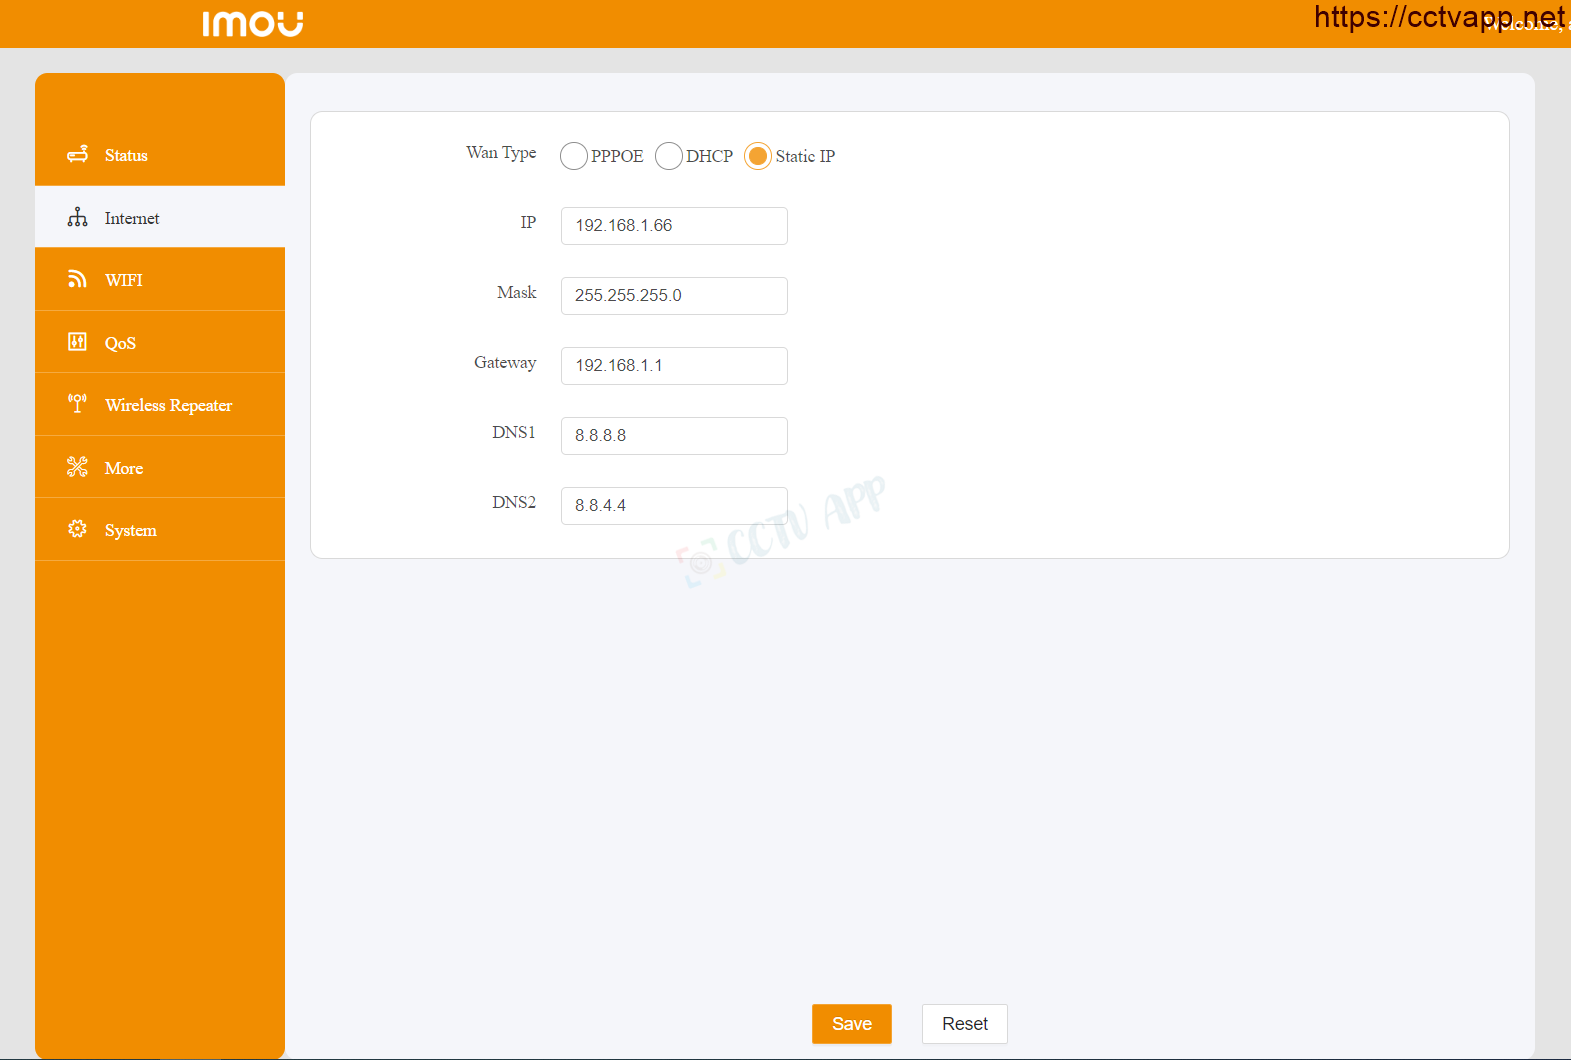
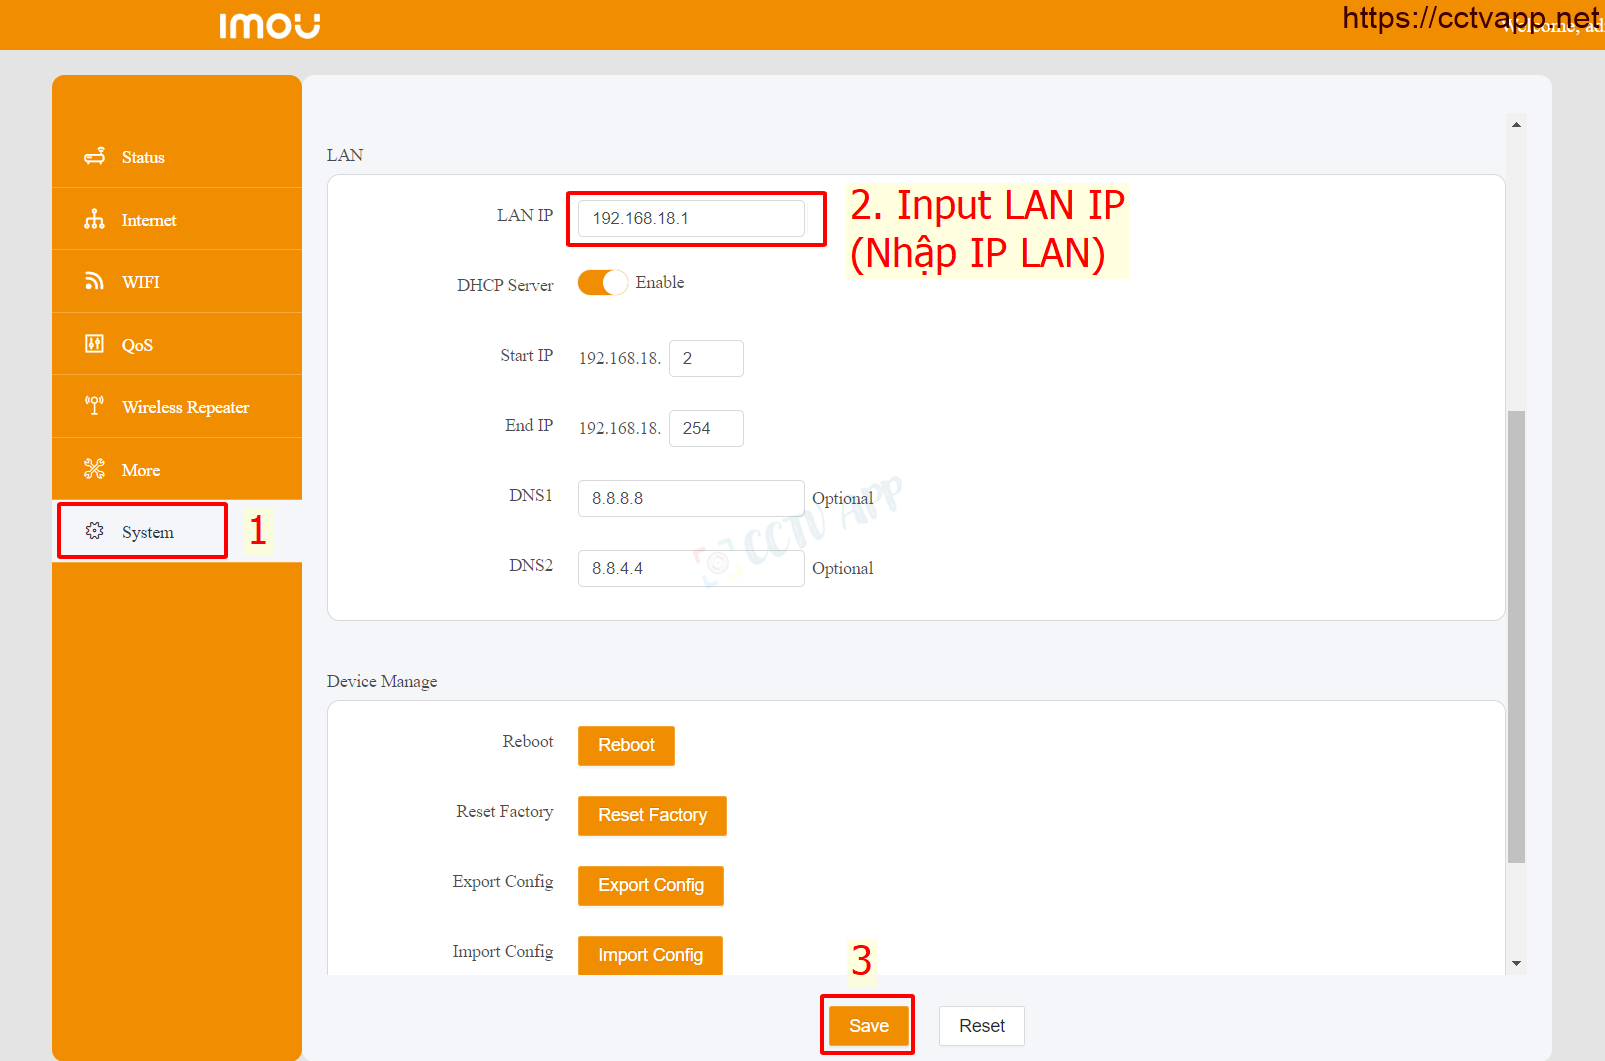
Instructions for configuring the LAN network layer on Router IMOU N300.
Manipulate as instructed below. After setting up on the Router, you need to reboot the device to receive a new IP.
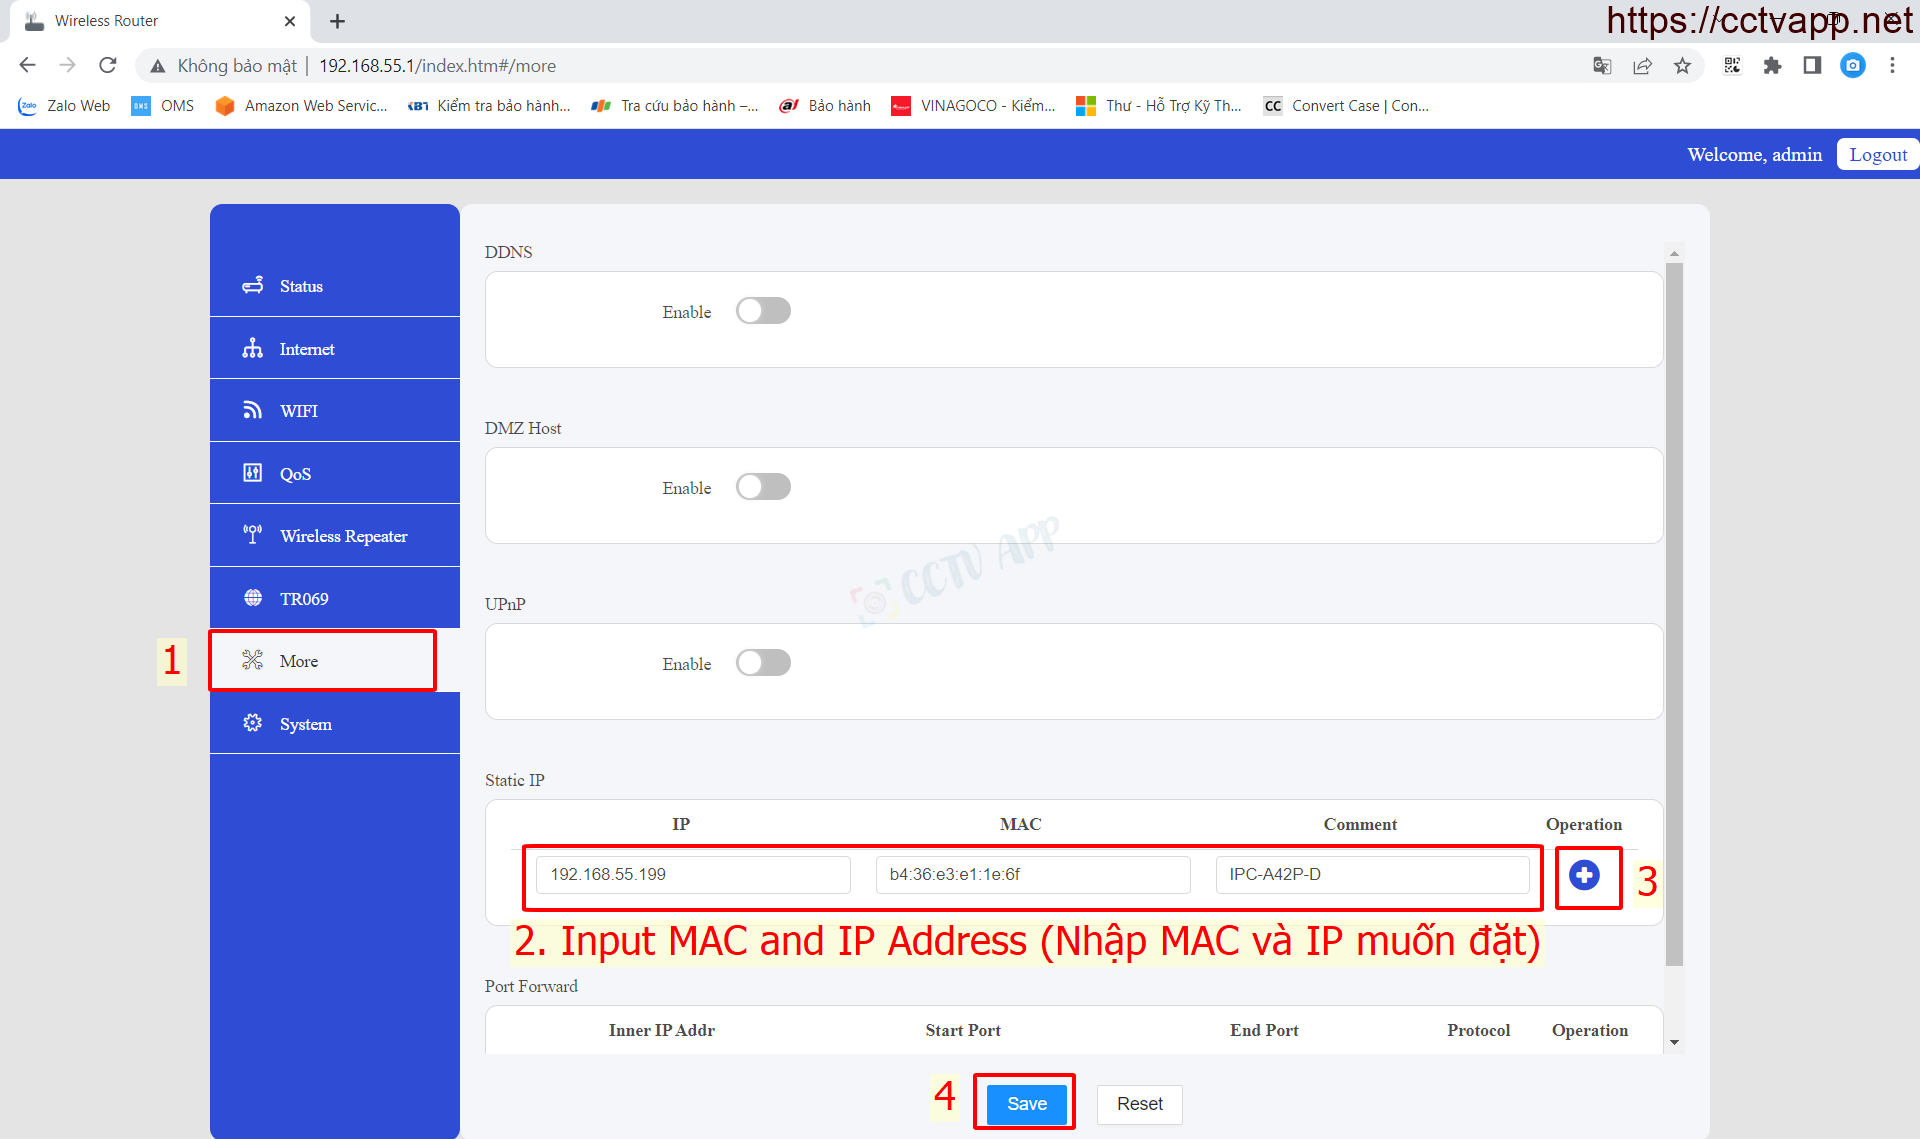
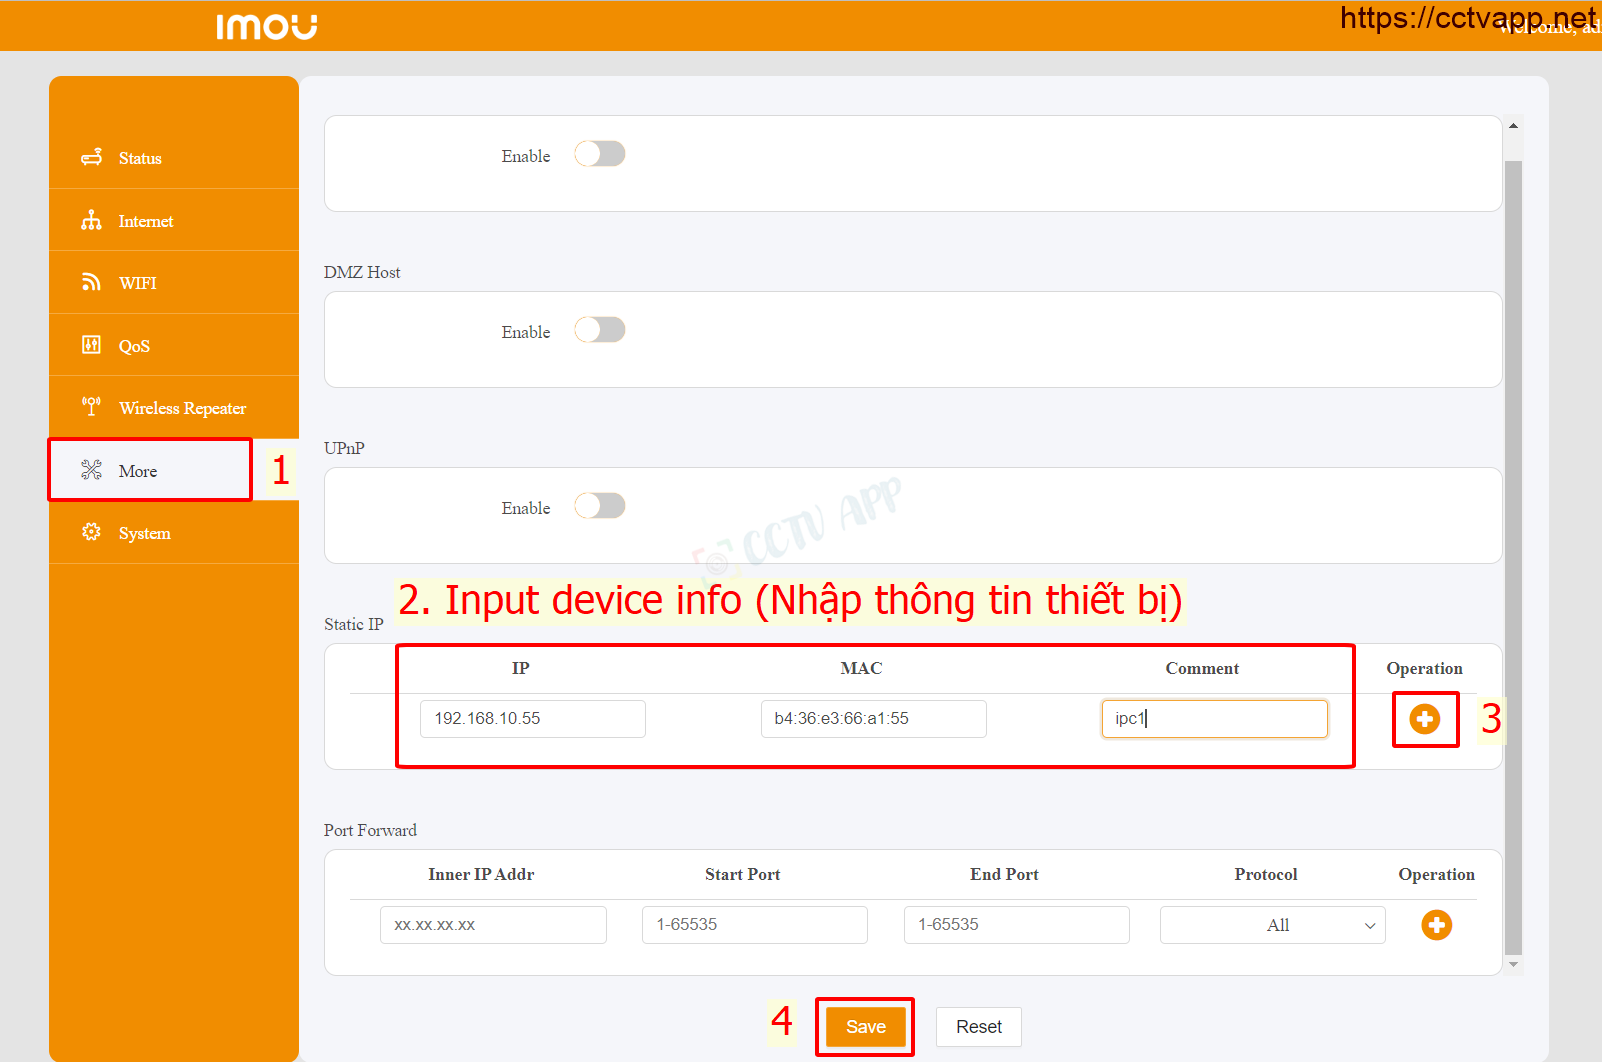
Instructions for assigning MAC to set static IP for cameras and video recorders.
Manipulate as instructed below. After setting up on the modem, you need to reboot the device to receive a new IP.
No matter what modem port you open, no matter what network operator you open. You need to prepare yourself for some of the following requirements:
-
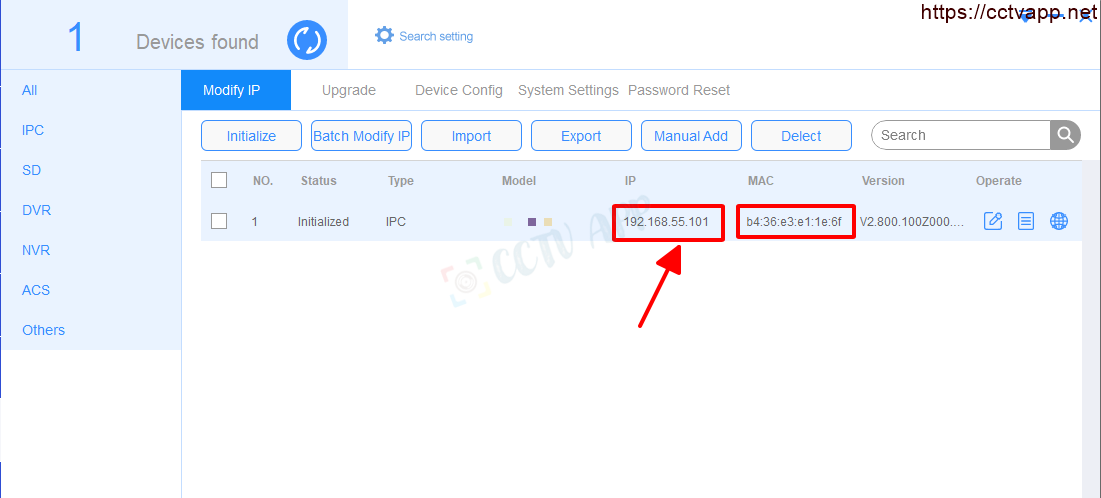
- Determine the IP address of the video recorder and the ports that need to be opened.
- Determine the IP address of the modem (turn on cmd -> type ipconfig -> see the address of Gateway)
-
- The computer or phone and camera receiver must be connected to the same Internet network as the Router.
Step 1: Log in to Router IMOU
- Log in to the modem by opening a web browser and typing: http://192.168.10.1 (default) or. It will appear the modem interface and ask to log in.
- Router IMOU N300 has a default account and password of: admin
Step 2: Open port on Router IMOU
-
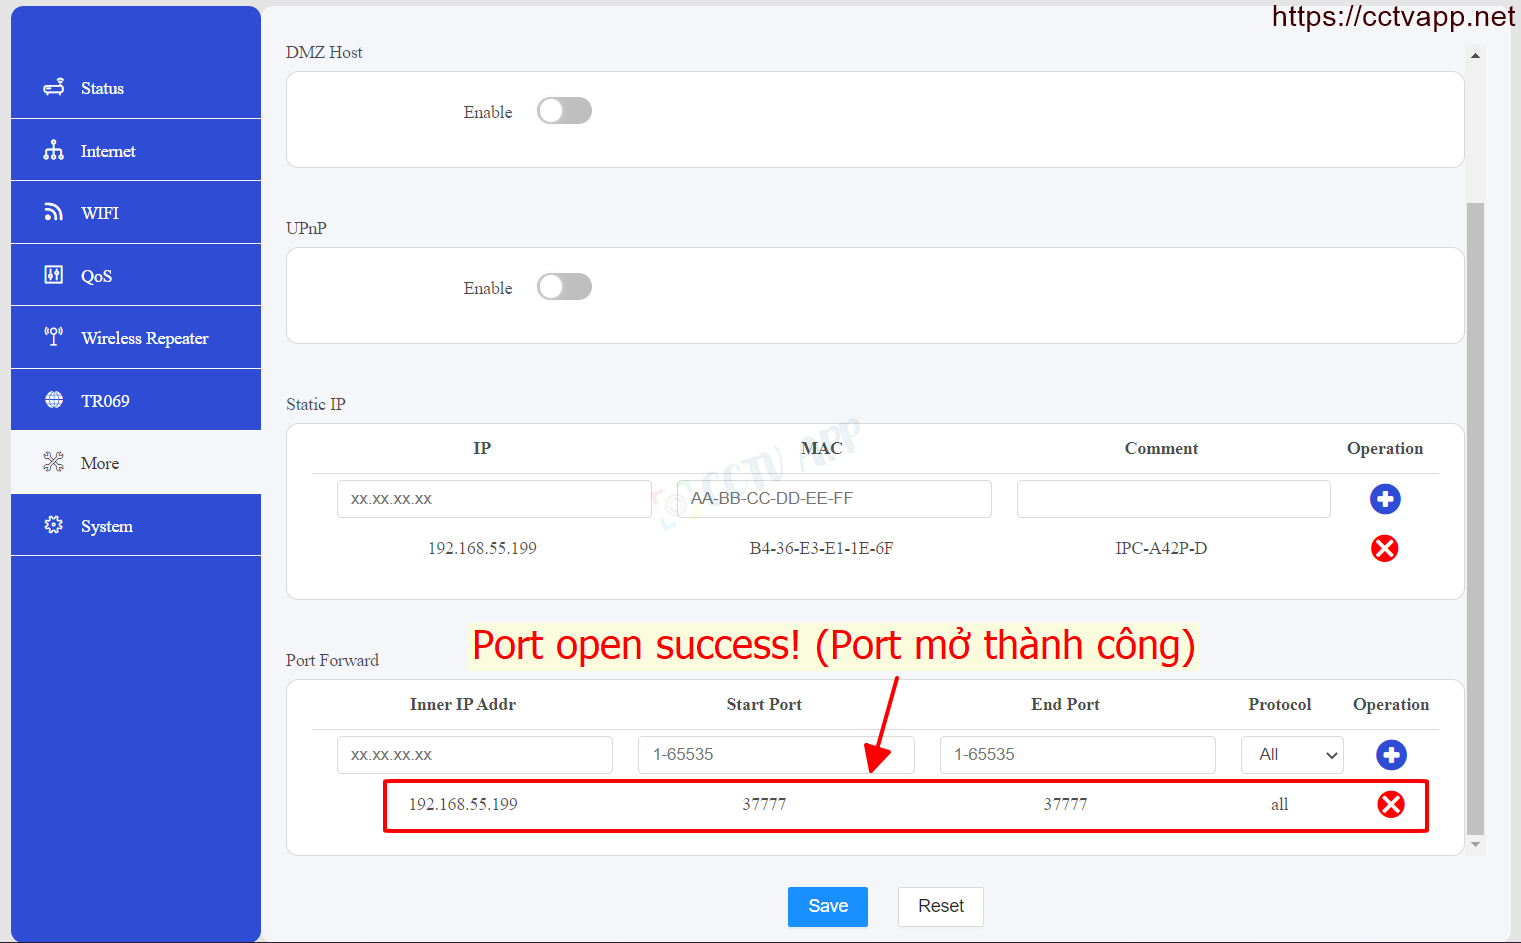
- After logging in to the main interface on the modem, select: More -> Port Forward -> Fill in the Port -> ‘+’ (Add) as shown below:
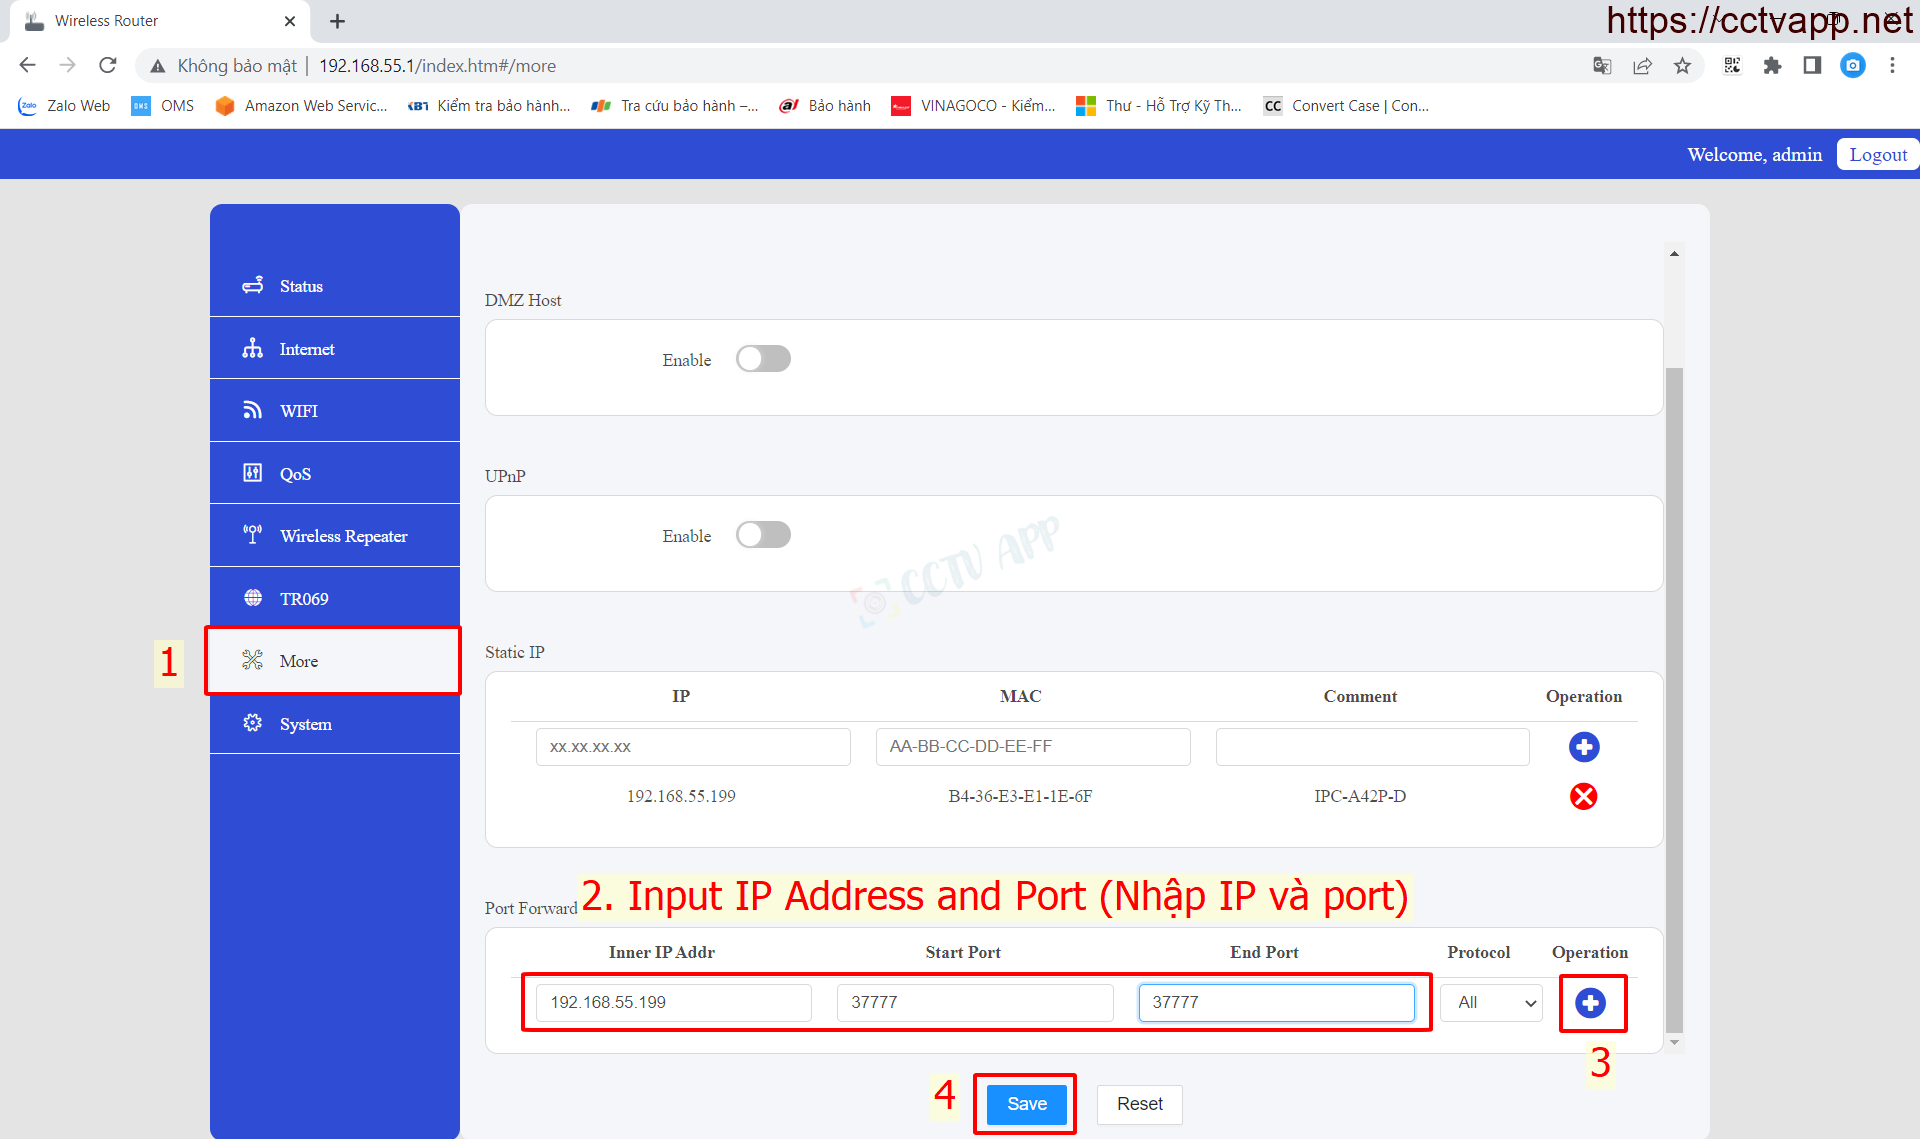
In which:
- Inner IP Addrr: Fill in the IP address of the camera and video recorder.
- Start Port, End Port: Enter the port you want to open.
- Protocal: Default is ALL, can choose TCP or UDP.
Finally press ‘ + ‘ (Add) to Add port.
Example: As shown above, port 37777 is opening for the device with IP address: 192.168.55.199
After opening the port, the list of ports is listed as follows:
Step 3: Check the results of opening the port
After opening the port. You need to check whether your port is open or not.
- By visiting ping.eu ;then you select Port Check.
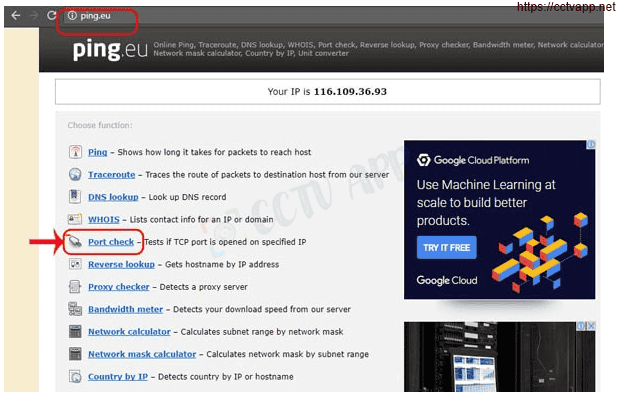
- The browser will redirect to another page where you do the following:
- Click on the series of numbers after the words Your IP is
- In the box IP address or host name that series of numbers will appear
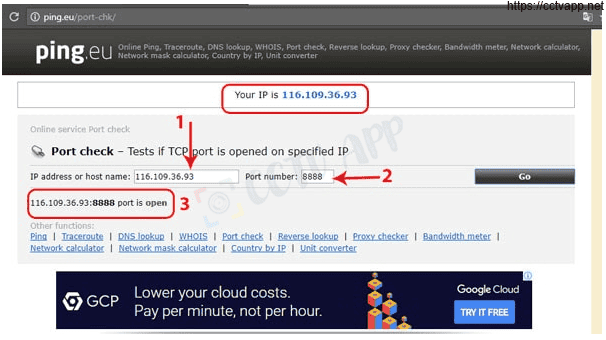
- In the box Port Number you fill in the ports you have opened. click Go.
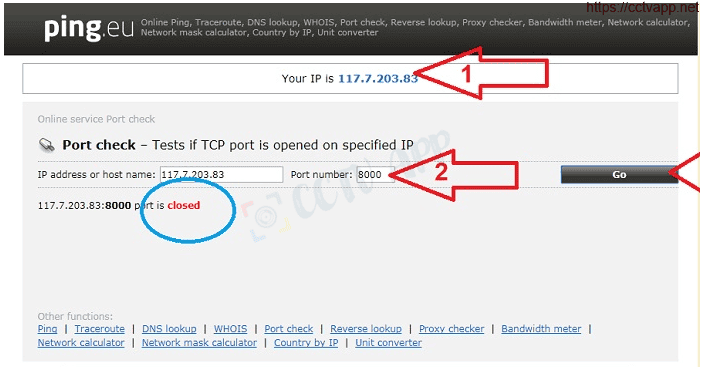
- If the result is as shown above, you have been successful. If the result is as shown below, you have not been successful, you need to recheck the steps above.
II. Instructions for using Router IMOU HR300
Manipulate as direction Following:
Manipulate as direction Following:
Manipulate as direction Following:
Manipulate as direction Following:
Instructions for assigning MAC to set static IP for cameras and video recorders.
Manipulate as instructed below. After setting up on the modem, you need to reboot the device to receive a new IP.
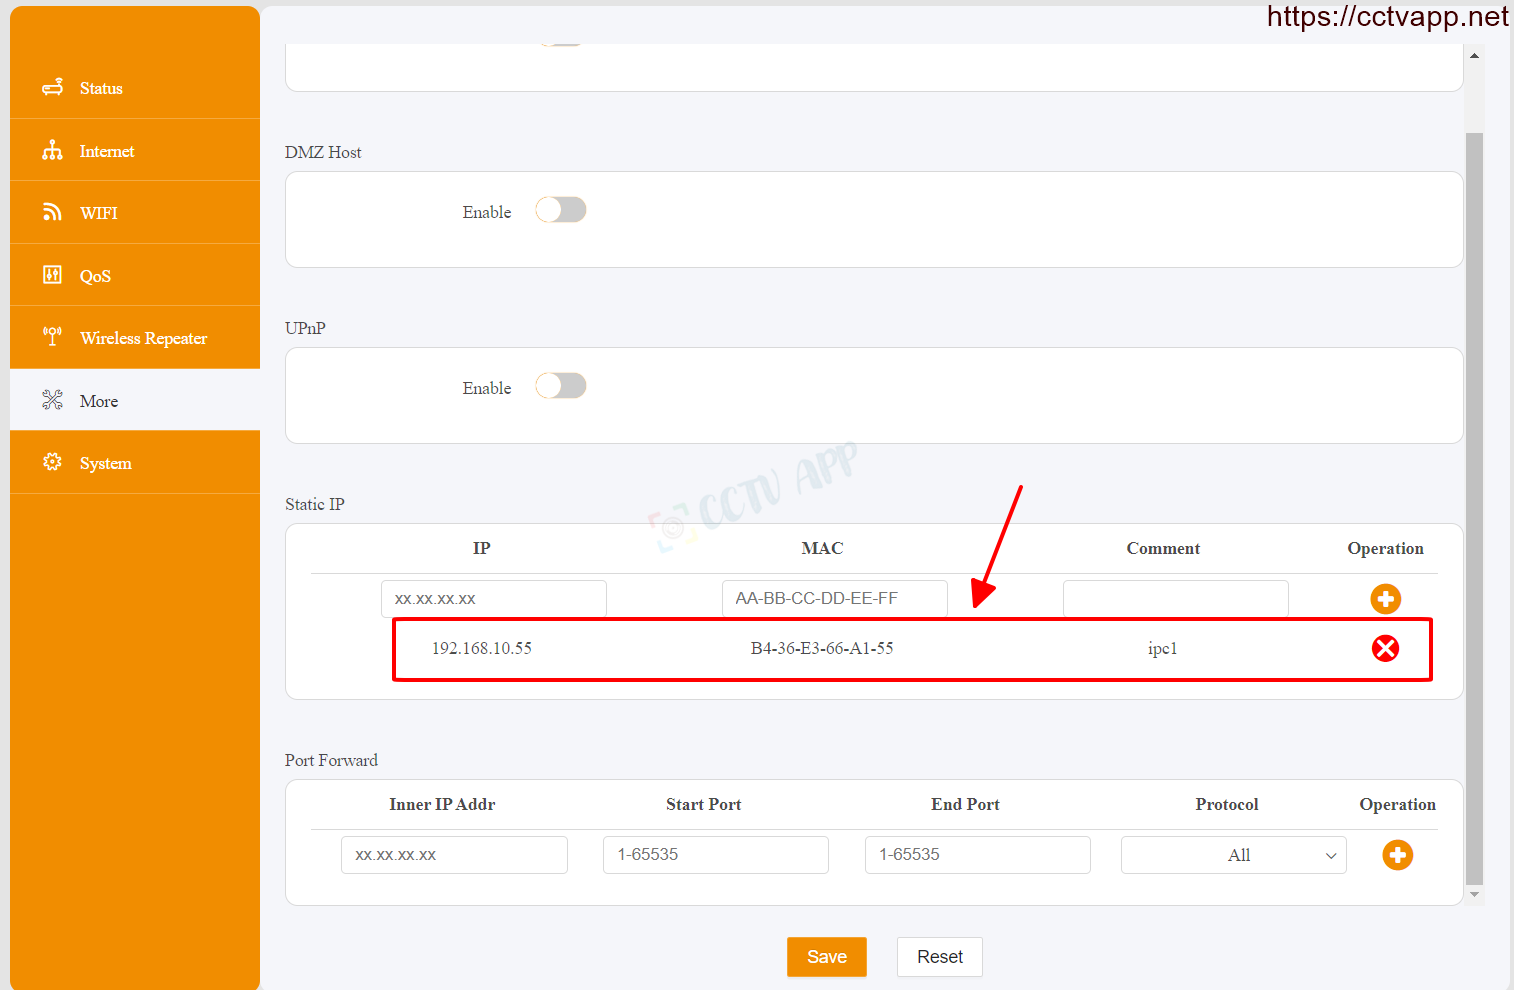
After performing the Mac assignment operation, you will get the result as shown below:
No matter what modem port you open, no matter what network operator you open. You need to prepare yourself for some of the following requirements:
-
- Determine the IP address of the video recorder and the ports that need to be opened.
- Determine the IP address of the modem (turn on cmd -> type ipconfig -> see the address of Gateway)
-
- The computer or phone and camera receiver must be connected to the same Internet network as the Router.
Step 1: Log in to Router IMOU
- Log in to the modem by opening your web browser and typing: http://192.168.10.1 (default). The modem interface will appear and ask to log in.

- The default account and password of this modem is usually written on the stamp below the modem.
Step 2: Open port on Router IMOU
- After logging in to the main interface on the modem, select: More -> Port Forward -> Fill in the Port opening parameters -> ‘+’ (Add) as shown below:
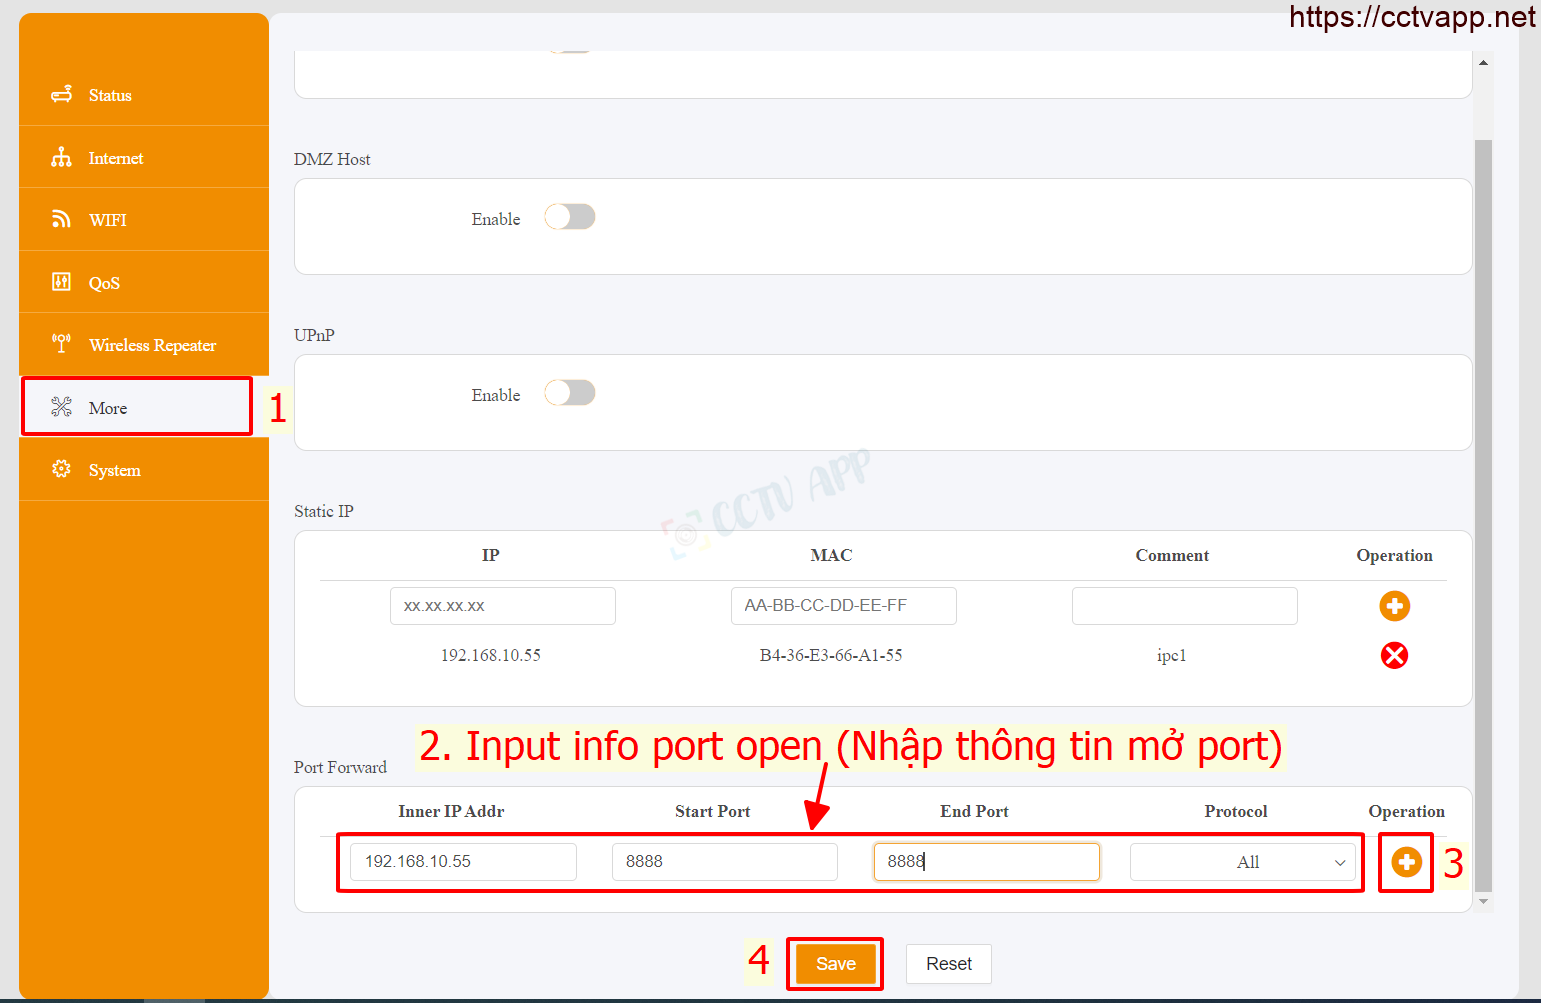
In which:
- Inner IP Addrr: Fill in the IP address of the camera and video recorder.
- Start Port, End Port: Enter the port you want to open.
- Protocal: Default is ALL, can choose TCP or UDP.
Finally press ‘ + ‘ (Add) to Add port.
Example: As shown above, port 8888 is opening for the device with IP address: 192.168.10.55
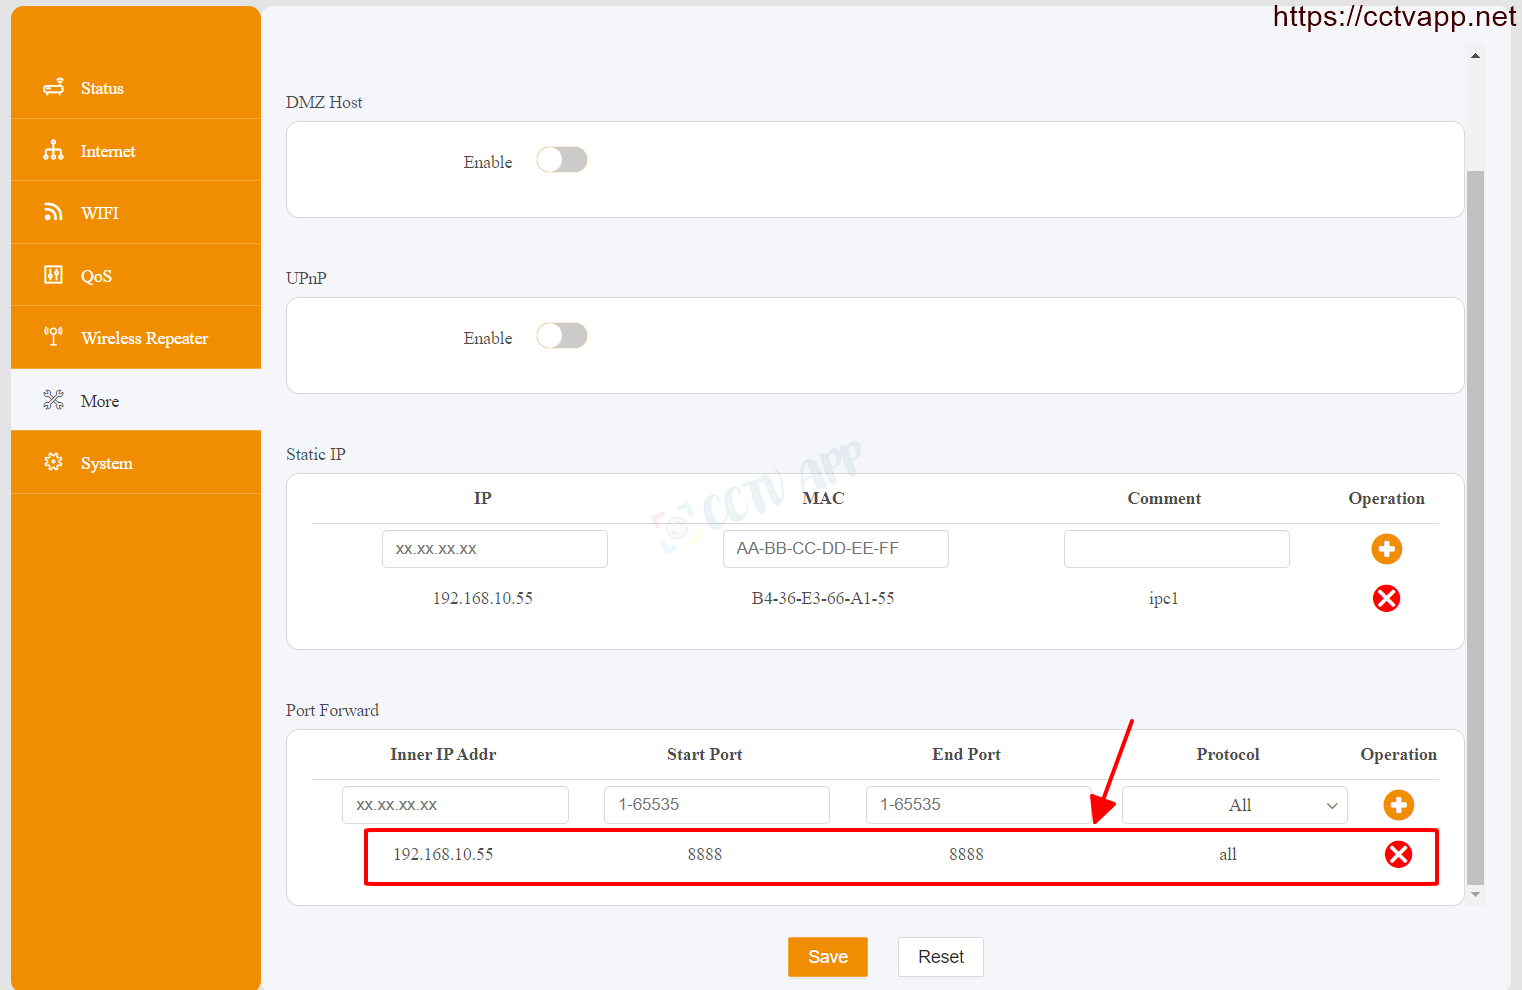
After opening the port, the list of ports is listed as follows:
Step 3: Check the results of opening the port
After opening the port. You need to check whether your port is open or not.
- By visiting ping.eu ;then you select Port Check.
- The browser will redirect to another page where you do the following:
- Click on the series of numbers after the words Your IP is
- In the box IP address or host name that series of numbers will appear
- In the box Port Number you fill in the ports you have opened. click Go.
- If the result is as shown above, you have been successful. If the result is as shown below, you have not been successful, you need to recheck the steps above.
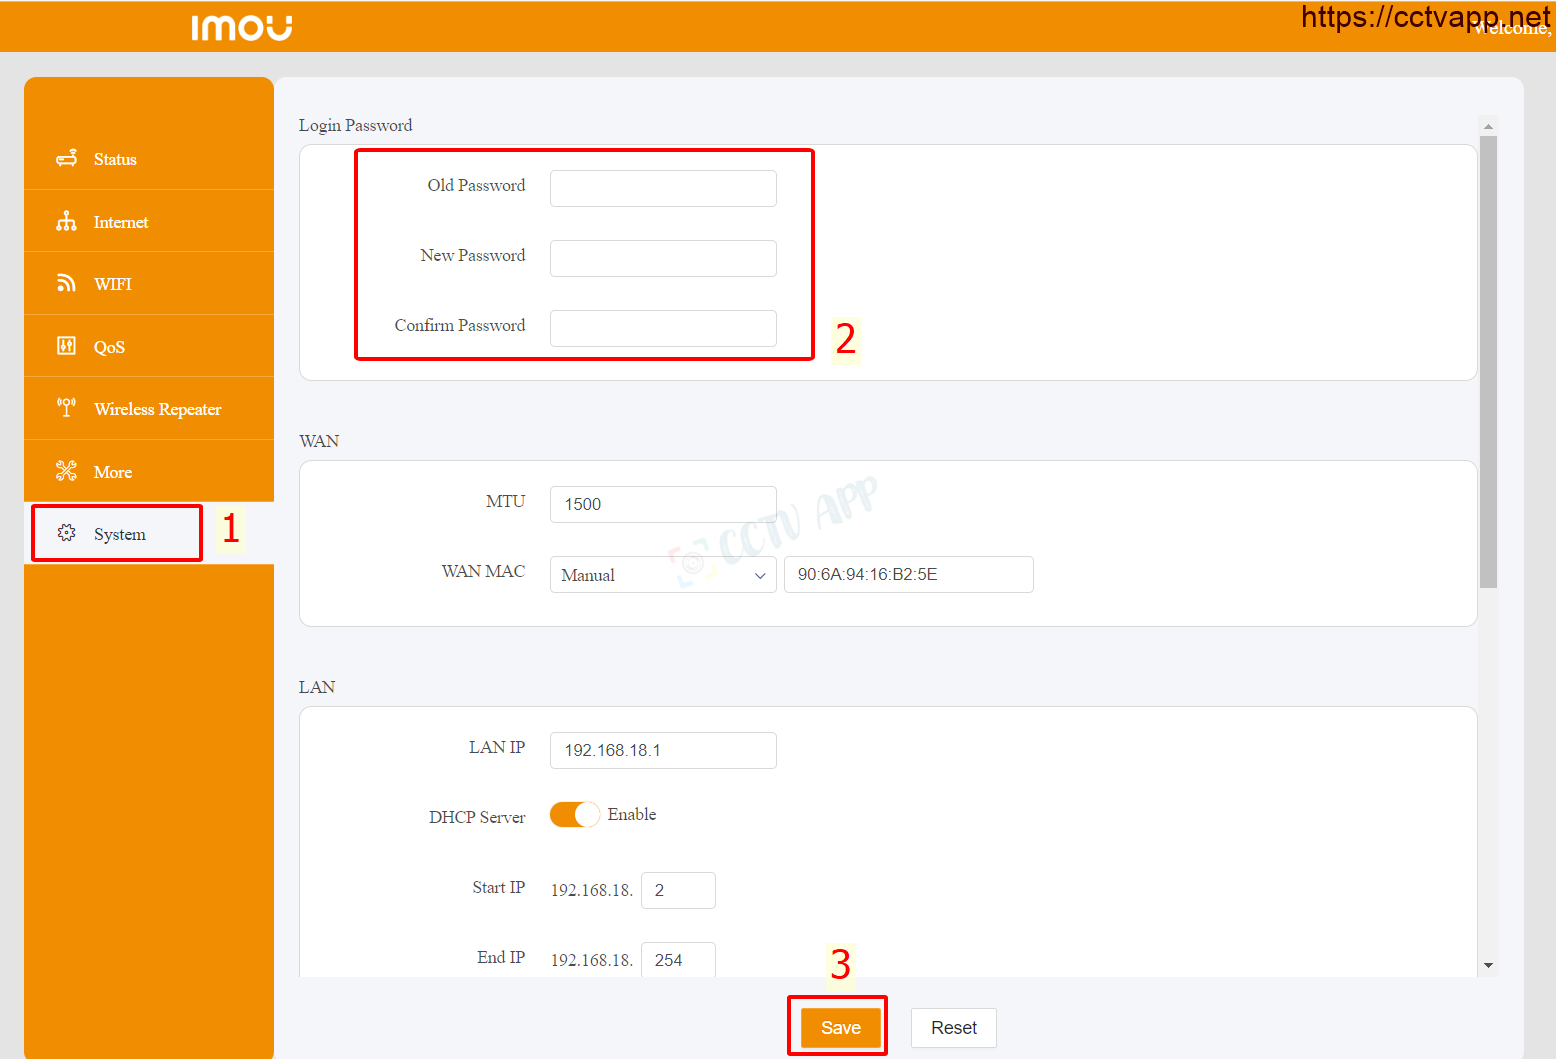
Manipulate as follows:
Assign MAC to set static IP:
Manipulate as direction Following:
Thank you for following the article!!!