


 Tiếng Việt
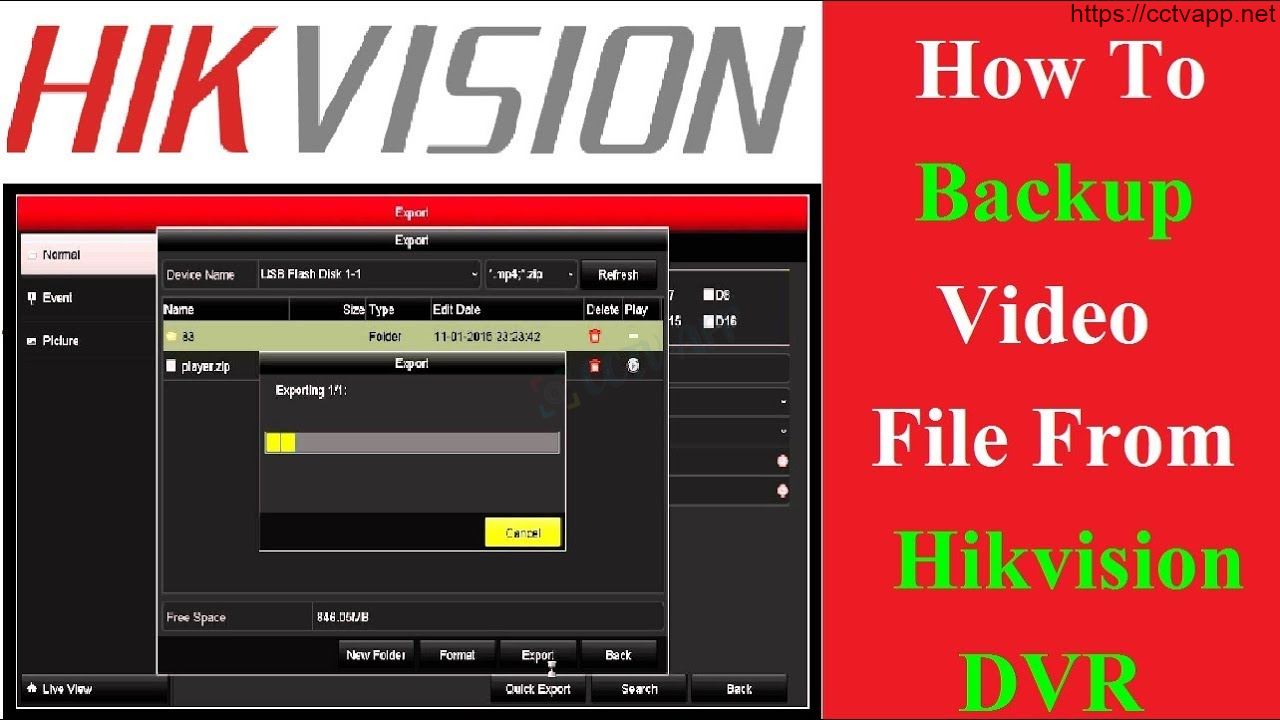
Today, I will show you how to get video data from Hikvision DVR. This guide applies to both DVR and NVR recorders
There are many ways to extract data from Hikvision recorders, you can choose for yourself the most suitable method.
1. Operation at the recorder
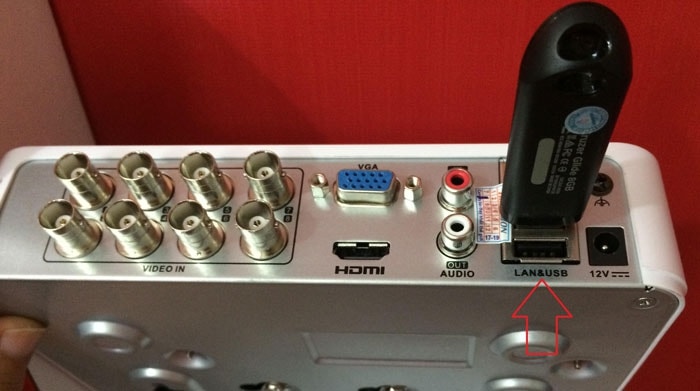
First you need to prepare a USB with a capacity of 4GB or more, and a monitor to connect to the recorder.
- Step 1: Plug the USB into the USB port on the Hikvision recorder, most recorders now support 2 USB ports, the other port you can connect more mouse for easier manipulation during data copying.
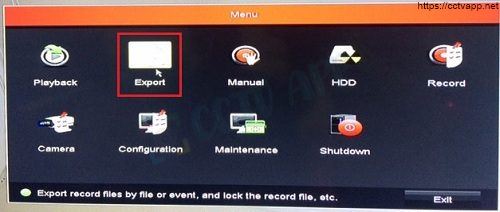
- Step 2: Right click on the screen select Main Menu then enter username and password. Next, you choose Export.
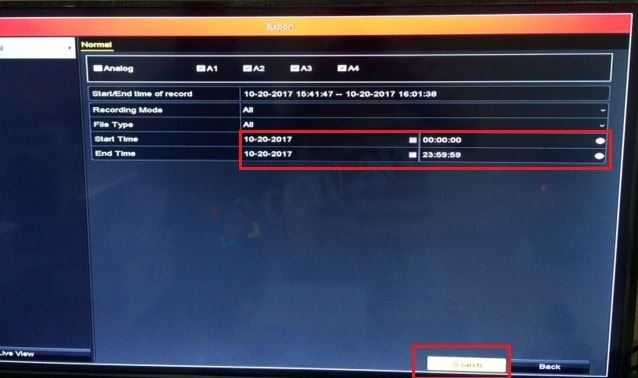
- From the interface below you select the camera to get data on the top line, select the time to need Backup Data at the bottom. Then you click Export.
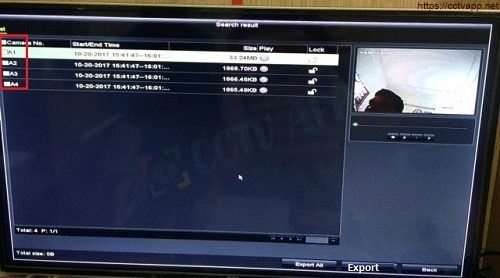
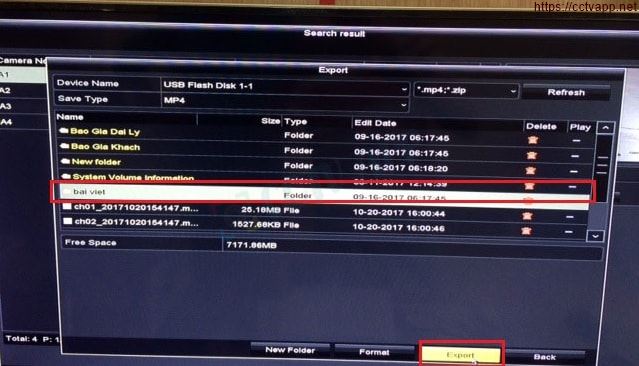
- Step 4: Hikvision recorder will open a folder for you to choose where to store it. At this point, you choose where to save the video on the USB and finally click Export
If you download a lot, it will take longer to wait.
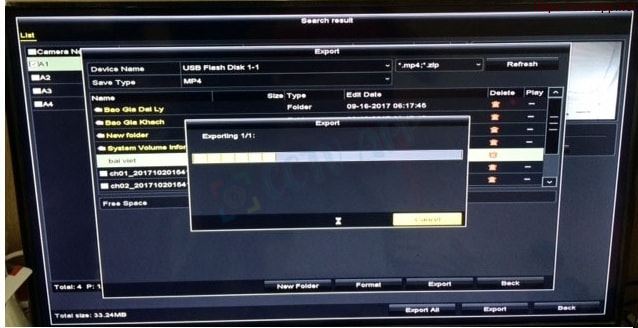
Note: When downloading data from a DVR/NVR recorder, please select a video format that can be viewed on your computer.
2. Get data by IVMS 4200 Client software
If you don’t have a USB or monitor nearby, you can still use your laptop to copy data from the Hikvision camera recorder.
- Step 1:Open IVMS 4200 from the desktop icon.
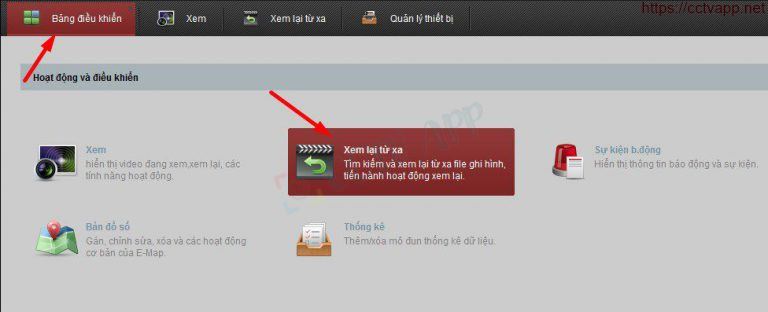
- Step 2:After opening the software we go to the Control Panel -> Remote playback for remote video playback. If we look over the LAN (internal view), please also click here.
- Step 3: We will enter the remote review, an interface appears with the Tab we just opened.
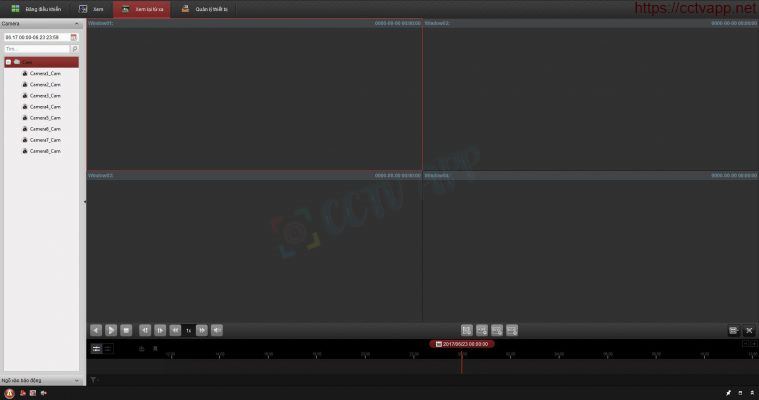
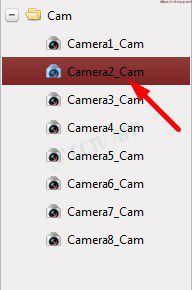
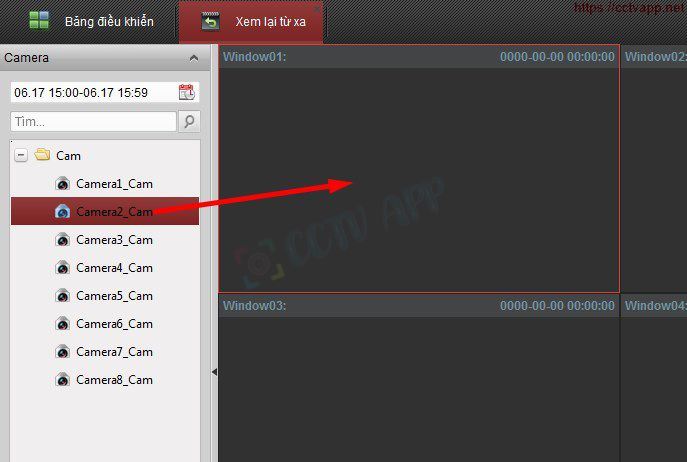
- Step 4:On the left side of the software interface you will see the cameras numbered in order of camera. If not, it means that you have not connected the recorder and software together. Here you will select the camera that needs Back Up data.
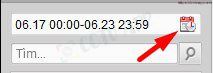
- Step 5:Select the time period to get camera data from the recorder. In the upper left corner, you click on the calendar icon then a pop-up window will pop up, you choose the date and time you want to export the video.
Note that the date boxes in red are the days with the camera data, and the cells without the red mark are the deleted data. Please refer to how many days the camera saves.
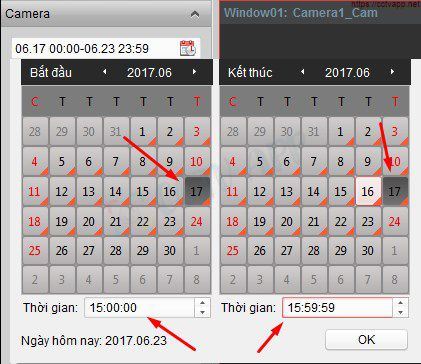
Next, you need to choose the start date and end date in the same day so that data retrieval will be faster, avoiding the situation that the recorder is standing. The speed and access time depends on the rpm of the hard drive for the camera.
- Step 6:We double-click on the camera we want to view or hold down the mouse and drag the camera we want to view to the next box to view. Both ways are equally viewable.
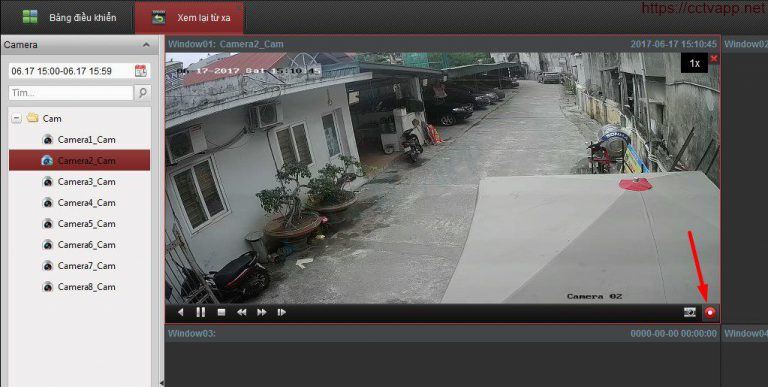
- Step 7: The video to be extracted will be reviewed here, notice below there is a blue line, that is the time we need to extract. export. You can drag, rewind to review for accuracy before downloading.
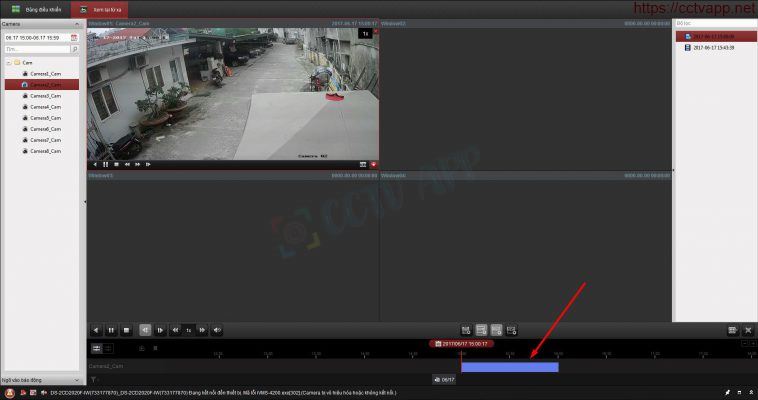
- Step 8: We wait a little while until the part you need to go back to, then click the red button in the right corner (see image below). li>

Step 9: Sit until you have finished recording the video you want to take, then press the red button again to stop. At this point, a link appears in the lower right corner, click on it to go to where the video is saved.
Default video will be stored in the following path: C:\iVMS-4200\video\file date.
3. Get data by browser
You can directly get the data using Internet Explorer (IE), Google Chorme, Firefox Coccoc.
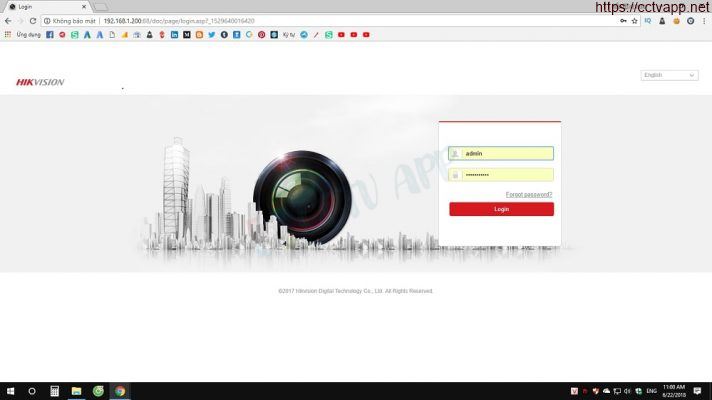
- Step 1: Open any web browser and type the IP address or camera domain name in the address bar.
The browser will then ask to log in with the User Name and Password of the Hikvision recorder.
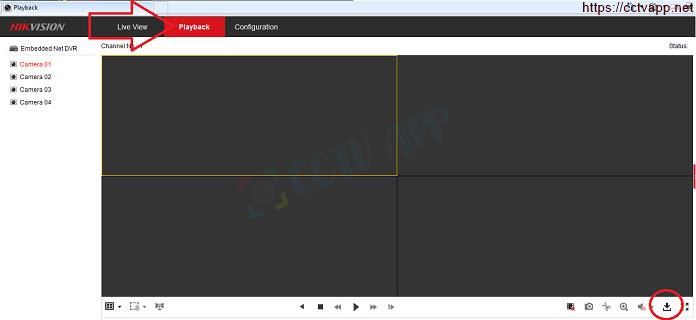
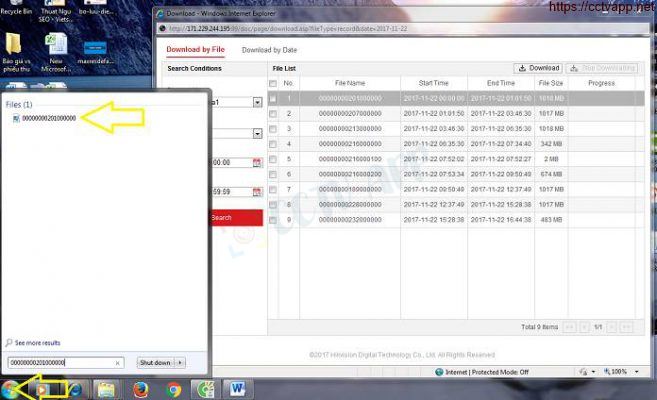
- Step 2: On the Menu bar, select Play Back, then select the download icon in the lower right corner. A new window appears.
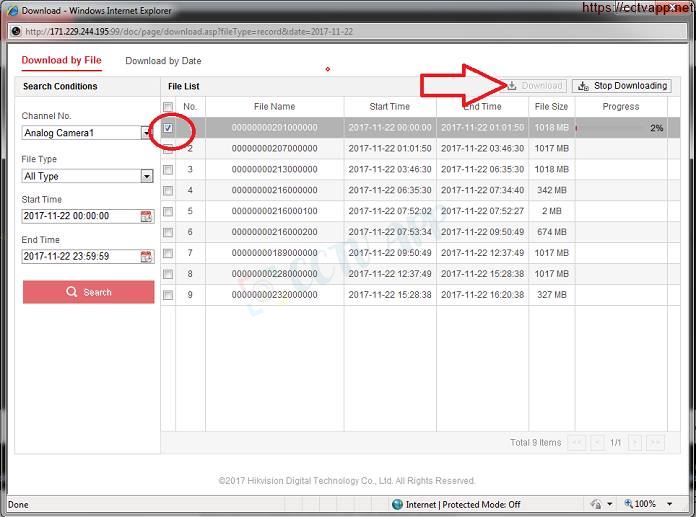
- Step 3: From the interface below you notice on the left is where to select the camera to be extracted, the start and end time, and then click the Search button. The interface will display a list of files corresponding to the time frame you have selected. You select the File to download then click Download.
You wait for the download to complete and then open the download section, there will be a video file. You can copy the video file name and search it in your computer if you don’t know where to save the extracted video file.
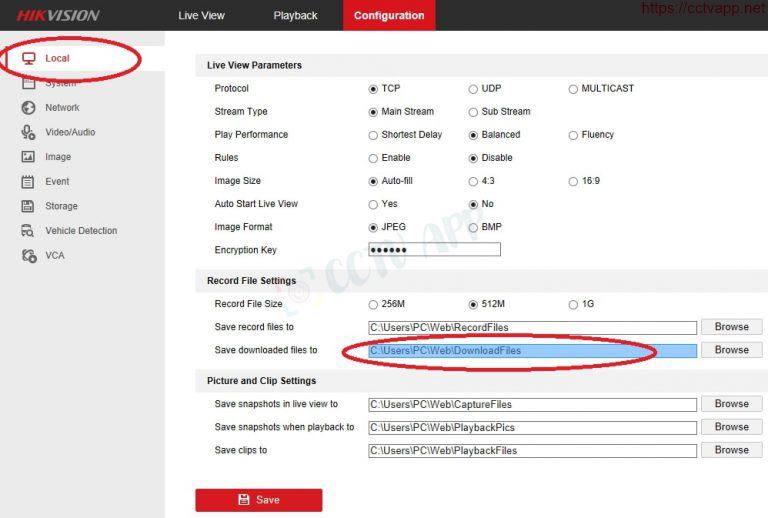
Or you go to Configuration > Local and then go to the link as shown below to find the video in that File.
Wish you a successful installation! Source: https://phuongviethcm.com/