


 Tiếng Việt
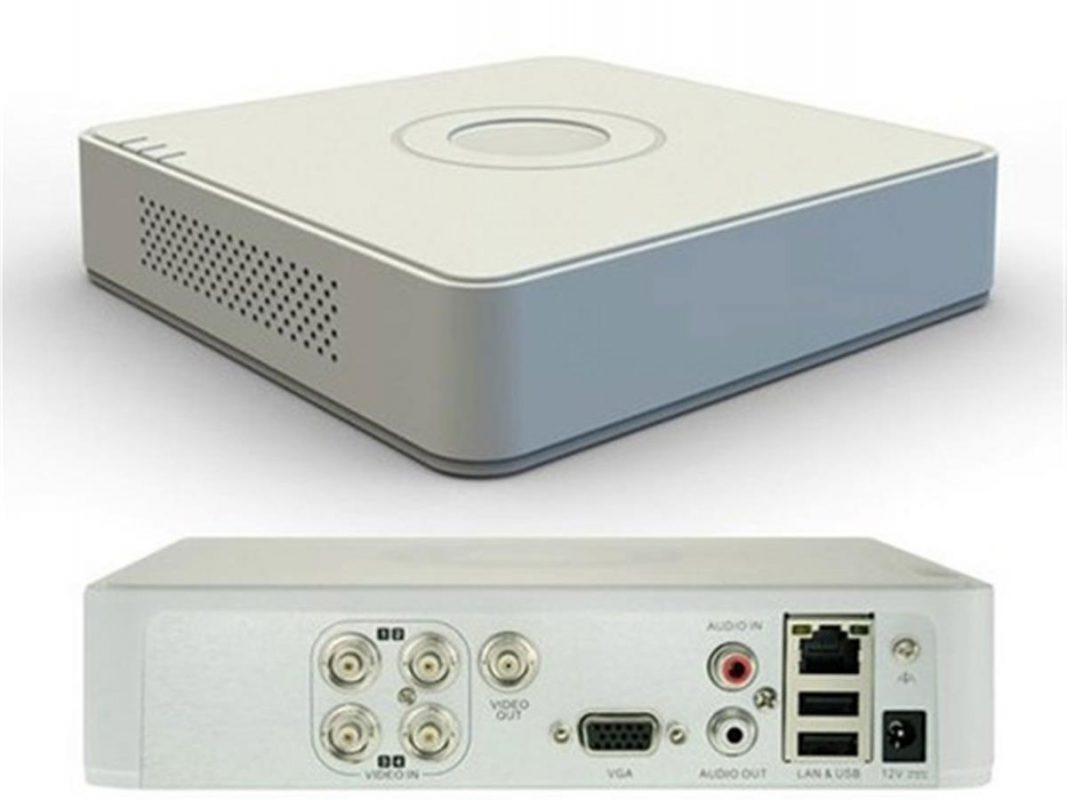
Some of you, after buying a camera kit that includes a recorder, are often confused at the installation stage. To help you do this, in this article, I will guide recorder installation Hikvision fastest and most effective!
After installing the camera system, we will proceed to install the Hikvision recorder.
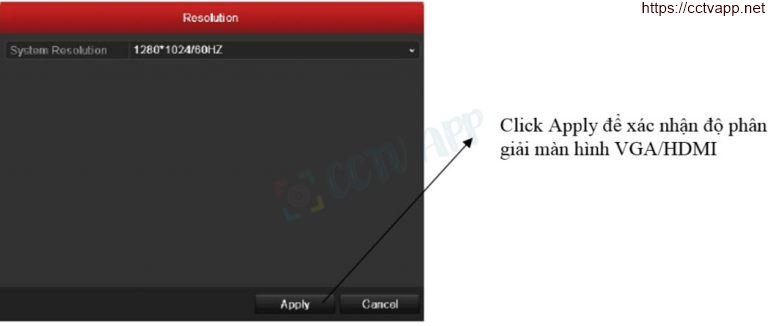
- Confirm resolution Is the monitor I am adjusting to VGA or HDMI.
- Turn off Wizard mode by unchecking Start wizard when device starts and click in Cancel to disable this mode.

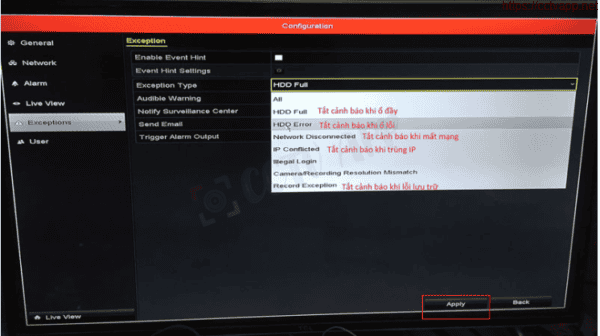
- Turn off the beeps that warn of PAL/NTSC system checks, hard drives… by going to Menu on the recorder > Configuration > Exception > HDD Full under Exception Type to display the category.
- Select All > Apply to mute the beep sound.
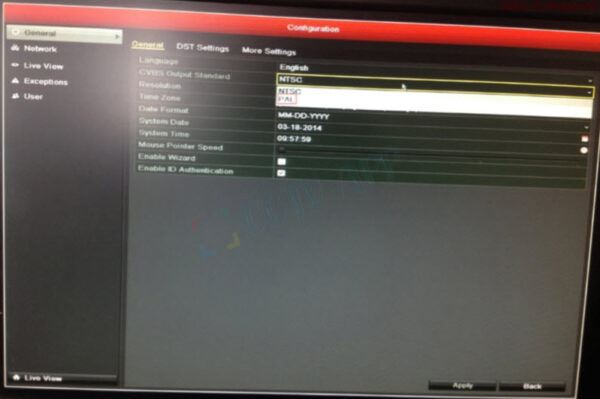
- Switch to system PAL: in tab General -> select system PAL-> Click Apply to confirm
- Adjust network parameters.

- Mainly adjust the parameters: IP address of the recorder, gateway accordingly. Then click on “More Settings” to change the port, mainly set the RTSP 554 port to 1024 (or optional).

- For some DVRs, it is also necessary to set the NAT port on the DVR to CAN access it remotely. Normally, you need to NAT the following 3 ports: 80,8000 and 1024.
- Click to set the RTSP port to 1024 and other ports like HTTP Port, Server Port, so that External port = port on the recorder (declared in the “More Settings” section in step 4).
Adjust recording image quality
Pay attention to the following main items:
- Stream Type: if only recording images, choose: Video only.
- Video Quality: Medium or Higher should be selected as appropriate for bandwidth.
- Max . Bitrate (Kbps):
- For analog cameras, if the Internet connection is low, it should be adjusted down to 512 for light, if it is optical fiber, it is reasonable to set it at 1024.
- For IP cameras, it is recommended to set 1024 for 1.3M cameras, and 2048 for 2MP cameras.
Note:
- We’ll make the same for two columns Main Stream (Continuous) and Main Stream (Event).
- Finally, click Copy adjusted parameters for other cameras.
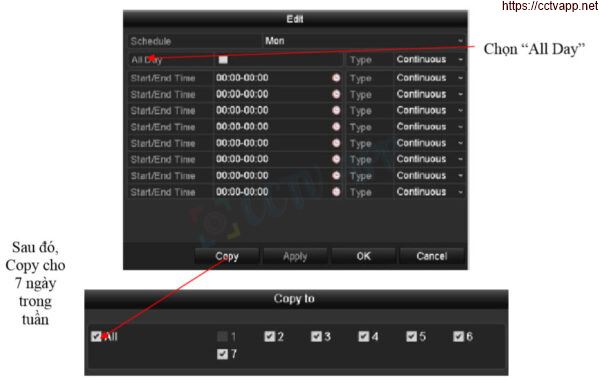
- Declare recording schedule camera image (usually for continuous recording of all cameras).

- Next is Copy recording schedule for all other cameras, and confirm OK.
Wish you a successful installation! Source: https://phuongviethcm.com/