


 Tiếng Việt
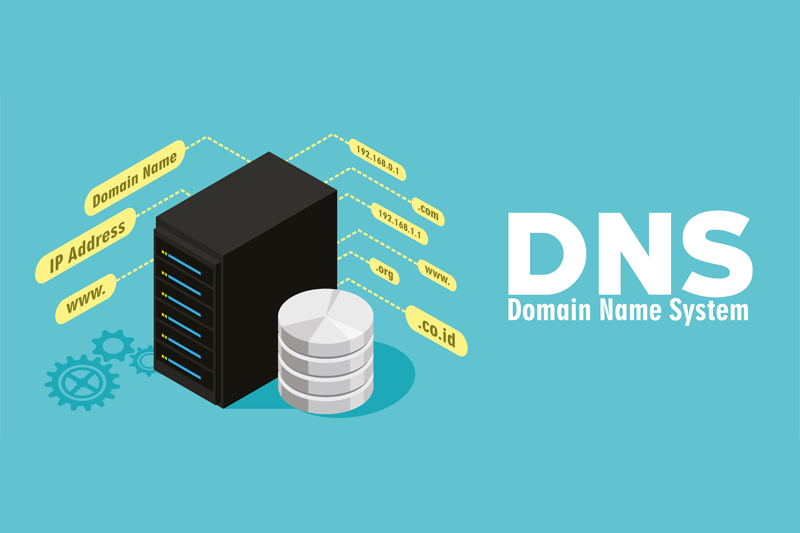
The connection between Camera brands is no longer a strange thing when most Camera devices and recorders support Onvif. Onvif can be roughly understood as a common standard for communication between camera companies in the market. So in this article, I will show you how to add Hilook Camera to Dahua DVR with Onvif standard.
See detailed instructions on how to do this:
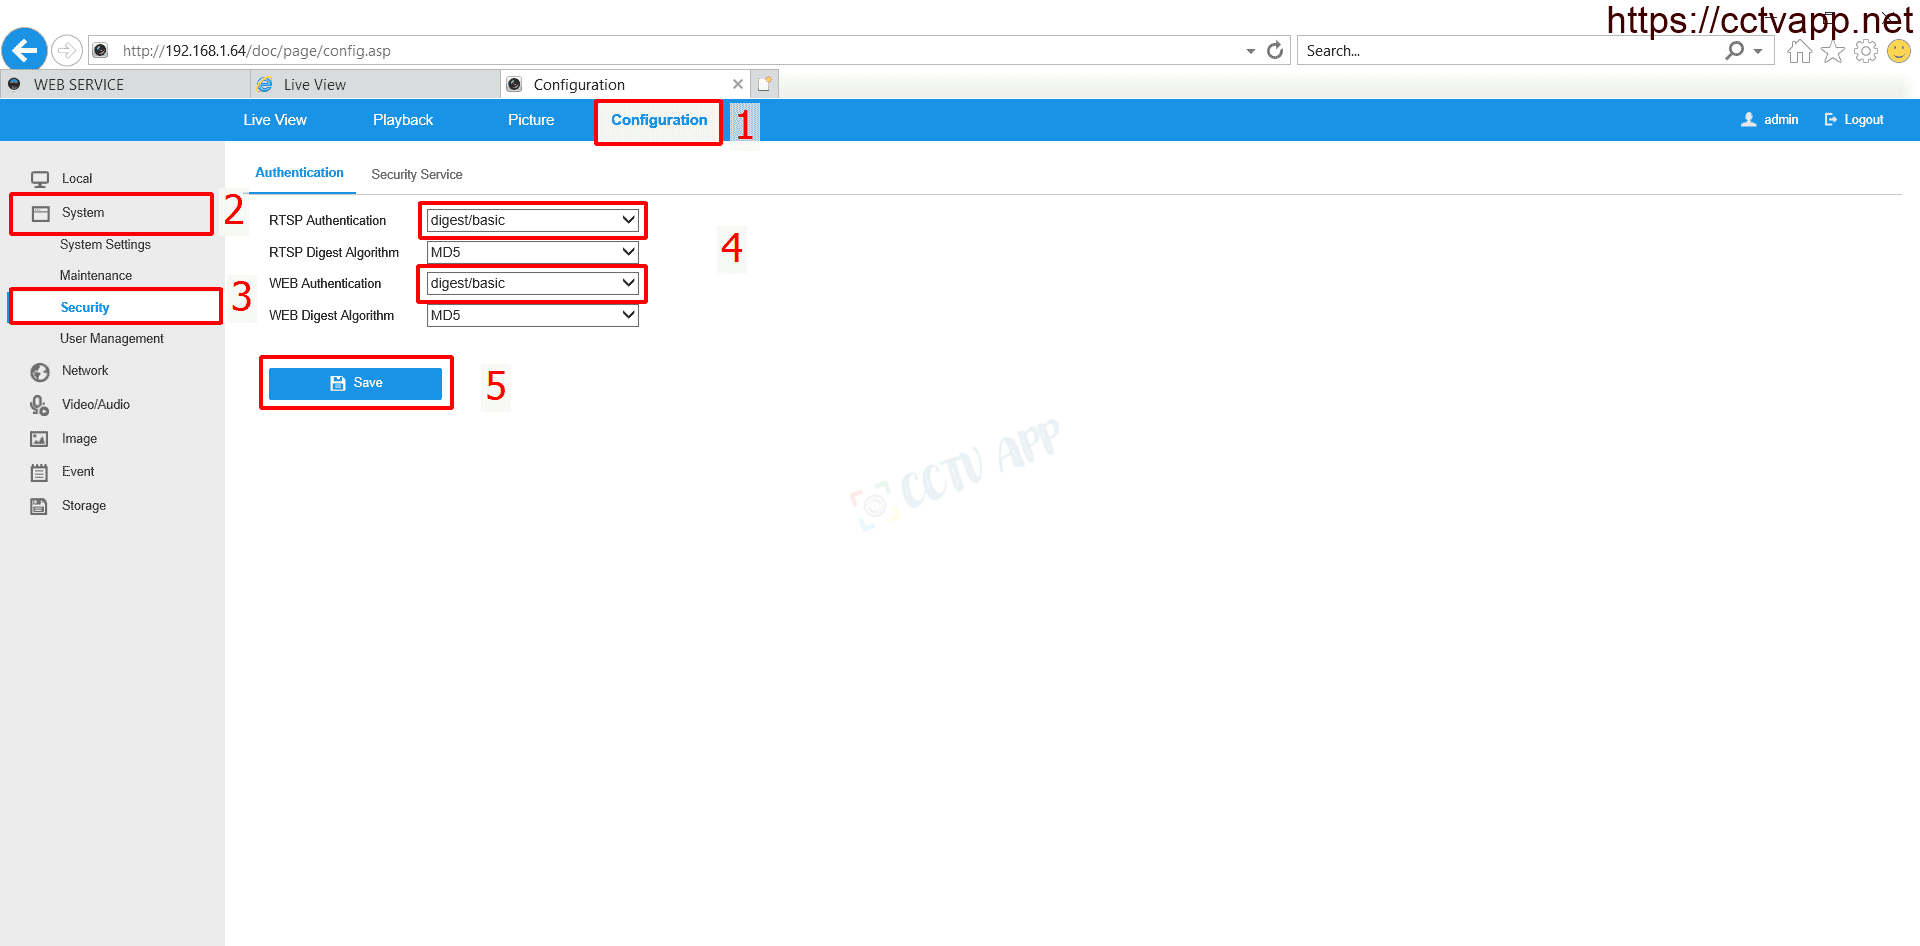
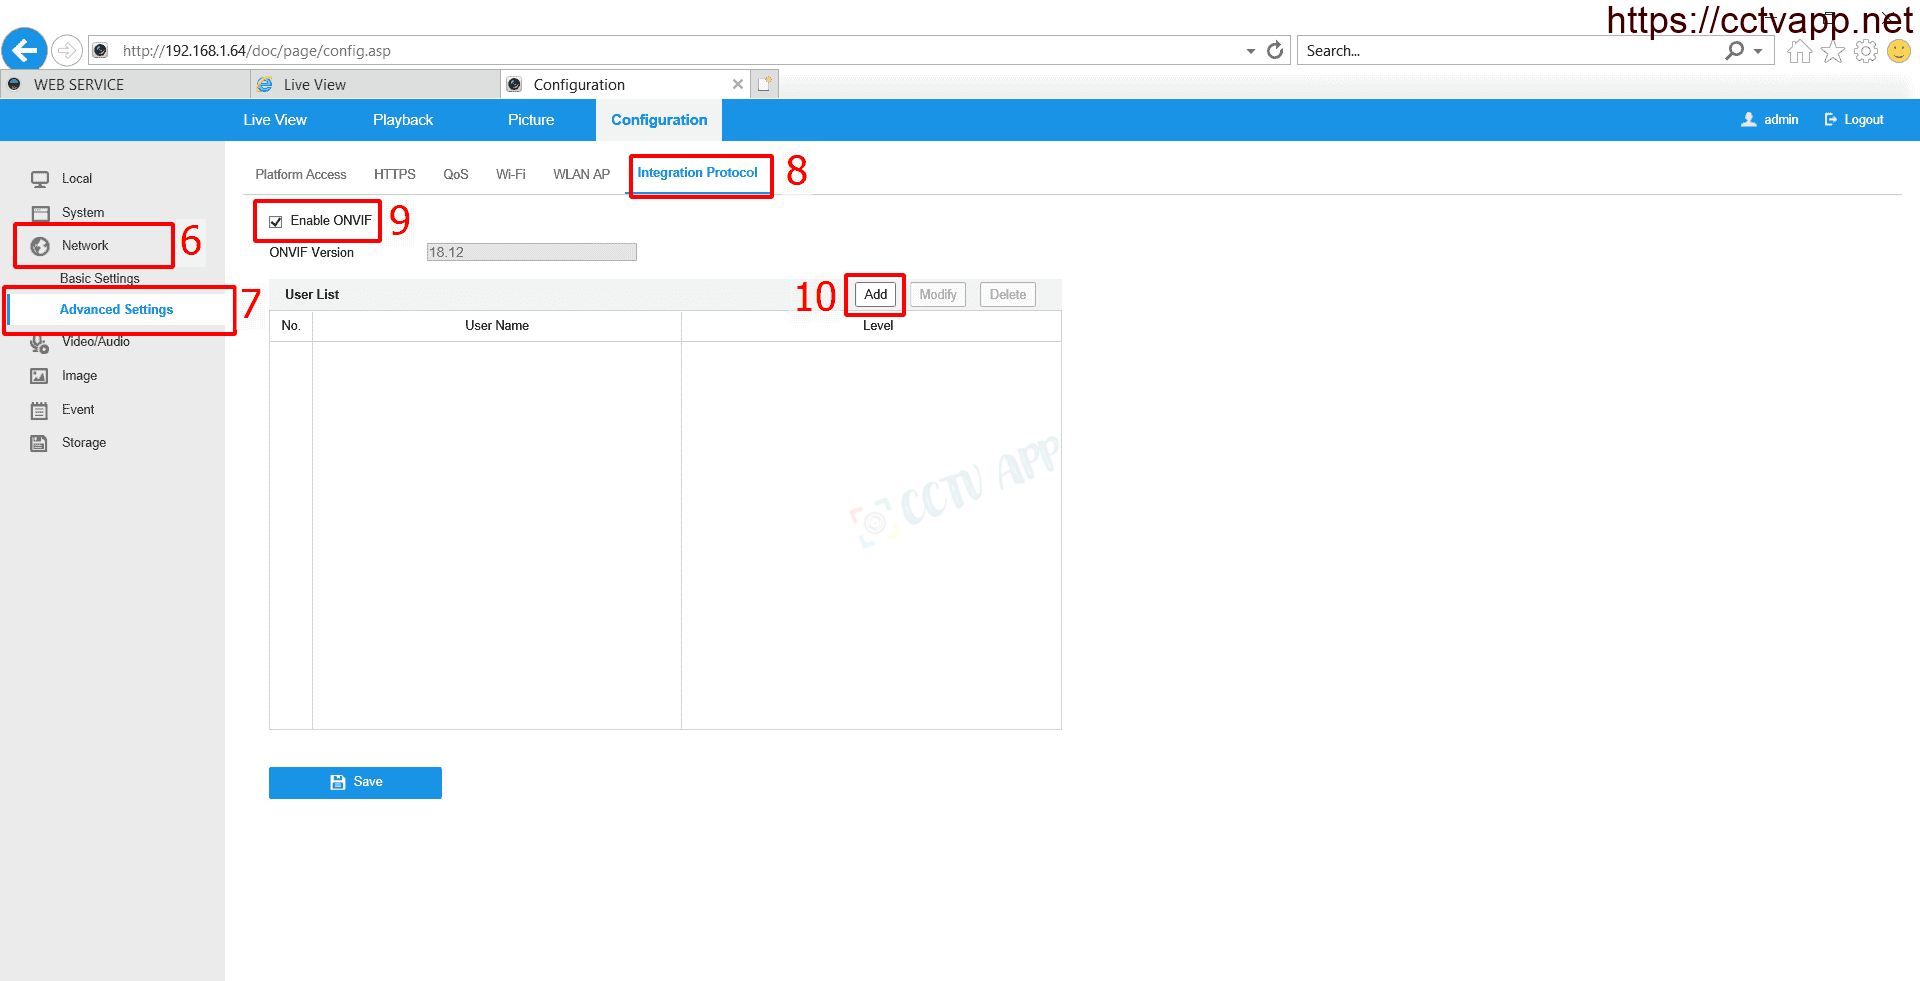
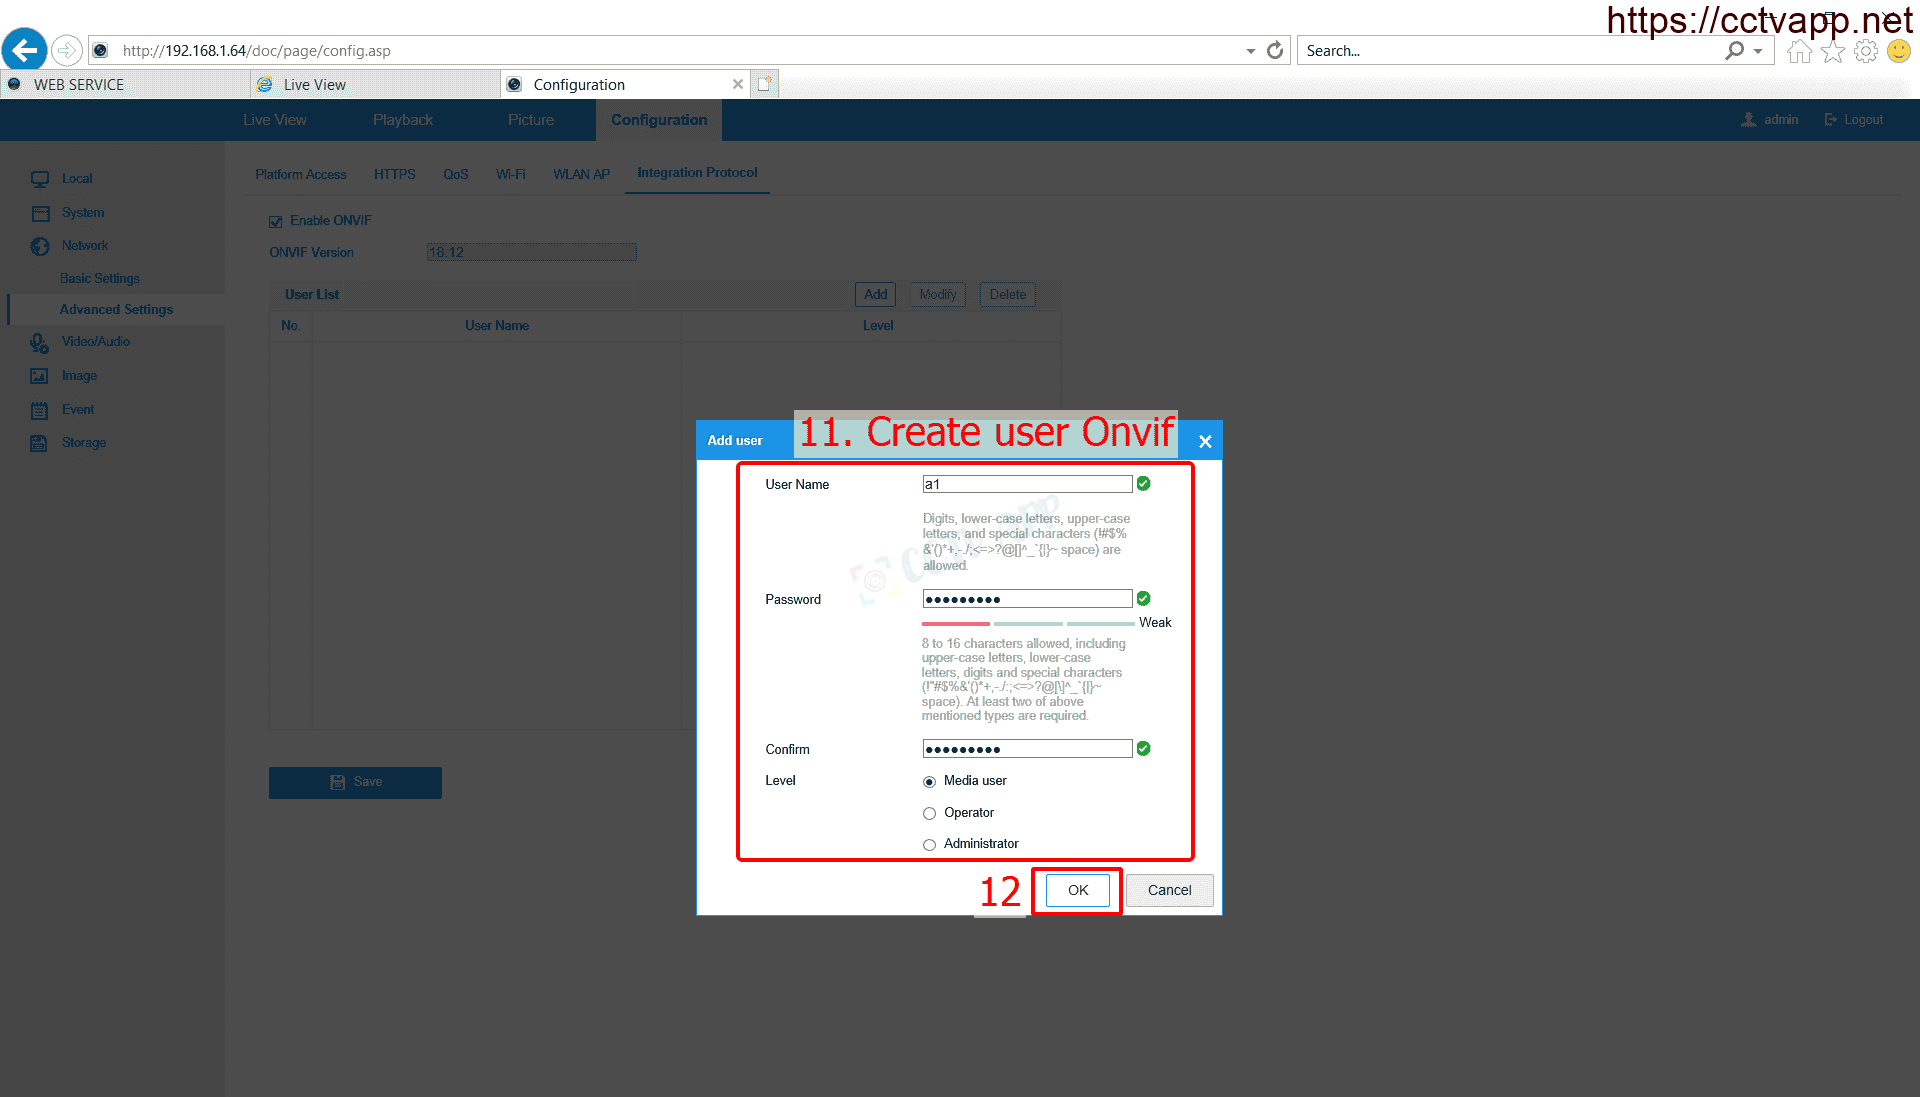
1. Enable Digest/basic authentication, create an Onvif account on Camera
First you need to convert the authentication status from Digest to Digest/basic:
Then create an Onvif account on Camera as follows:

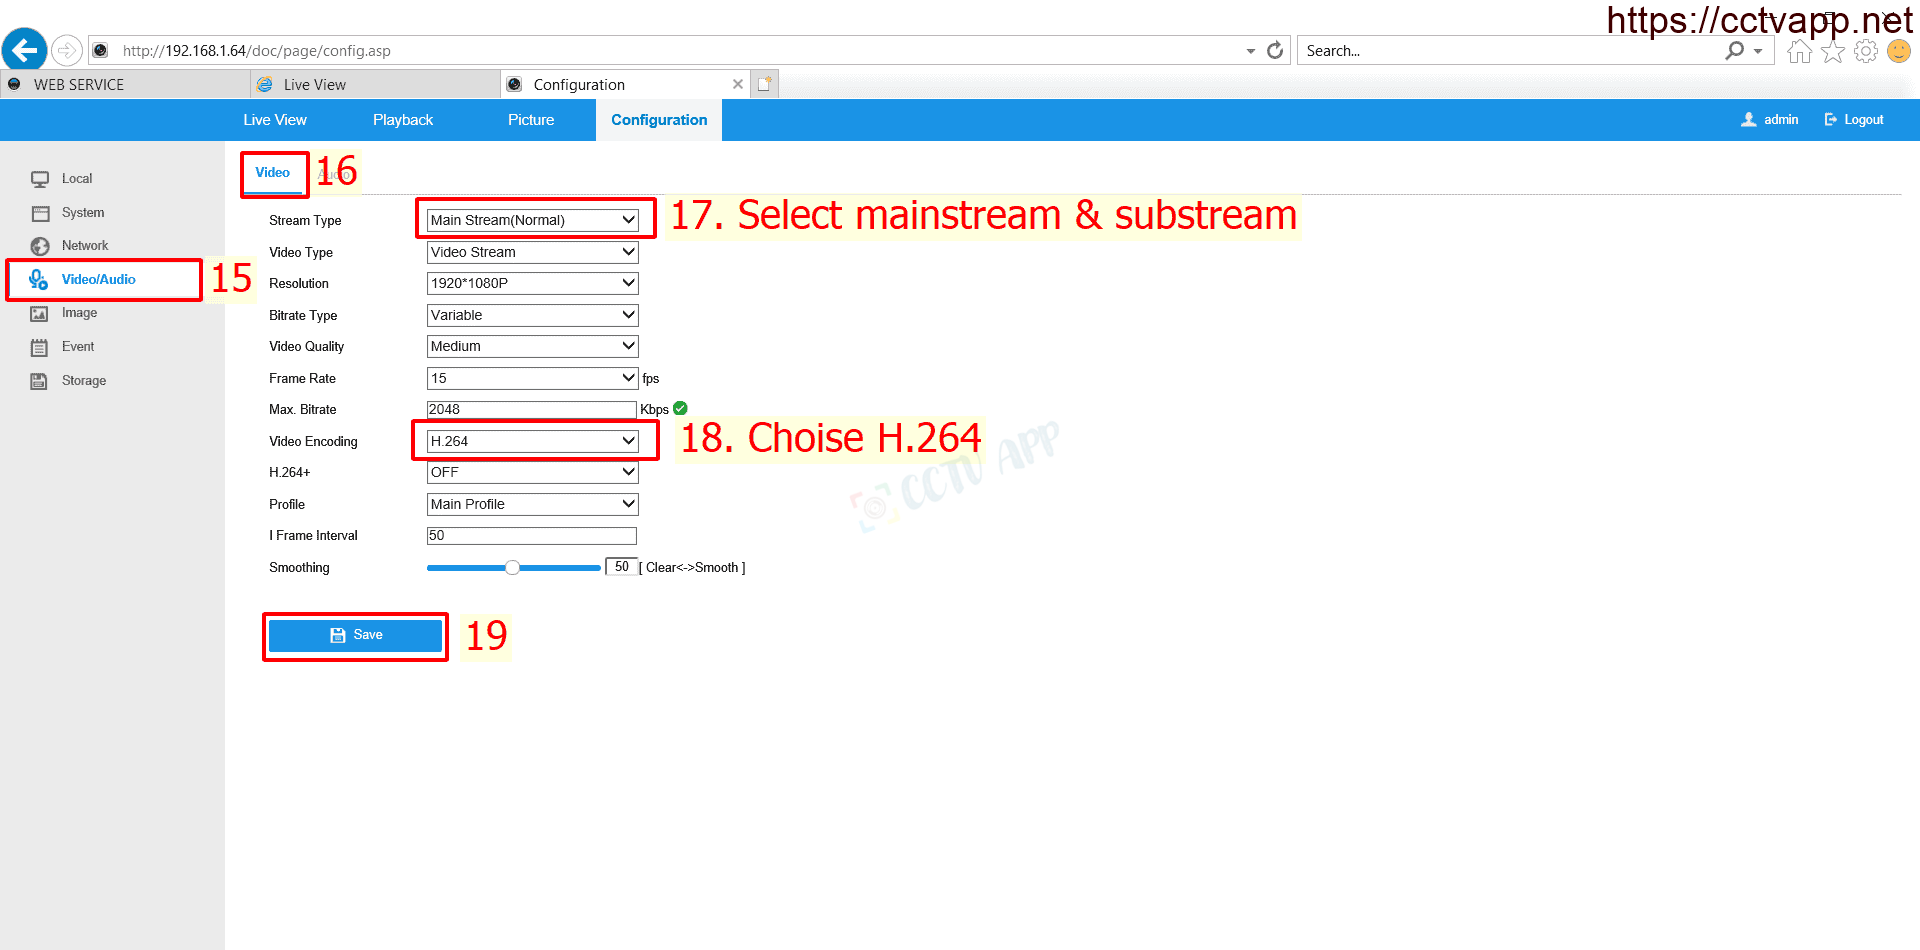
2. Convert compression standard to H.264
Currently, most Cameras already support H.265, H.265+, Smart H.265 compression standards, but Dahua video recorders only support Onvif version 2.4, so you need to convert output compression standard. Output from Camera to H.264 so that the recorder can connect and process images.
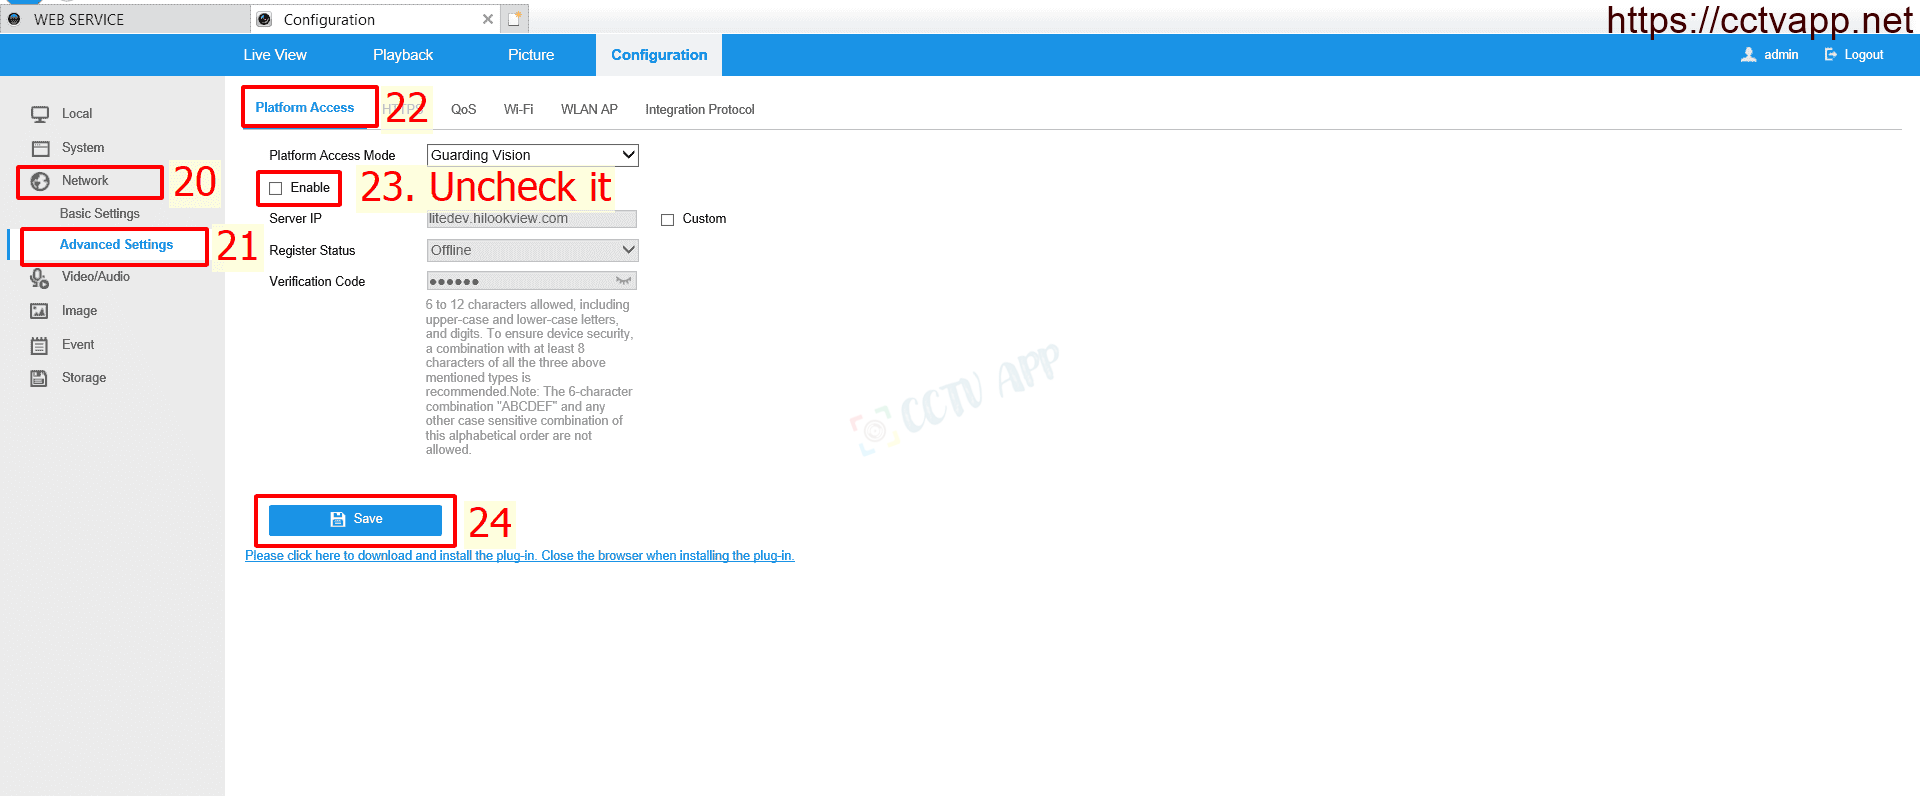
3. Turn off Platform Access
If Hilook Platform Access is enabled, the video image stream will be encrypted, you need to turn it off to use it.
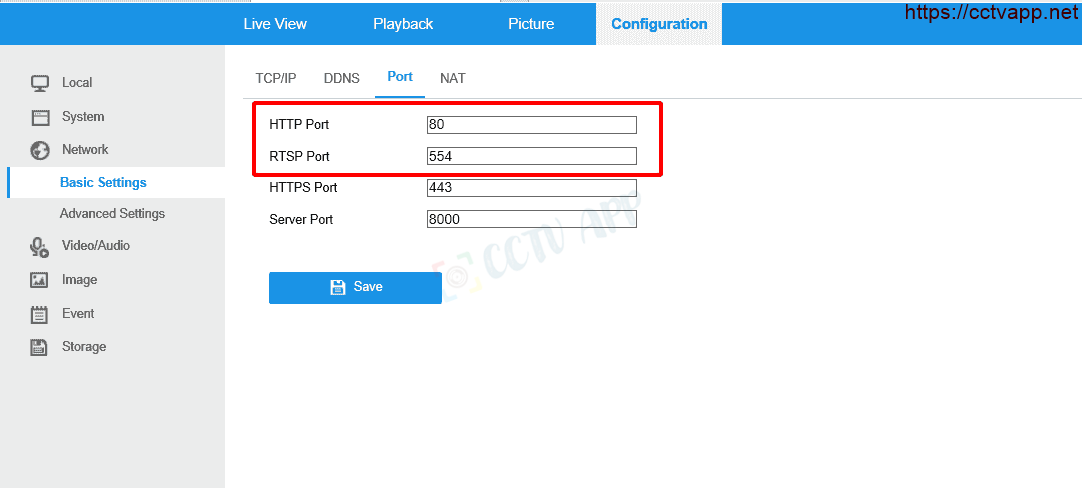
4. Change the connection port if using multiple devices
By default, Onvif will use 2 default ports, HTTP (80) and RTSP (554). If you add the Camera to the DVR in the LAN (internal) line, there is no need to change these 2 ports.
But if you add the Camera to the remote recorder with a different Internet connection, you need to change 2 different HTTP and RTSP ports on each Camera, then proceed to open the Port on the modem provided by the carrier.
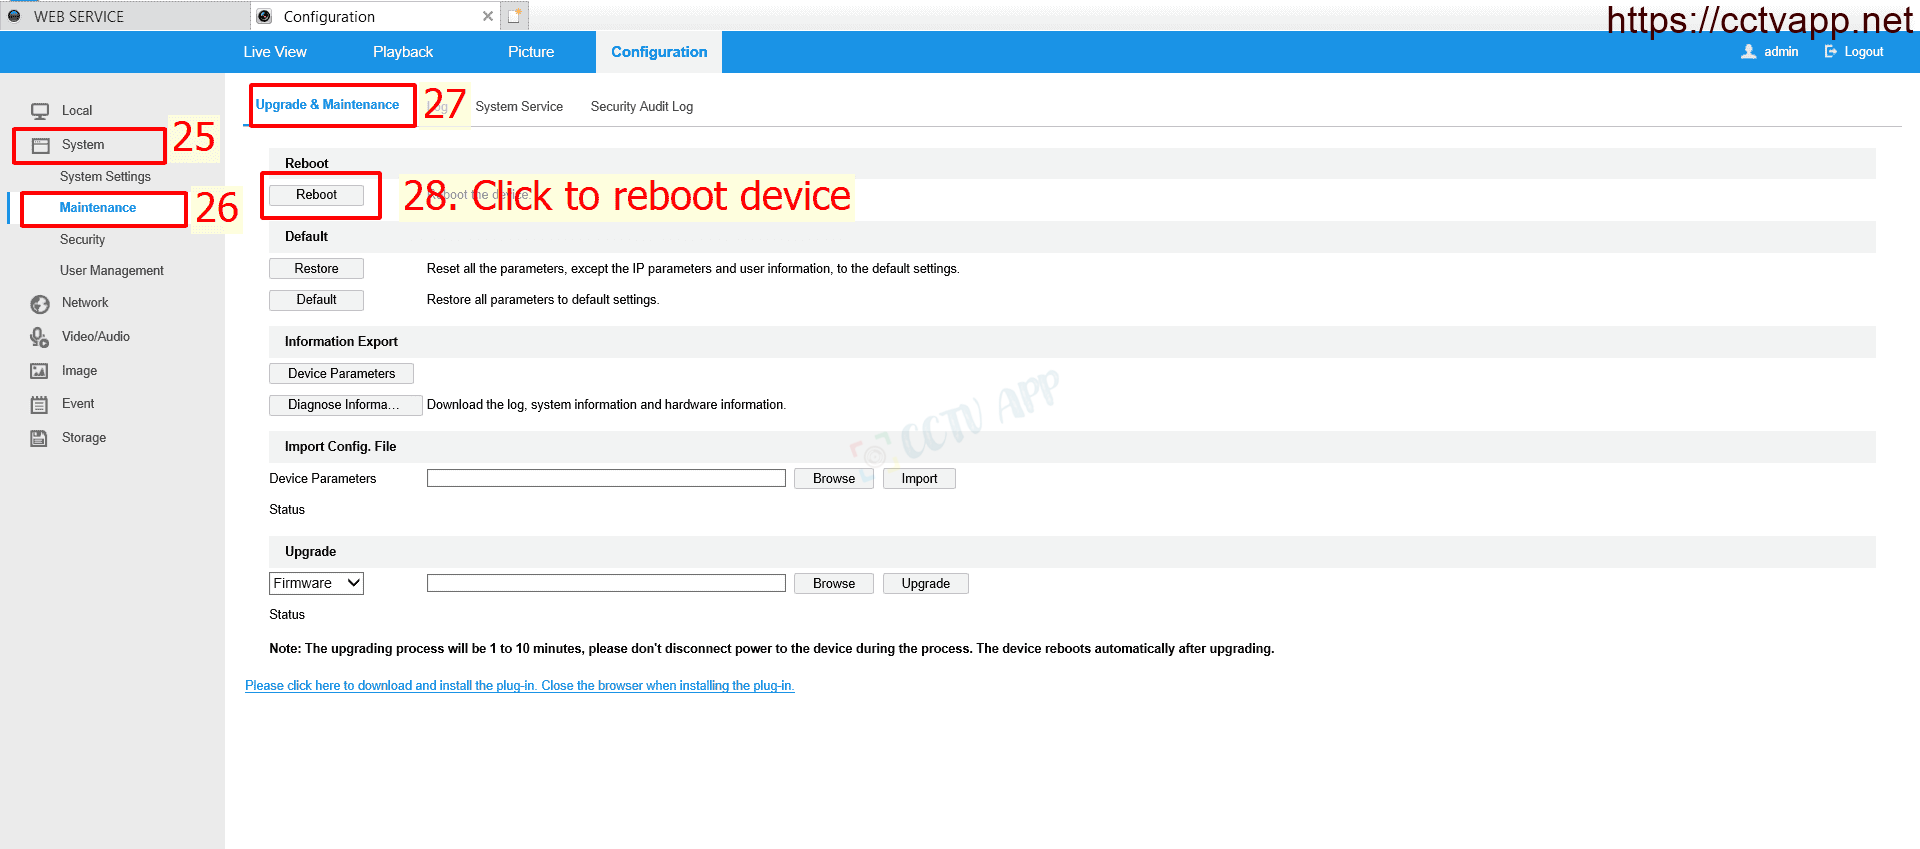
After performing the above steps, you need to restart Camera to apply the latest configuration.
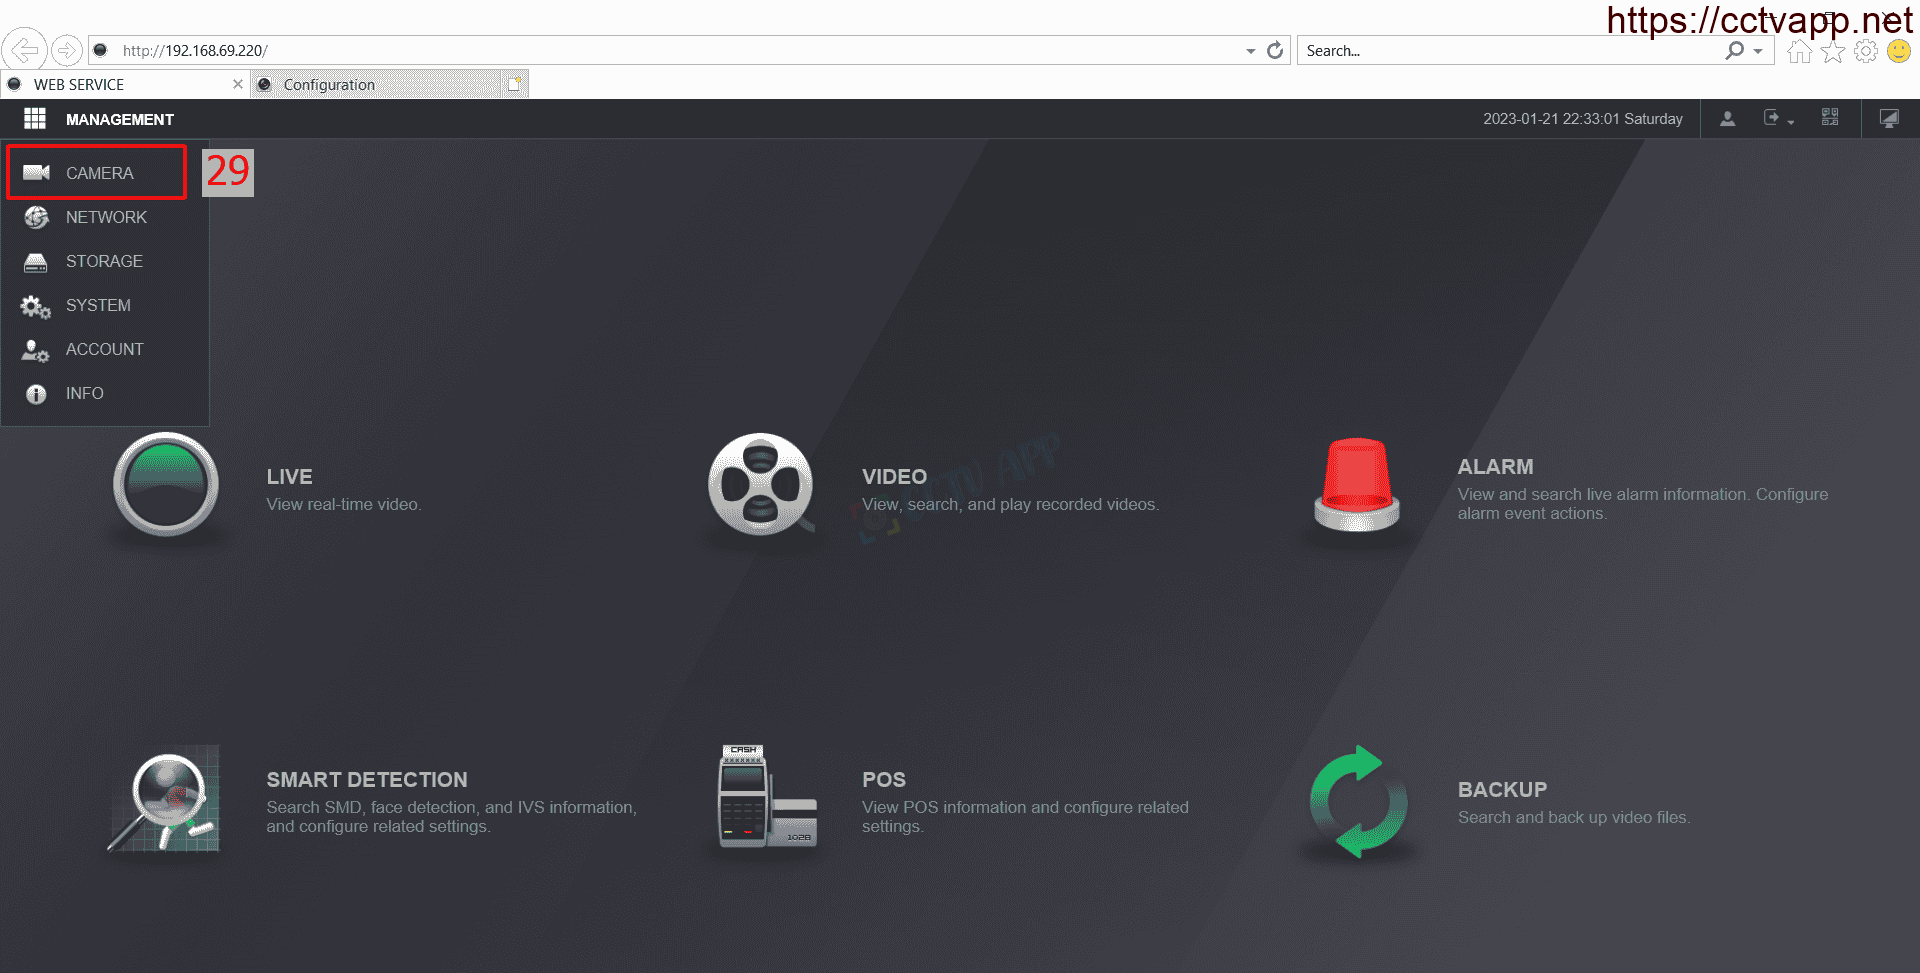
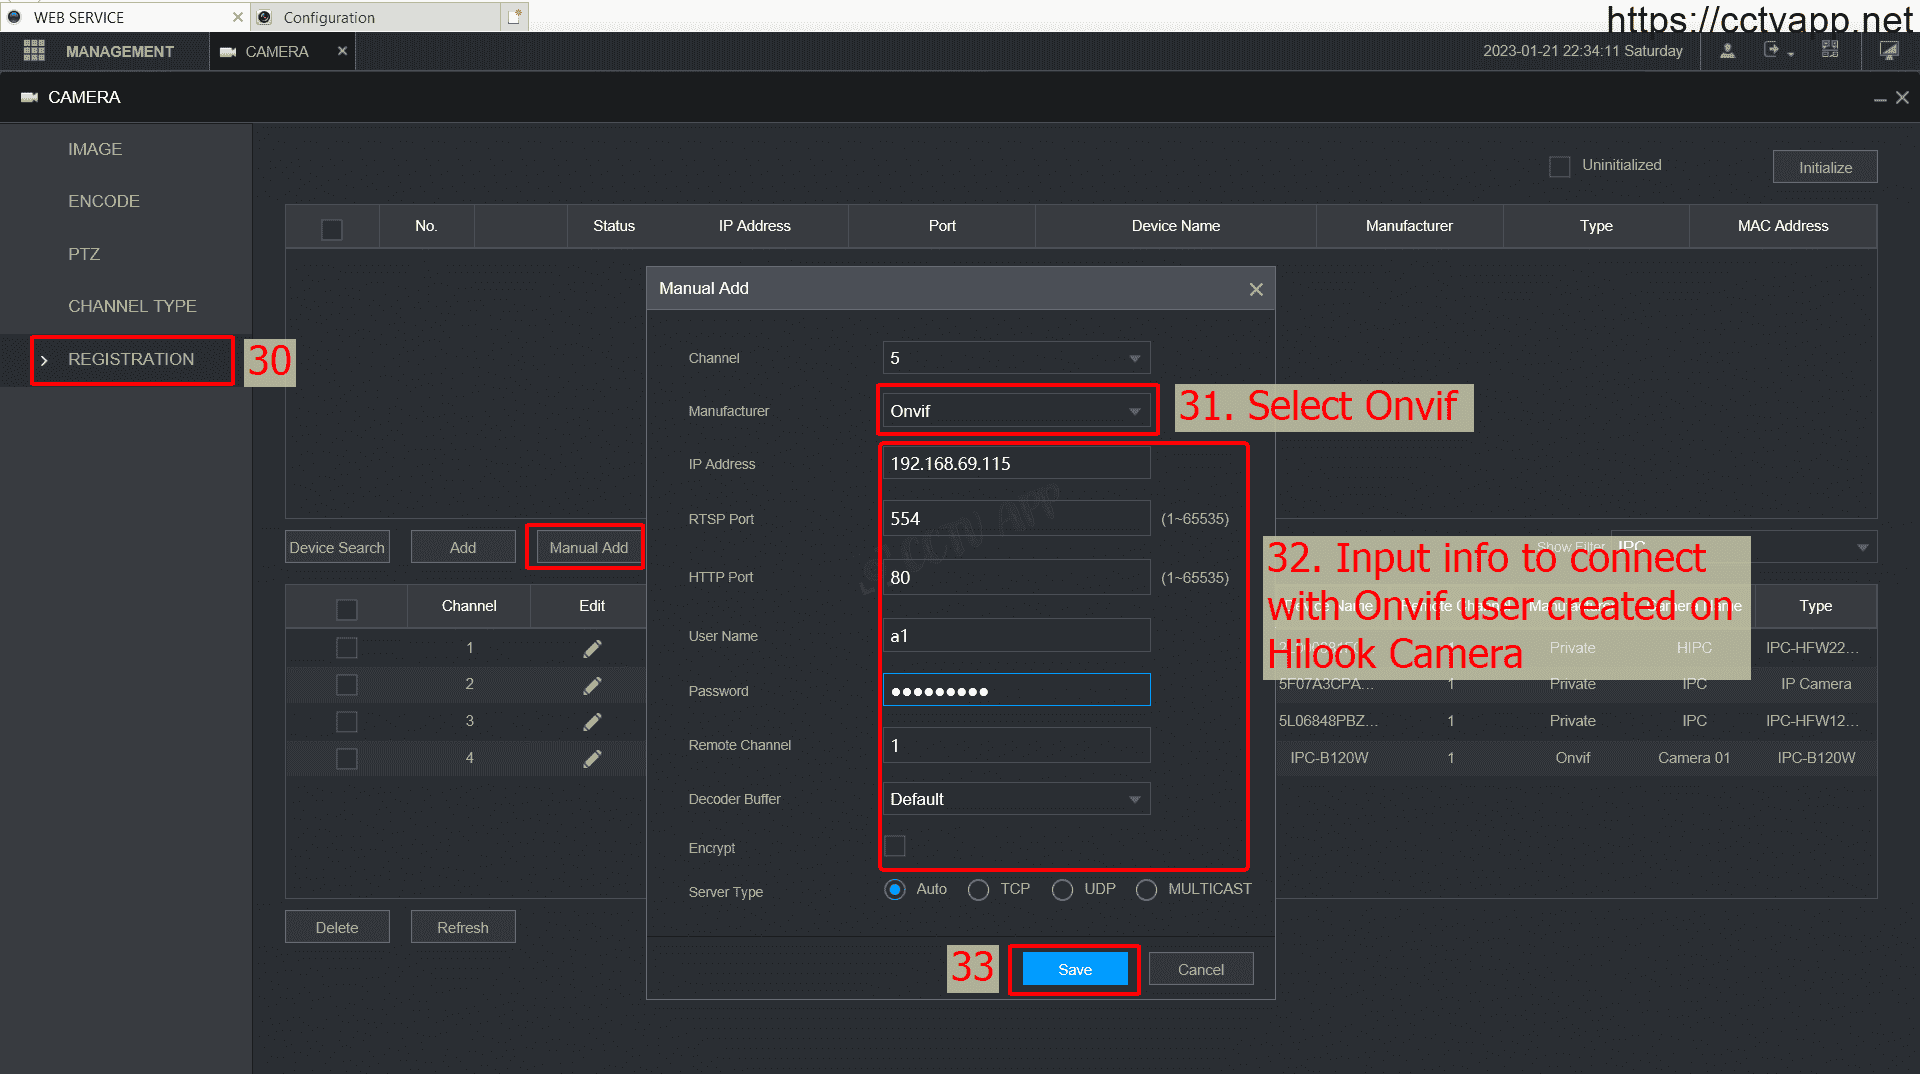
5. Add Camera to DVR
Step by step as follows:
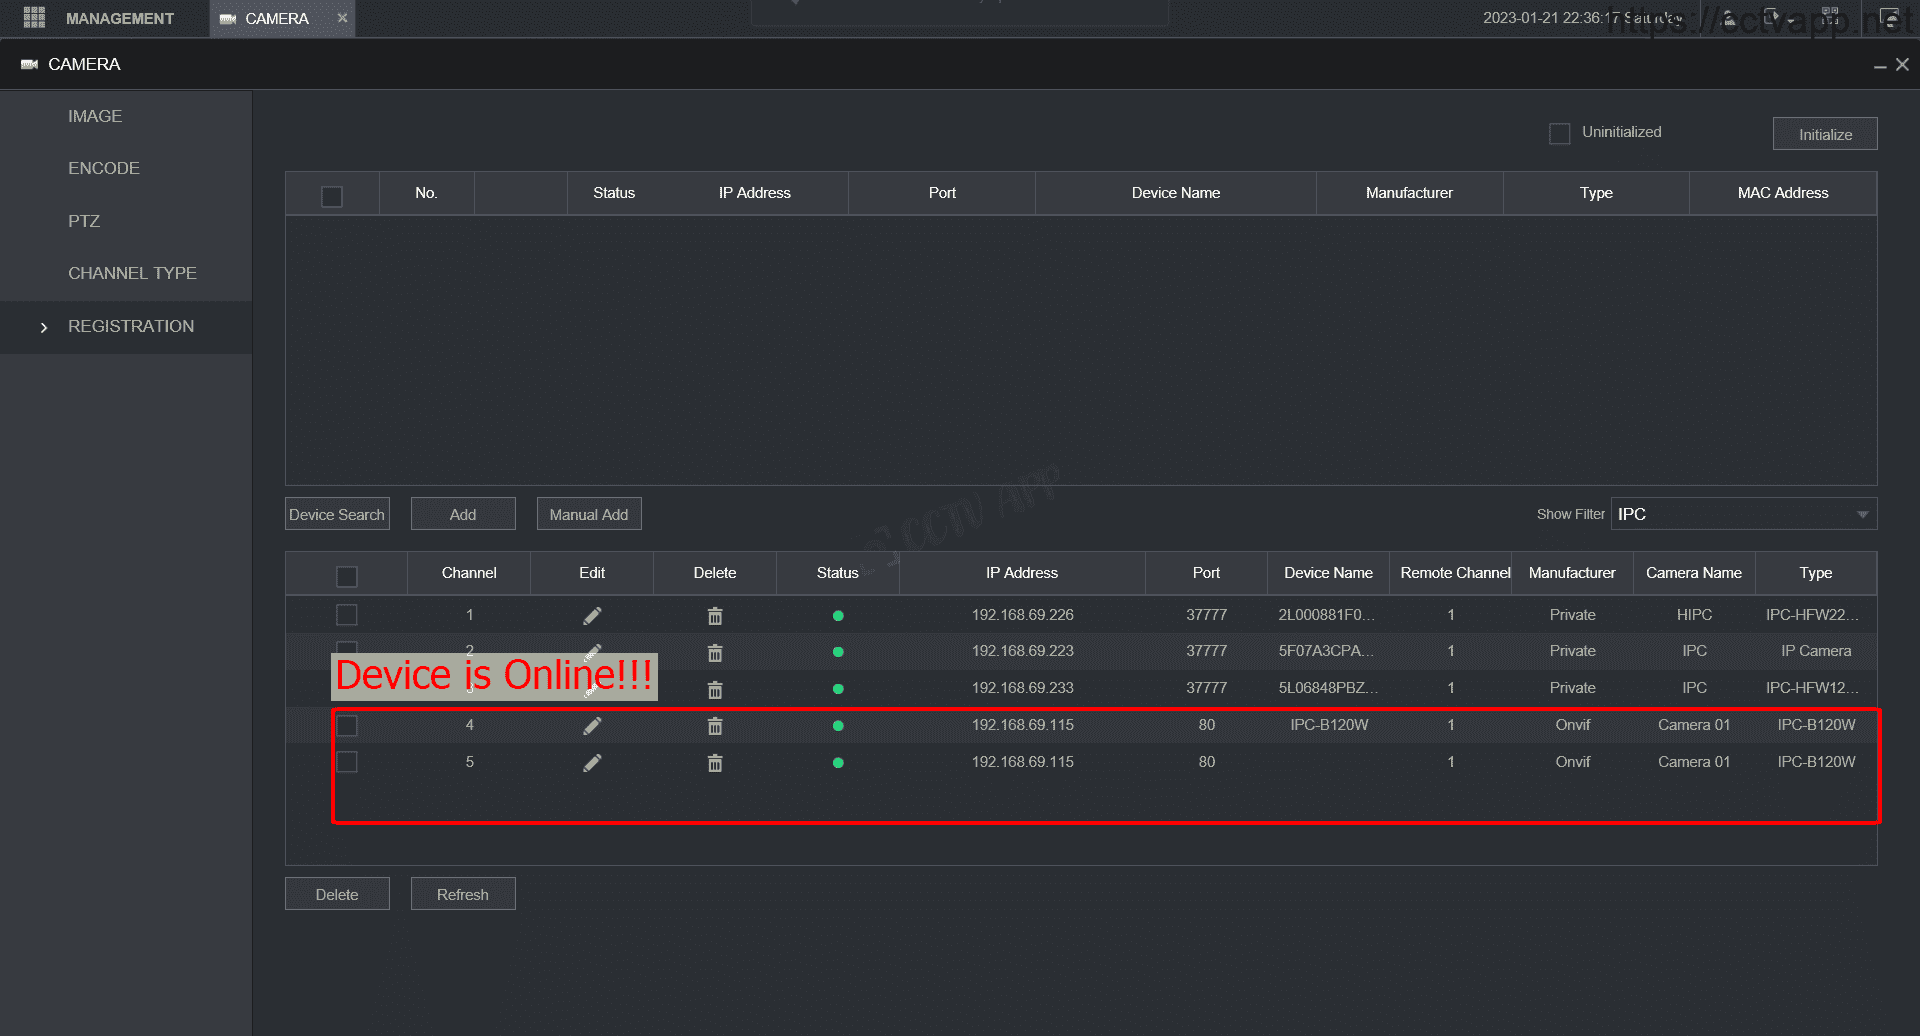
That’s it, you have successfully connected the Camera to the DVR. The above article I used with 2 devices:
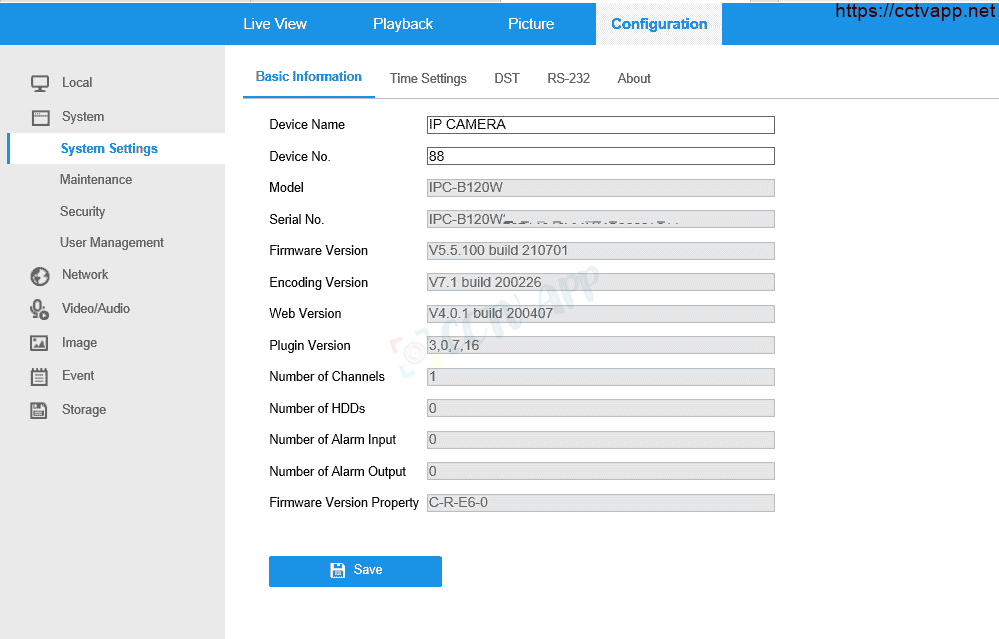
- Hilook Camera: IPC-B120W
- Dahua DVR: XVR5108HS-I3
Good luck with your device installation!!!