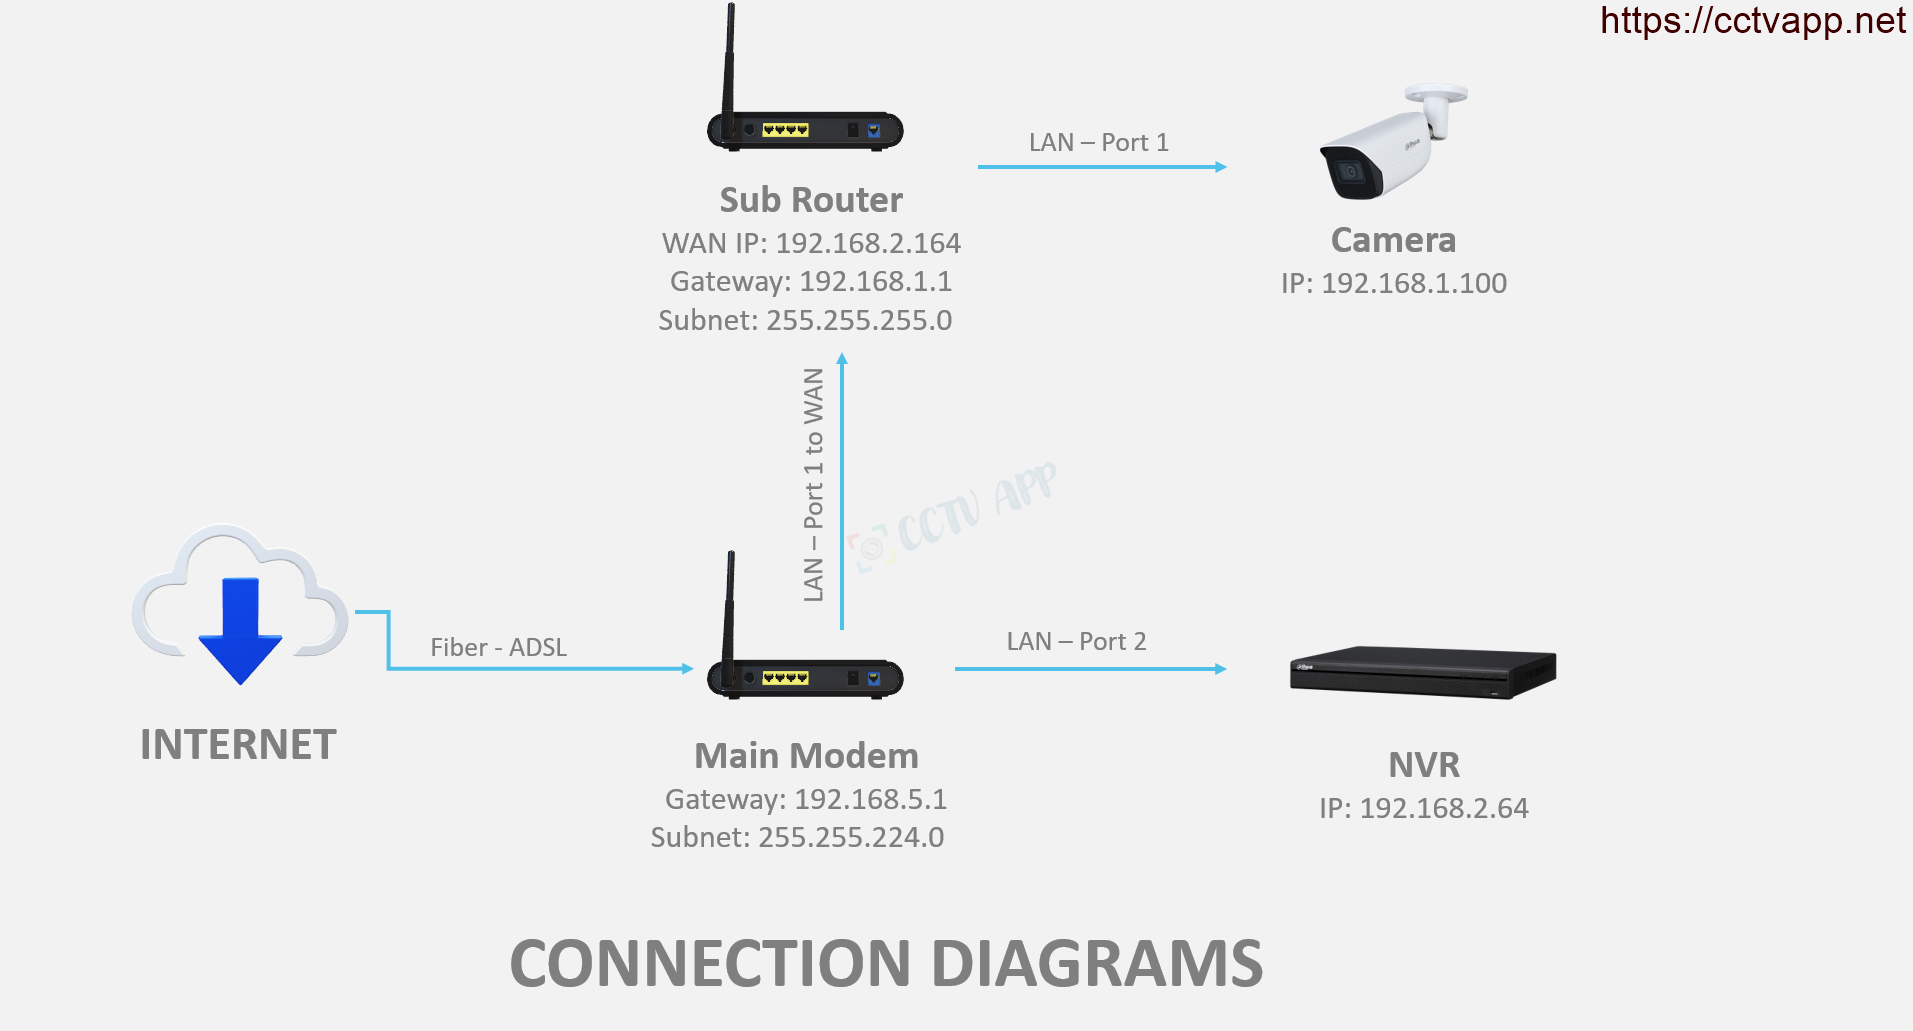
Suppose your house has 2 floors, the main Modem and recorder are installed on the ground floor, and the Camera is installed on the 2nd floor via a secondary modem but want to send data About the DVR, so what to do?
In this article, I will show you how to connect the Camera from the secondary Router to the DVR and set the main Modem to open step by step.
Directions
In this case, you will have 2 ways to do it:
- Turn off the DHCP Server on the secondary router, then the secondary router will only act as a switch to share the internet signal. The main modem will take on the role of management and provide IP addresses. Now both the Camera and the recorder will be on the same network layer, you just need to enter the IP Camera to connect as usual.
- Open the camera port and set a static WAN IP for the secondary router (this IP is provided by the main Modem. down). Then add the Camera to the DVR using the secondary Router’s IPWAN.
Option 1: Turn off DHCP Server
First, go to the secondary router, find Advanced -> Network -> DHCP Server -> disable DHCP Server:

Then, On the secondary router, switch the network port from WAN to LAN 1 (or LAN 2, 3, 4 are fine):

After doing the above 2 steps, restart the whole device (connecting the secondary Router) to get the IP with the downgrade from the main Modem.
Thus, the secondary router will act as a switch to divide the internet. All devices will share a network layer and connect to each other normally.
Option 2: Open Port on Secondary Router
First go to Camera’s web browser and set static IP:

Next, open the TCP Port on the secondary router. This port will vary by manufacturer such as:
- Dahua, Imou, KBONE uses TCP Port: 37777
- Hikvision uses TCP Port : 8000
- UNV, Onvif using Port: 80 and 554
- Jtech, Questek using Port: 34567
- Kbvision using Port: 8888< /strong>
- TVT use Port: 6036
- …..
If using on more than one Camera, please change this Port differently on Camera.

Open Port on Secondary Router:


Set Static WAN IP on Secondary Router. This IP is issued from the main Modem:

Final step, add Camera to the recorder:


That’s it. It’s that simple, isn’t it.
Thank you for following the article!!!










 Tiếng Việt