


 Tiếng Việt

Mikrotik is a European device supplier with the very famous RouterOS operating system. In this article SmartWifi will guide configuring Mikrotik step by step for any router.
The images in this article are taken on router Mikrotik RB750Gr3. This is a very powerful gigabit router that can handle 80-100 users and is very commonly used in cafes or small corporate offices.
I. What to prepare before configuring Mikrotik?
1. Tools needed
First you need to prepare a windows computer, network cable to connect the computer to the router. Then download the software winbox to your computer.
The computer needs a LAN port for easy connection, set a static IP for the network card: 192.168.88.99/24.
If the computer has a wifi card connected to the internet, the LAN card should not set a gateway.
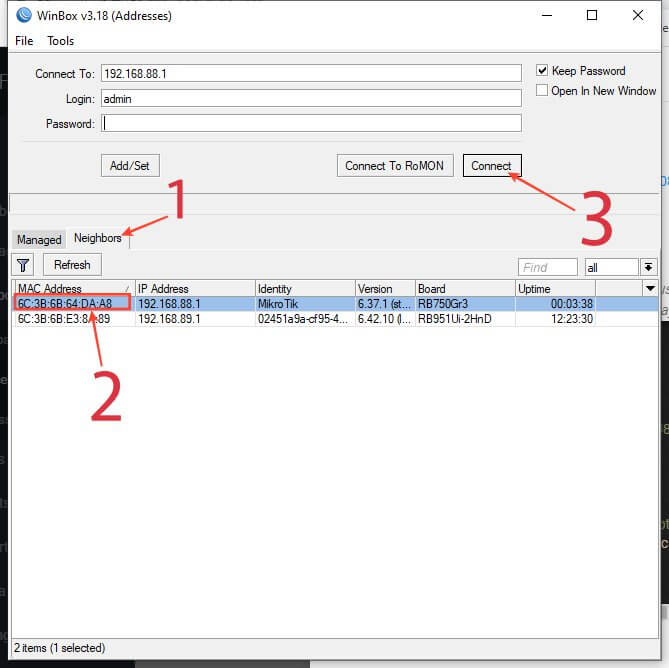
Open the winbox software and connect to the router. If in the neighbors tab you see the router has an IP, then double-click the IP box to connect. In case IP = 0.0.0.0, connect by MAC address – Connection via MAC is less stable than connection via IP
2. Update software for router Mikrotik.
The next step is to update your routerOS software to the latest version. The latest version will make the router run smoother and it has also fixed security issues.
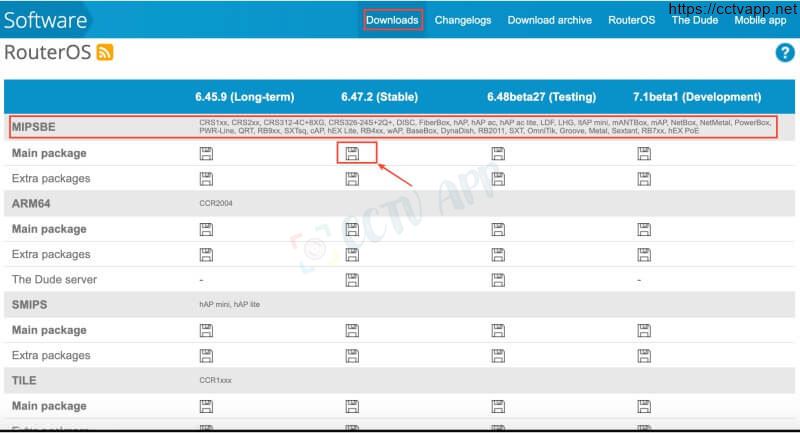
Back to page download by Mikrotik, scroll down to RouterOS and Find the entry that corresponds to your router. On the Main package row, click on the latest Stable version (or long-term) to save it to your computer. The other two betas should not be used unless you want to test.
The saved file is named *.npk (eg routeros-mipsbe-6.47.2.npk). Go back to the winbox window connected to the router to upgrade. The process is as follows:
- Go to the Files menu to upload this file to the root directory.
- Reboot to restart the router to complete the upgrade.
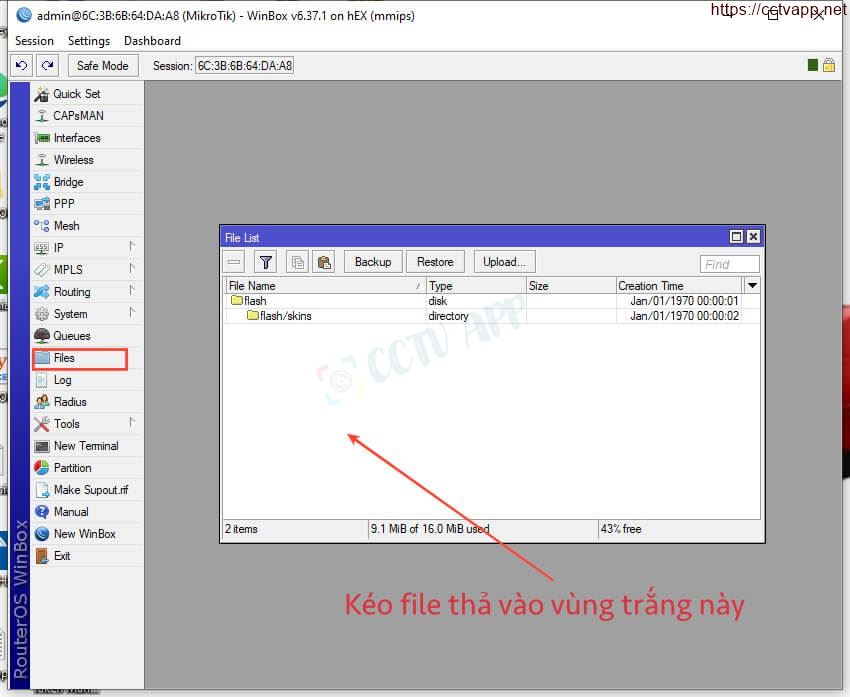
How to upload is also very easy to do. Go to the File menu and leave the winbox windows and the folder window containing the downloaded file next to each other. Proceed to drag the file and drop it into the Files window in winbox.
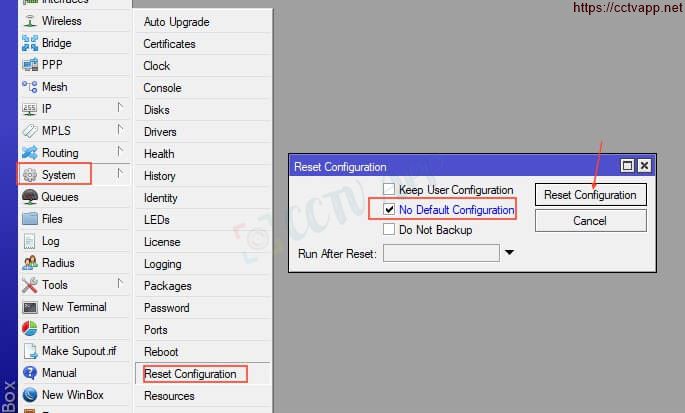
3. Delete all settings on the router
After reboot upgrade is complete you can proceed to delete the settings. Go back to winbox and go to menu System > Reset Configuration to clear all settings put. Note the check box No Default Configuration.
II. Basic Mikrotik configuration steps
Step 1: Create a bridge for the local area network (LAN)
- With routerOS, bridge is a bridge connecting hosts on different networks. It is created to link interfaces including: ethernet interface, wlan, vlan…
- Here, we can roughly understand creating a bridge is to create a group of ports that can be connected like a switch .
- Go to the Bridge menu, click + to add a bridge, name it bridge-LAN

Next add the ports you need to use to the newly created bridge.
In the bridge window, click the Ports tab, press the + sign to add a port. Below are all 4 ports 2-5 that are included in the bridge-LAN.
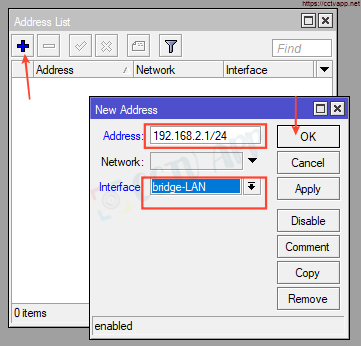
Step 2: Set the IP for the newly created bridge.
This IP will act as the Gateway for the clients in the LAN. From Winbox, go to menu IP > Addresses to open a subwindow Address List. Press + and declare IP:
Step 3: Setup DHCP Server for bridge-LAN.
Go to menu IP > DHCP Server to open the settings window. Click the button DHCP Setup to open a subwindow. Select bridge-LAN and click Next to continue.
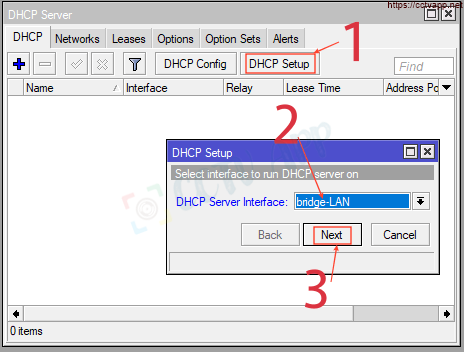
1 – DHCP Setup
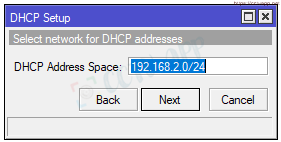
2 – Set IP range, automatically set if bridge already has IP
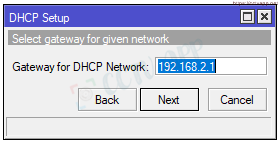
3 – Set gateway ID
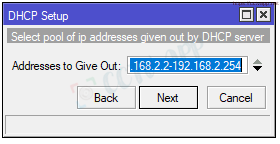
4 – Set first and last IP

5 – Set DNS
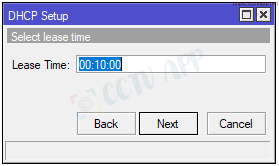
6 – Set IP lease time
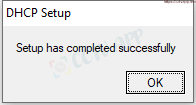
7 – Finish DHCP server settings
Step 4: Configure WAN for Mikrotik.
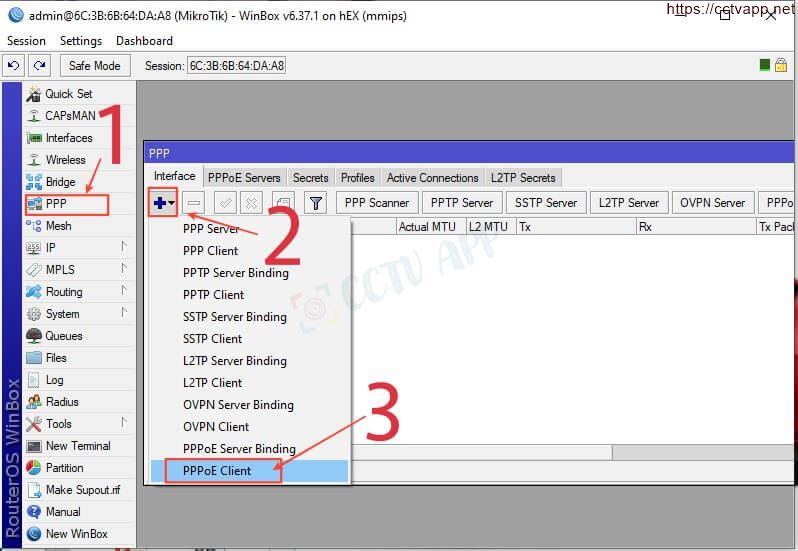
WAN for routers comes in many forms, usually DHCP Client or PPPoE. In this configuration guide, PPPoE will be selected to install the WAN port on ether1.
To install pppoe, go to menu PPP to open a sub-window. From this window click on + and select PPPoE Client in the drop-down menu.
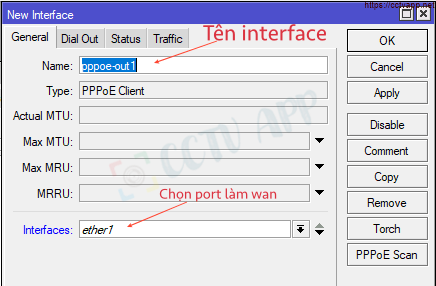
The window New Interface will be opened for you to enter the parameters:
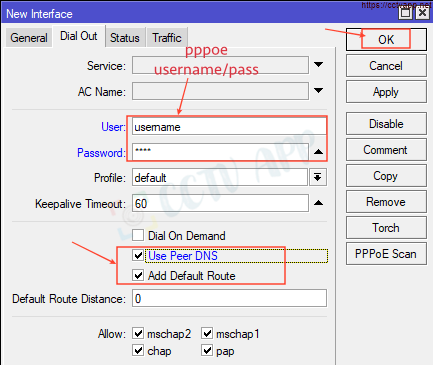
In the next step when configuring pppoe, you need to select 2 items: Use Peer DNS and Add Default Route to connect pppoe automatically using carrier-provided DNS and also automatically adding default route.
If you don’t select these 2 items, you will have to declare DNS and default route manually.
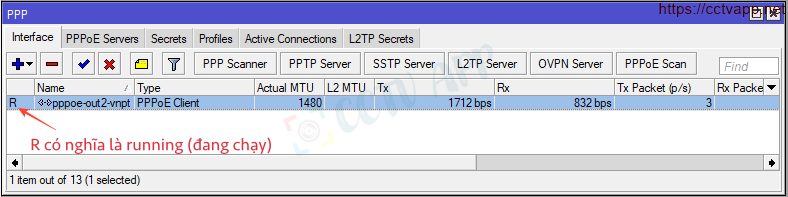
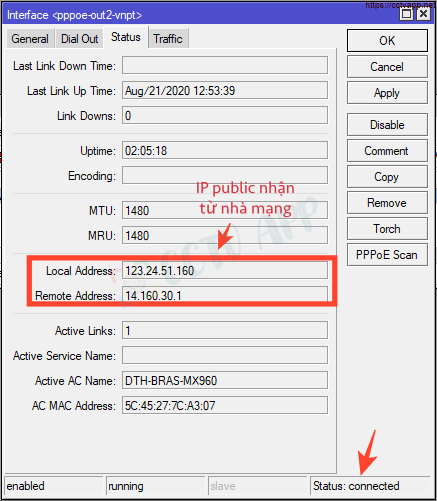
After clicking OK to create PPPoE Interface, it’s done. If the modem has switched to bridge mode and the router’s ether1 has been wired to the modem, this interface will start connecting to the network operator to receive the IP.
Step 5: NAT LAN traffic to the Internet – Allow internet access
Access menu IP > Firewall and select tab NAT.
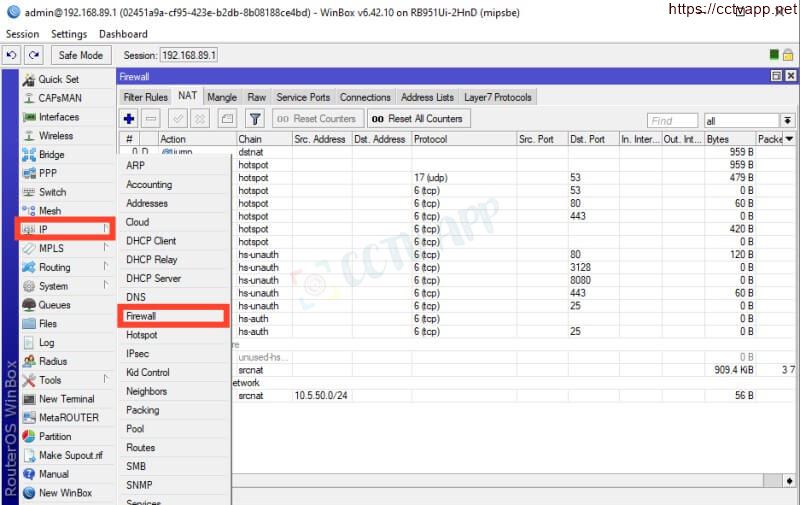
In the Firewall window, select tab NAT and click the button marked + to add a NAT rule.
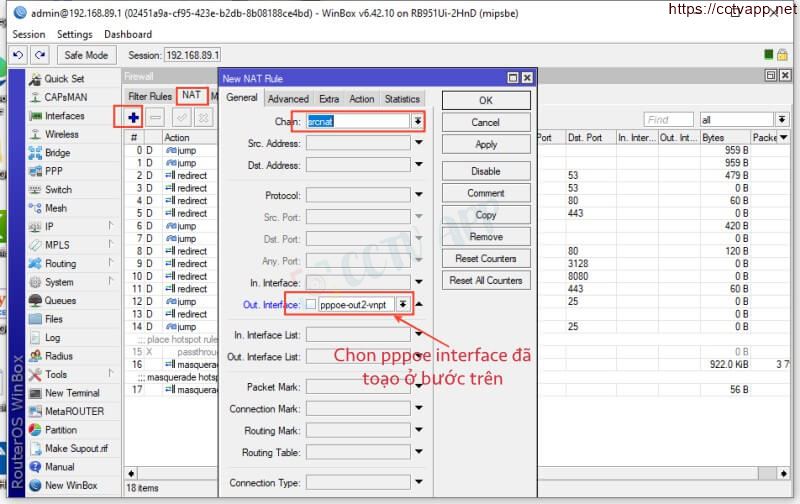
In the window New NAT Rule: Enter the values in the tab General like above. Then switch to tab Action:
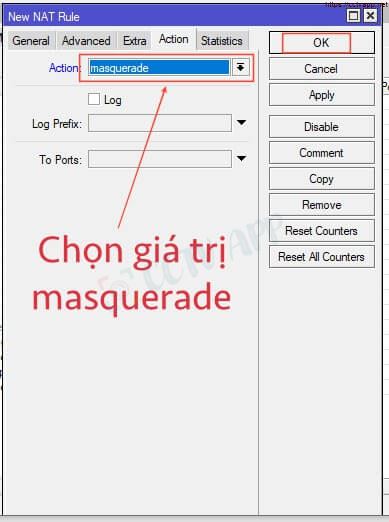
After clicking OK you will have a NAT rule that allows all local networks to be NATed to the internet. Creating a rule like this will be a total NAT rule – it will work for all other bridges or interfaces.
If you configure Mikrotik at a more advanced level, when creating a NAT rule, you can set more options such as In – Interface, Src Address… However, creating rules in the way described in this article also works at a basic level. latest version.
After this step, machines in the bridge-LAN can connect to the internet normally.
Step 6. Set final parameters.
At this step you can proceed with the following settings to finish the installation
- Set a password for the admin account in the System menu > Password.
- Set optional DNS at IP > DNS
- Setting to automatically update system date and time: System > SNTP Client
- Install some basic rules for the firewall to make the system more secure.
III. Final configuration check
- After completing Step 6 above, you should have a relatively good router. You can either use a computer connected to ether2 to test the internet or do an external ping to see the results.
- If the computer can ping to the internet then everything is configured correctly. You can perform a backup of the system configuration for future use.
Source: https://smartwifi.com.vn
Thank you for following this post!!!