


 Tiếng Việt
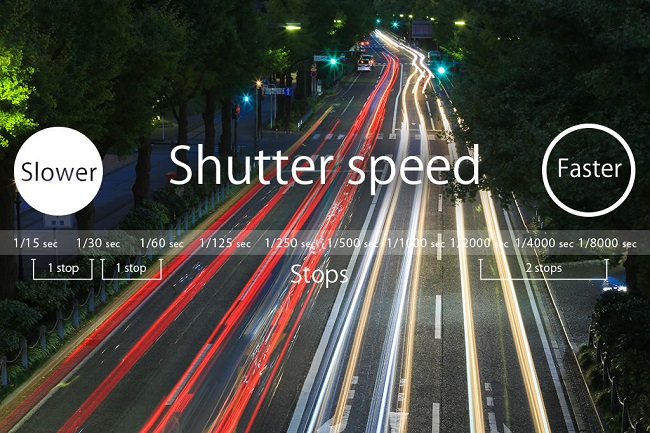
Exposure is one of the first concepts to learn when you enter professional photography. Let’s learn about exposure photography for beginners in the article below!
I. What is exposure?
Exposure is a term in photography that refers to the amount of light the sensor receives during the process of taking an image. This is the decisive factor to the brightness of the photo, evaluate whether the photo is overexposed or underexposed.
There are three factors that affect the exposure of a photo: Aperture (aperture), shutter speed (shutter speed) and light sensitivity (ISO), These three factors are called the exposure triangle.
To take a good photo, from sharpness to depth of field, you need to balance the exposure triangle. To do this you have to go through a real training process.
Most of today’s camera the above parameters are adjusted automatically in the camera’s presets, however these settings only work in certain environments. determine.
In low light, overexposure, or in extreme conditions such as shooting in the rain, capturing fast movement and creating beautiful artistic effects you must adjust the exposure triangle by hand.
In cameras the brightness of a photo is indicated by EV (Exposure value). EV = 0 means that the image is exposed for 1 second at f1 focal length, each step up and down (stop) increases or decreases by half the EV.
II. Exposure triangle
Three values of aperture, shutter speed and ISO are closely related. When you adjust one value, the other two must also change. Below is a brief overview of these three factors.
1. Shutter speed
Shutter speed is the amount of time it takes it to take a picture. For example, on the Nikon D850, you can shoot at any shutter speed. from 1/8000 s to 30 s, as well as a time mode for longer exposures.
Shutter speed is crucial when it comes to exposure because:
– The speed at which the long shutter lets in a large amount of light and vice versa the shorter the shutter speed, the less light passes through. You can imagine, if you take a normal daytime photo with a shutter speed of 30 seconds, you will get a completely white photo, whereas if you take a picture at night with a shutter speed of 1/8000 second , the image will be completely black.
For easy visualization, you can refer to the image below:
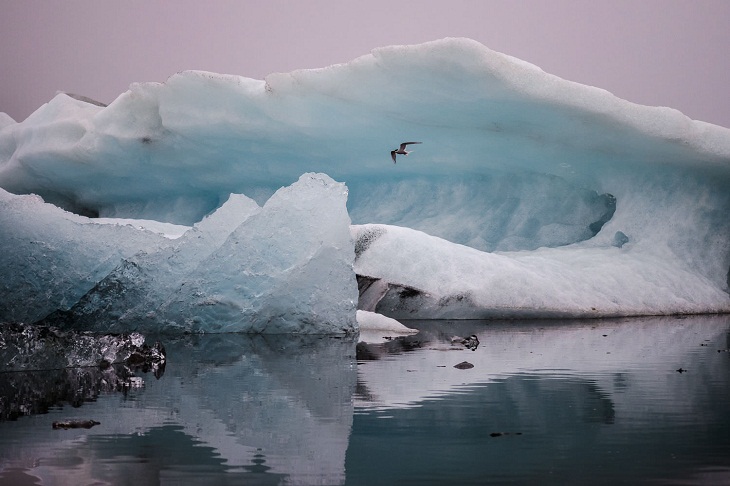
– Shutter speed creates motion blur in photos. A long shutter speed (such as five seconds) will capture anything that moves during the exposure. If one were to pass by, they could appear as an extraordinary light streak across the image. This is called motion blur.
Use fast shutter speed helps capture fast motion better. For example you can take a picture of a waterfall at 1/1000th of a second and see the water droplets in mid-air without the naked eye camera.
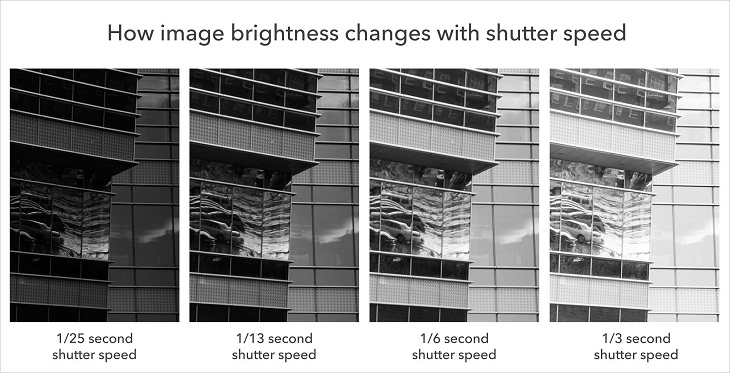
You can see the difference in the image displayed when changing the shutter speed as shown in the picture below, the scene taken on a high windy day:
Your photo may be blurry due to two reasons: Camera blur or subject blur makes the photo The photo taken is blurred. If the camera shakes, then using a tripod may be limited, but the subject you want to capture is moving, like a landscape shot on a windy day, you need to adjust the shutter speed to get a clear image. .
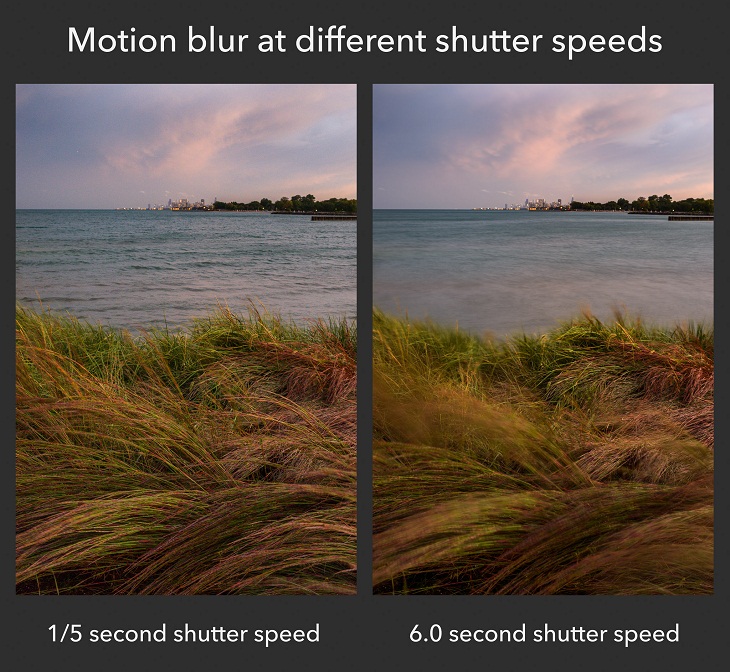
You can also adjust the long shutter speed to create beautiful motion effects like capturing the movement of light or capturing the movement of clouds for a smoother look. p>
When you zoom far to take a photo, the image will be prone to blur, this time you need short shutter speed to capture it subject movement, especially when you use a large telephoto lens.
There are no specific guidelines for shutter speed that you needs to practice, however there are some small suggestions you can refer to:
- Use 1/500 sec or faster for wildlife and sports activities.
- Use 1/100 sec or faster for portrait images. telephoto.
- Use 1/50th of a second or faster for wide-angle portraits or travel shots, where your subject doesn’t move too much.
- If your subject your subject is completely still and you have a tripod, use whatever shutter speed you want.
2. Aperture
Aperture:
Aperture is the opening of the lens to let light through. Just like the pupil in our eye can contract or open to receive light.
This part on the lens is called “aperture blade” these blades can larger or smaller, the working mechanism is the same the pupil of our eye, when it’s dark the pupil dilates to let in more light, just like when it’s dark you open the aperture of the lens wider to let the sensor in more light.
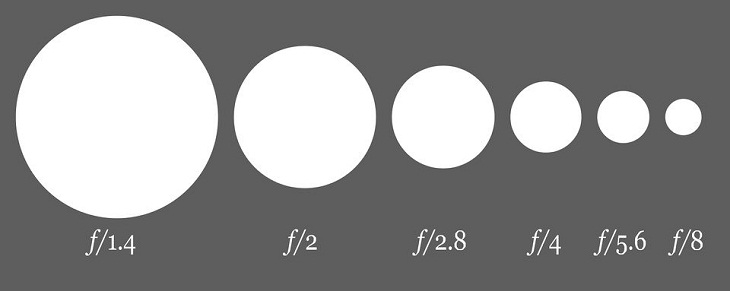
Aperture is indicated by the symbol f/parameter. Example: You can have an aperture of f/2 or f/8 or f/16,…
The smaller the parameter, the larger the aperture. You can refer as in the picture:
Aperture and Exposure:
To properly expose a photo, it is important to pay attention to the aperture setting.
The bigger the aperture, the brighter the photo. Large apertures like f/1.4 and f/2 allow you to see in the dark. On the other hand, an aperture as small as f/16 (with the aperture blades close to closed) will result in a much darker image. If you try to take a photo of the night sky at f/16, your photo will be black.
By changing the aperture and shutter speed settings, you can precisely adjust the amount of light that makes the photo properly exposed. This is why aperture is so important when it comes to exposure.
Aperture and depth of field (Depth of field):
Aperture is also an important factor affecting depth of field.
Depth of field is how sharp the scene is from front to back. For example, landscape photos have sharpness on each scene from the foreground to the horizon, while portraits have outstanding sharpness in close subjects, even only in the eyes, and the background behind is blurred. than.
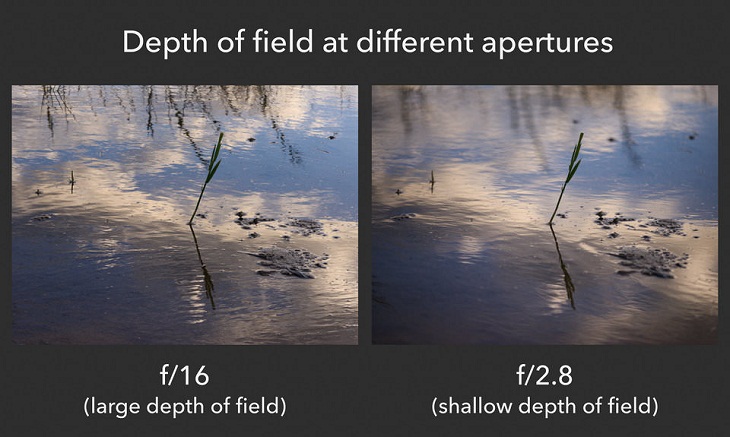
Aperture helps to change the depth of field, this makes a big difference if you want to take the best photos possible. Changing the depth of field in an image changes the image completely.
Specifically, a small aperture (like f/11 or f/16) gives you a large depth of field that makes every part of the image from front to back appear sharp. A large aperture (like f/1.4 or f/2.8) achieves a much thinner depth of field, with a shallow focus effect that helps you bring out close-up subjects while others blur.
In fact, the effects are quite obvious. As your aperture gets smaller and smaller, your exposure will get darker and darker and your depth of field will increase. (Also remember that you can return the image to normal by using a longer shutter speed).
3. ISO – Sensitivity
ISO brightens your image, but it is not part of the exposure because ISO does not affect the amount of light that reaches the camera sensor (by definition of exposure). Instead, ISO brightens the image after the sensor has been exposed to light.
ISO speed will be very useful when there is no way to lighten the image, for example you have opened the aperture all the way up and the shutter speed is too long to increase further. Moreover, now you can lighten the image more by increasing the ISO, but the higher the ISO, the more noise the image will have.
For example the picture below, The photo on the right looks more noisy, in the dark corners the color of the image is also changed because the photo was taken at ISO 25,600, which is an extremely high ISO (many) than what most photographers would put under normal conditions).
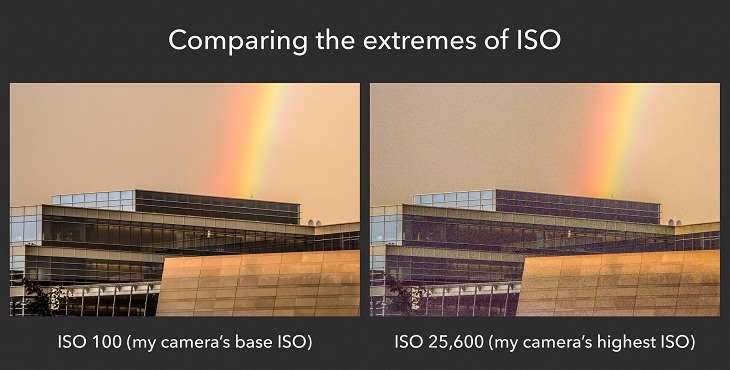
The main levels on the ISO scale are 100, 200, 400, 800, 1600, 3200, and 6400. Some cameras go beyond this range, in either lower or higher directions, such as the figure below. ISO 25,600 image above. Alternatively, you can set intermediate ISO values, like ISO 640 or ISO 1250.
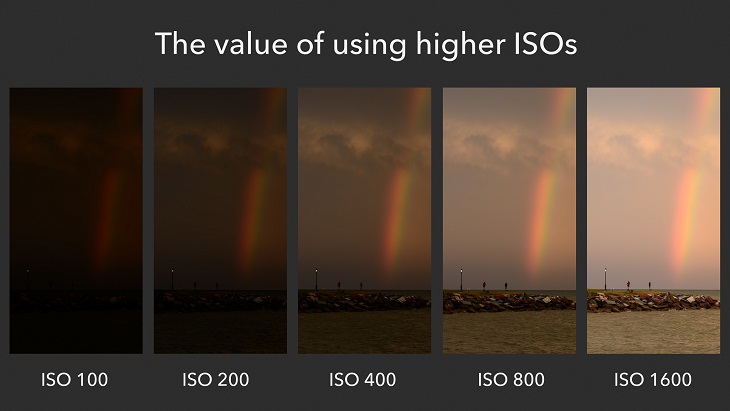
The lowest ISO on your camera is called the base ISO. Normally, the base ISO will be 100, but some cameras have ISO 64, ISO 200. If you set the base ISO and properly expose the image, the image quality will be very good and the noise will be minimal. .
Like the photo above at ISO 100, the image is too dark, at ISO 600, although zooming in, the image will be noisy but still acceptable. However, it is still best to use the base ISO. your camera whenever possible, instead of setting a higher ISO you should shoot with a brighter exposure (shutter speed and aperture).
It depends on the actual situation that you adjust the ISO, because sometimes you can’t increase the shutter speed longer, the light is too weak and you may miss a good photo if you just use the base ISO level. department.