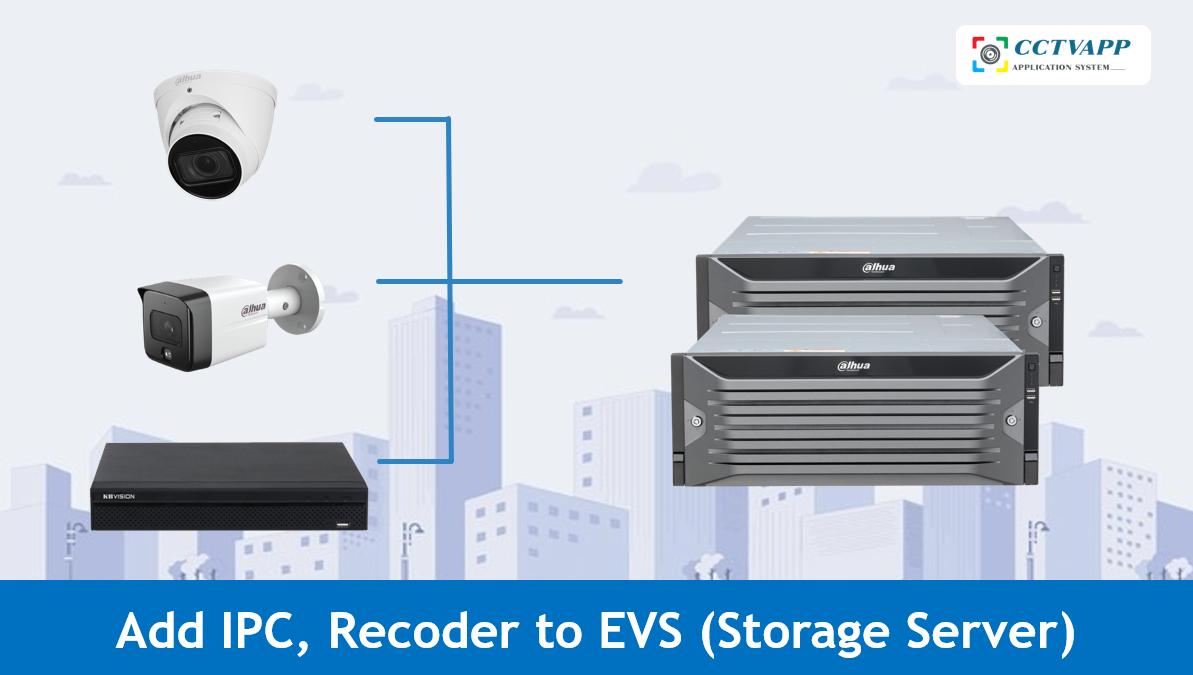
In today’s article, I will guide you how to add IP cameras and video recorders to the storage server (EVS), instructions that apply to Dahua products:
- EVS5000, EVS5024S-R, EVS5036S-R, EVS7048S-R, EVS5136S
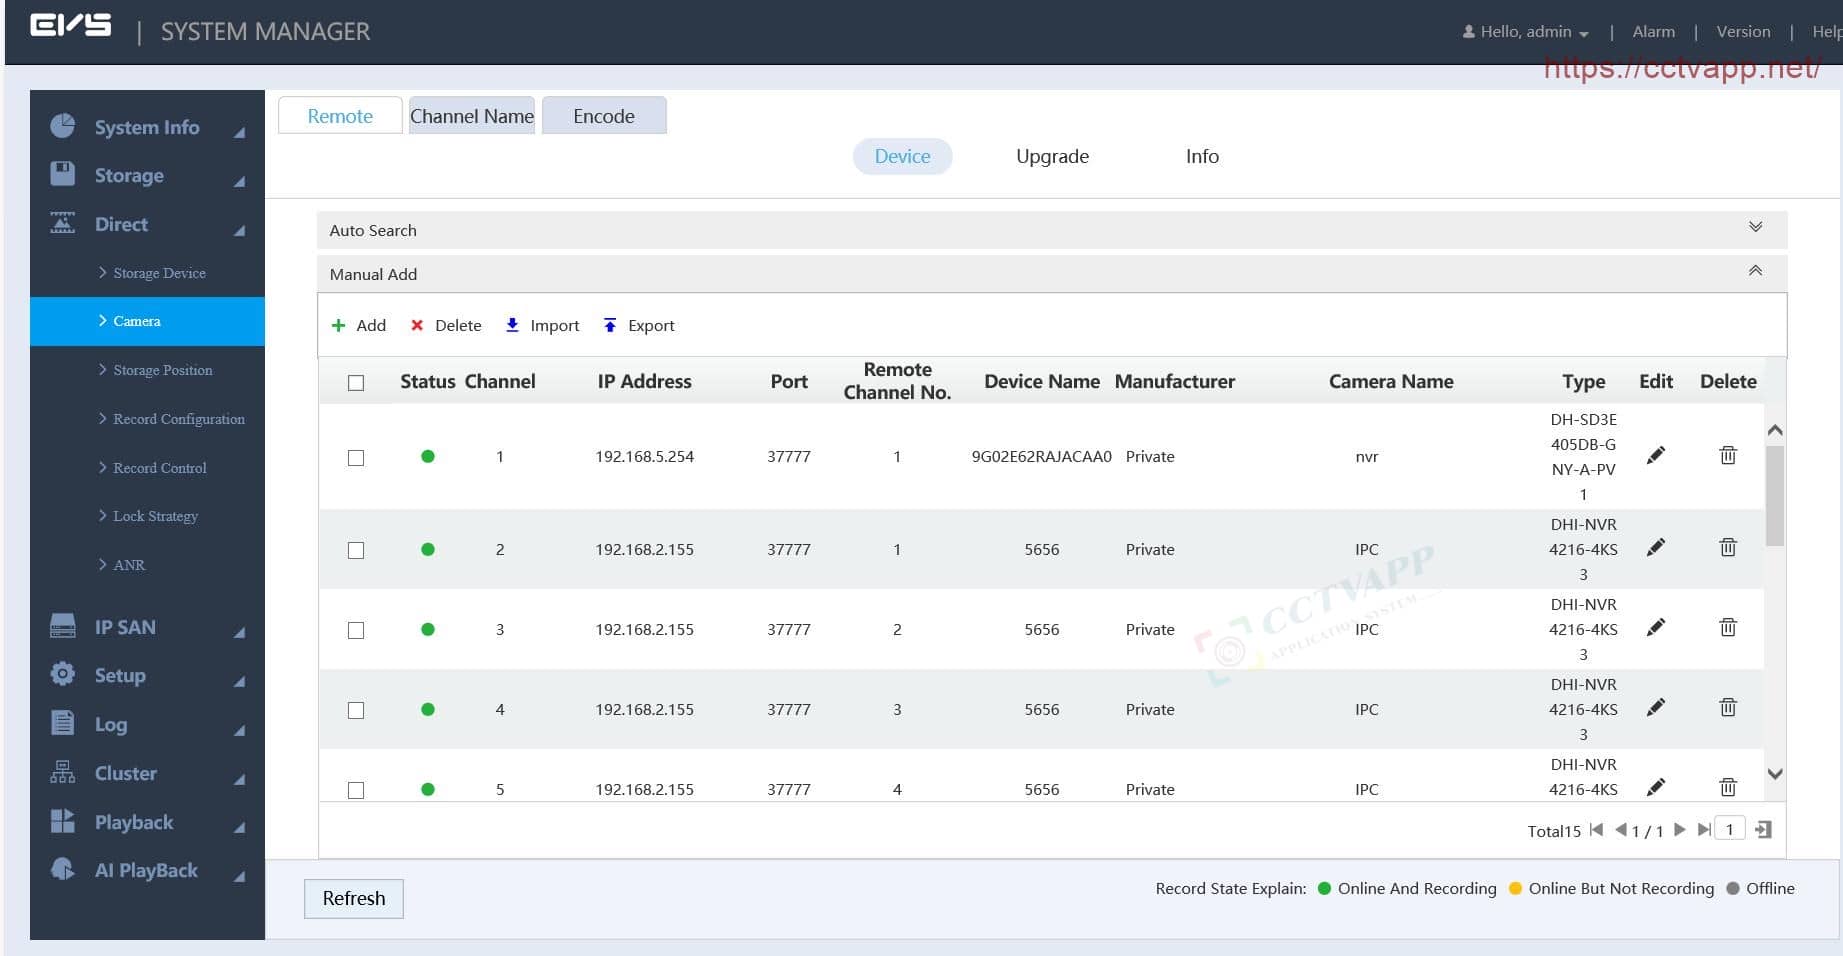
1. Add IP cameras to EVS
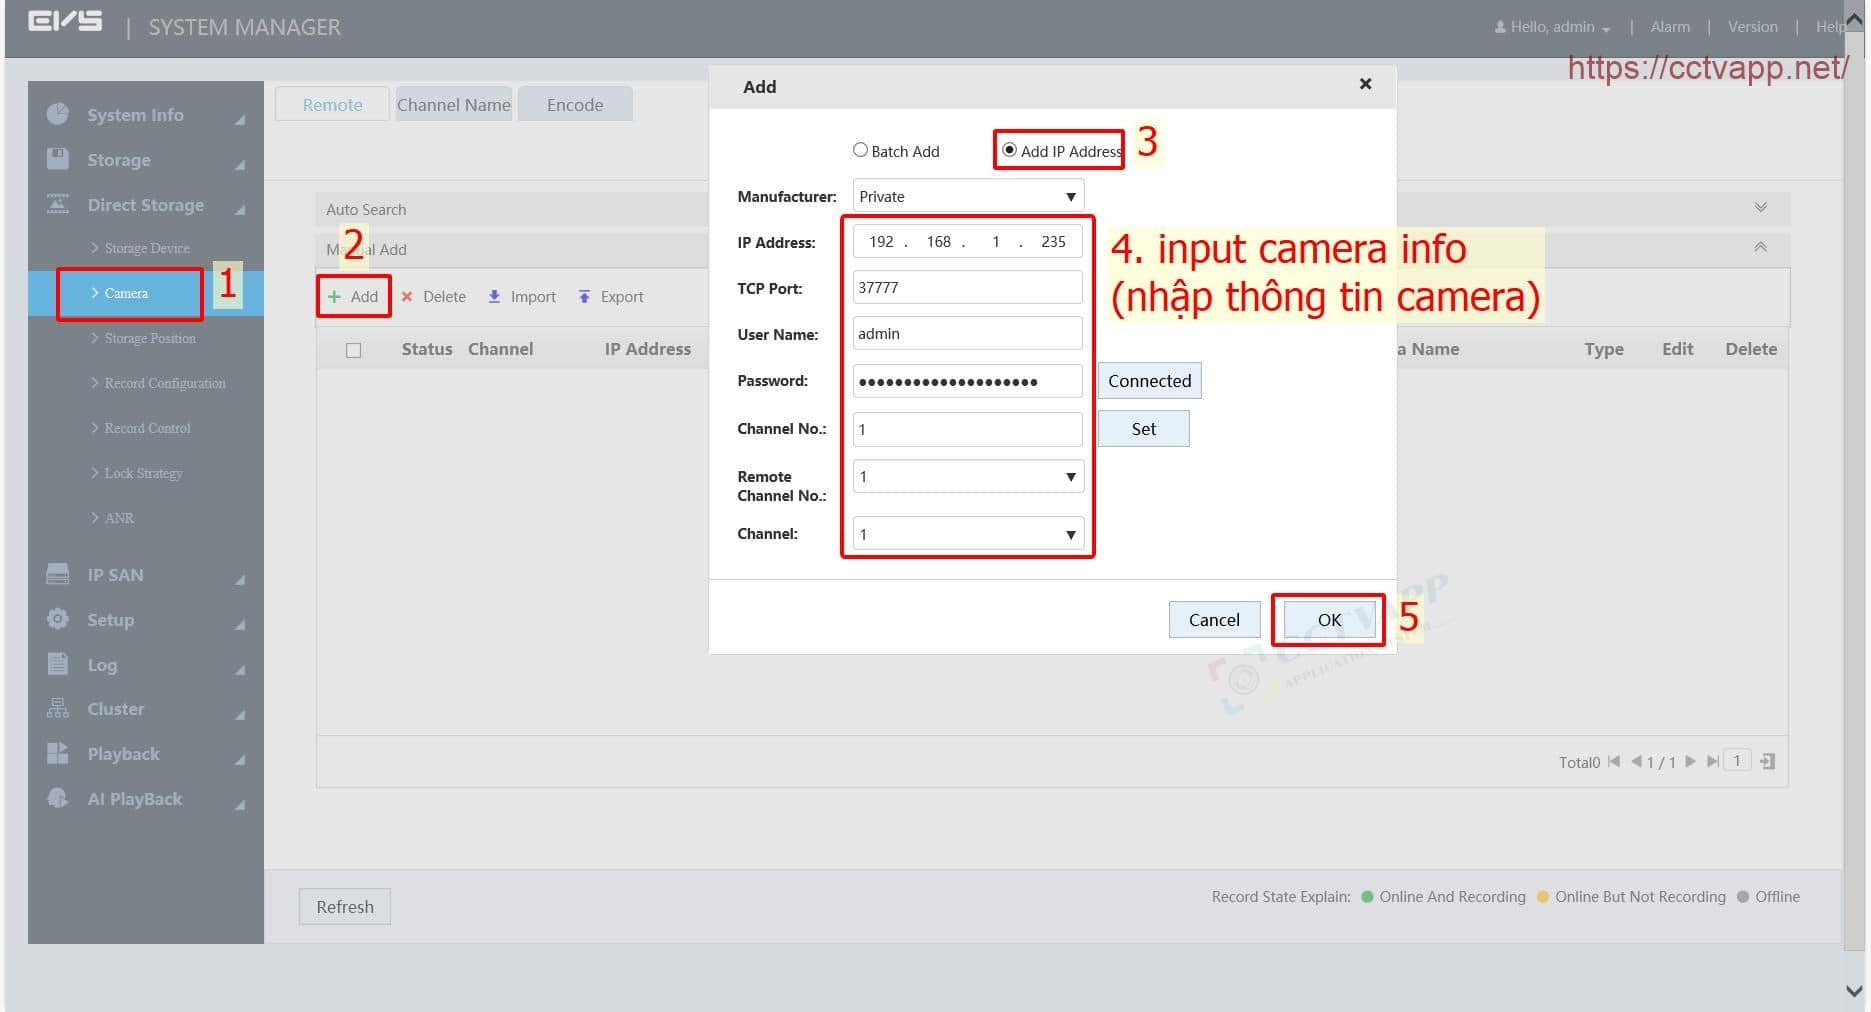
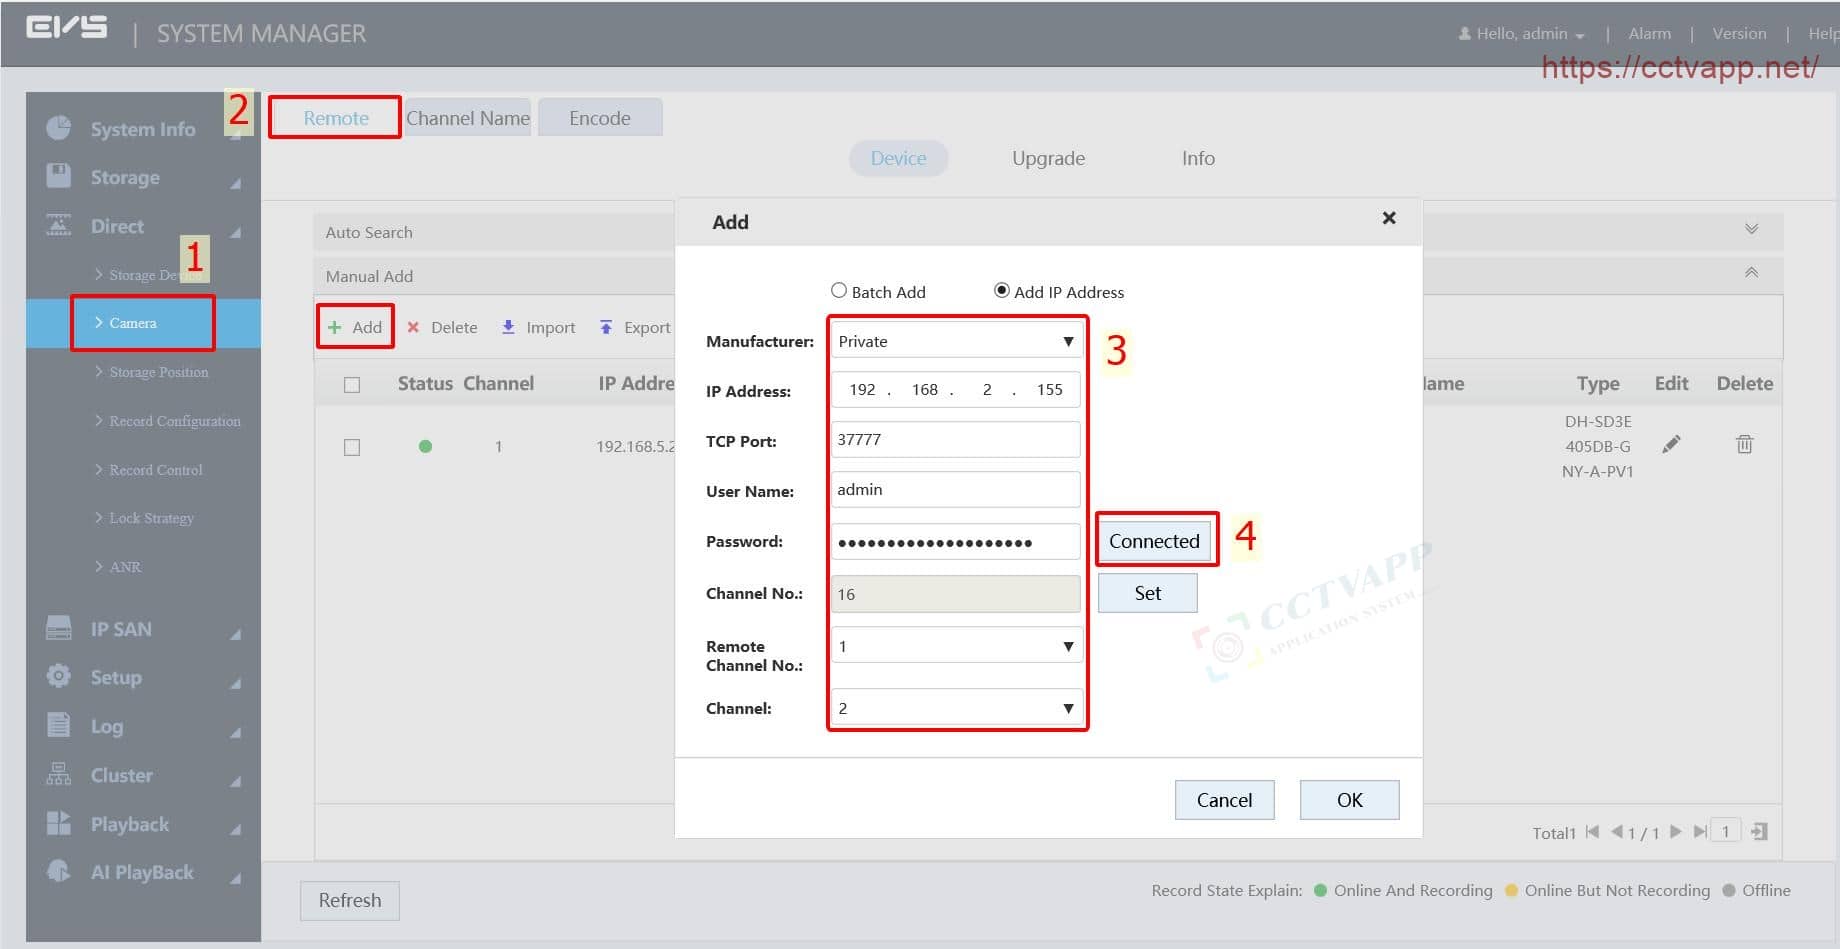
After adding the Camera, EVS starts connecting to the Camera:
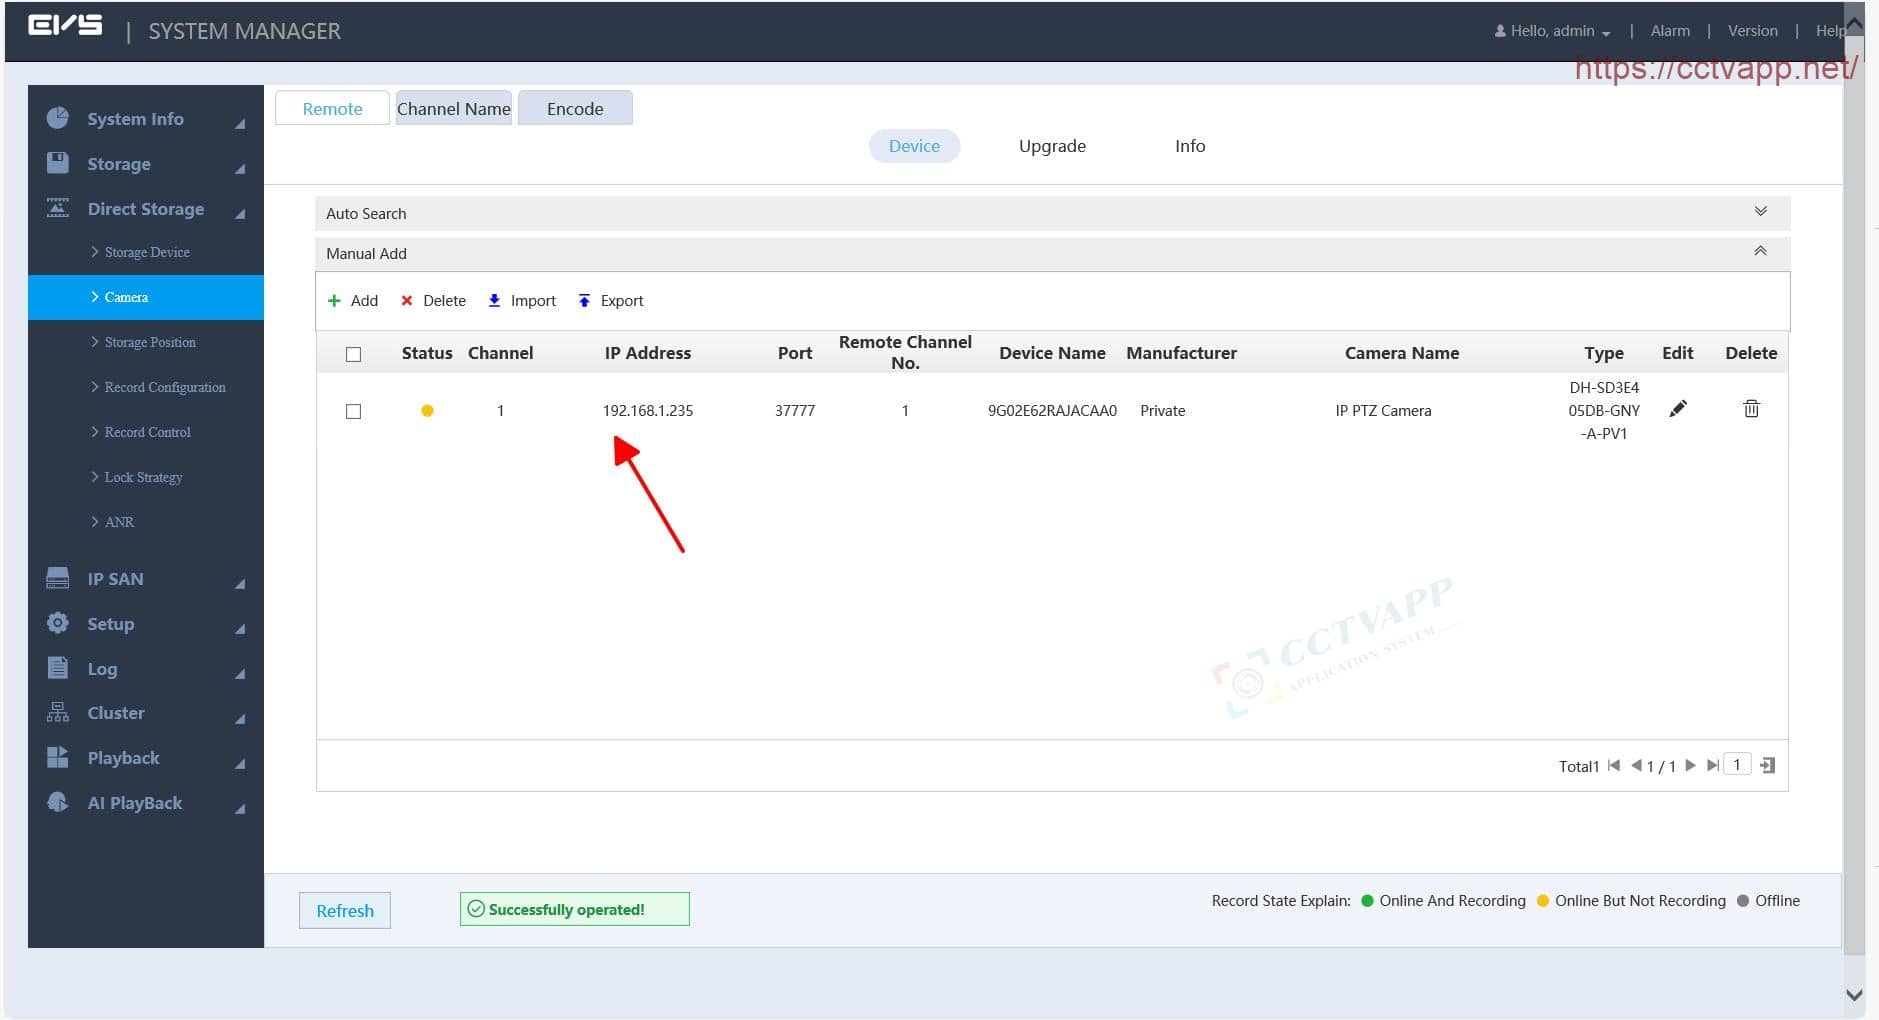
Wait about 10 seconds, press the button Refresh, you will see the Camera has connected successfully!
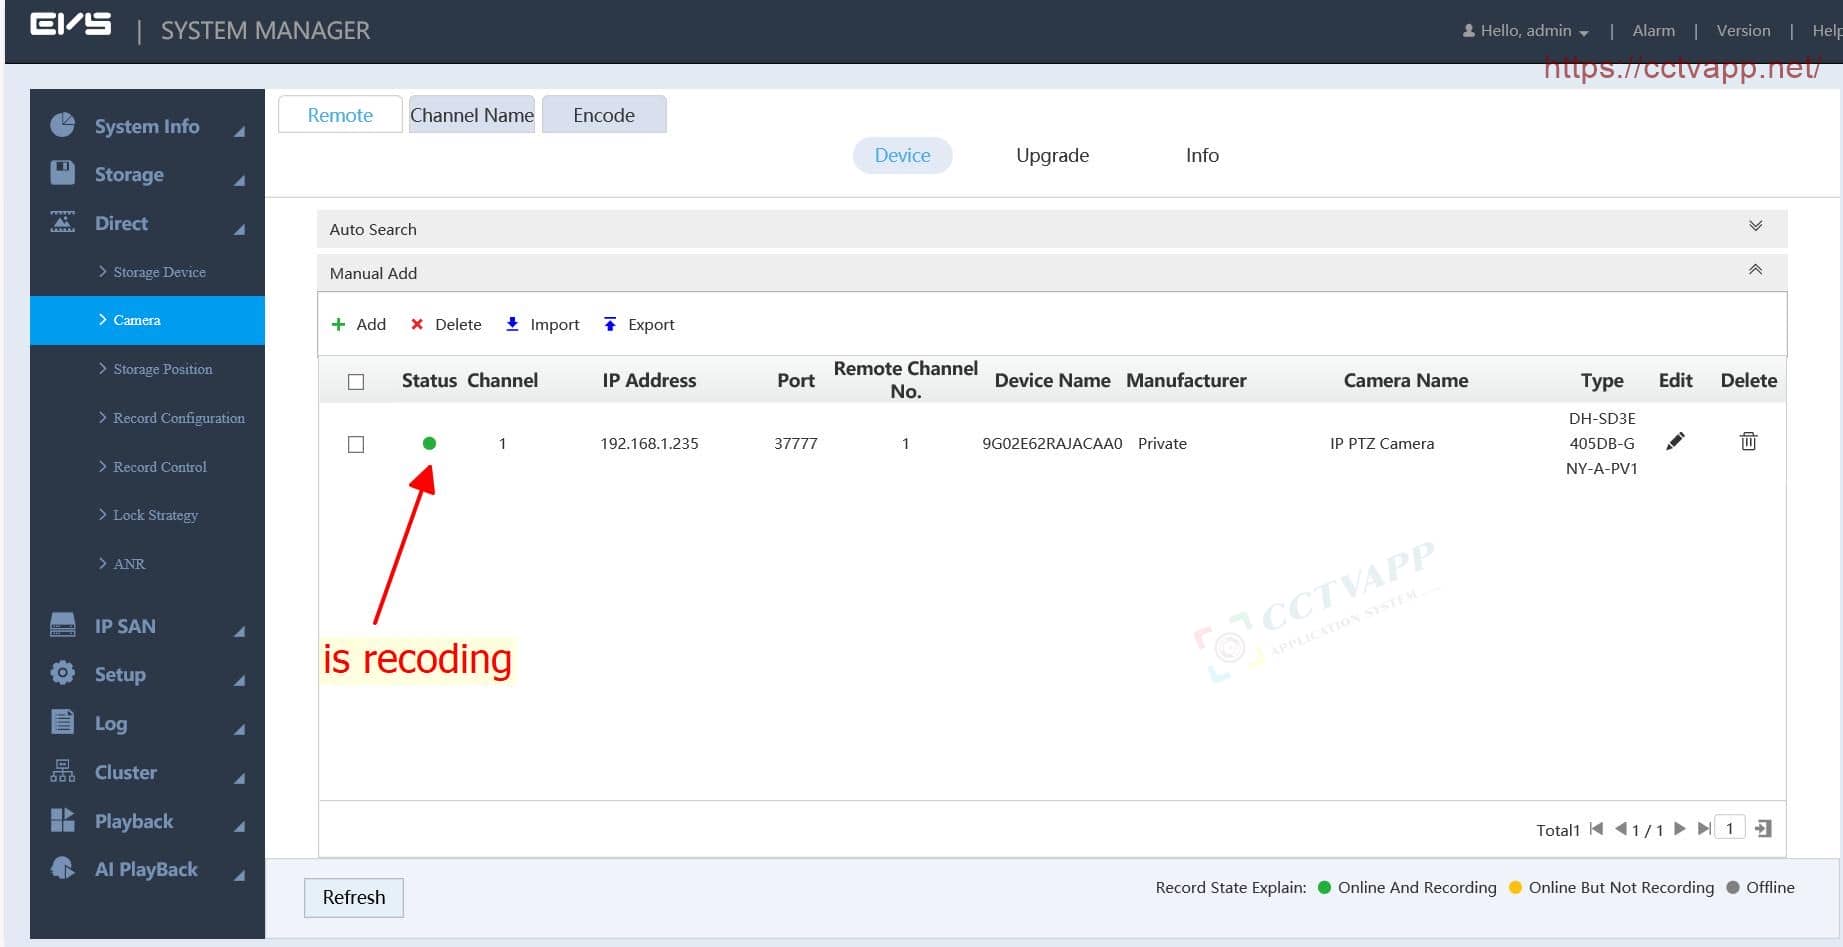
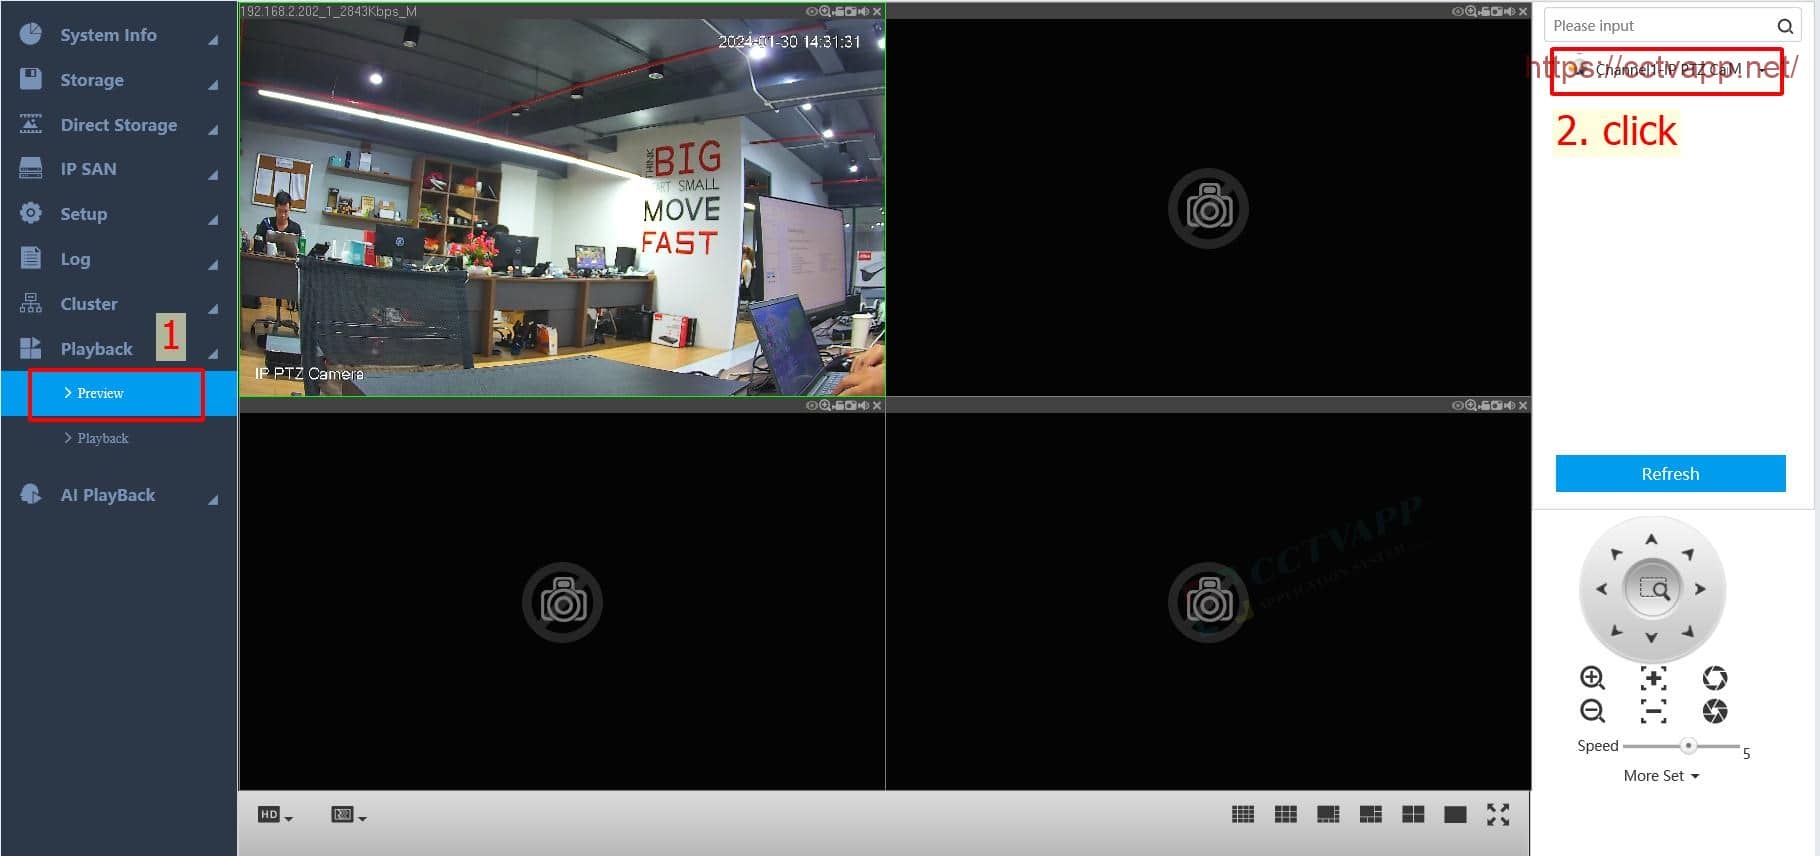
Return to the main interface, select Playback -> Preview -> Tap the Camera added on the right to start playing the video.
2. Add video recorder to EVS
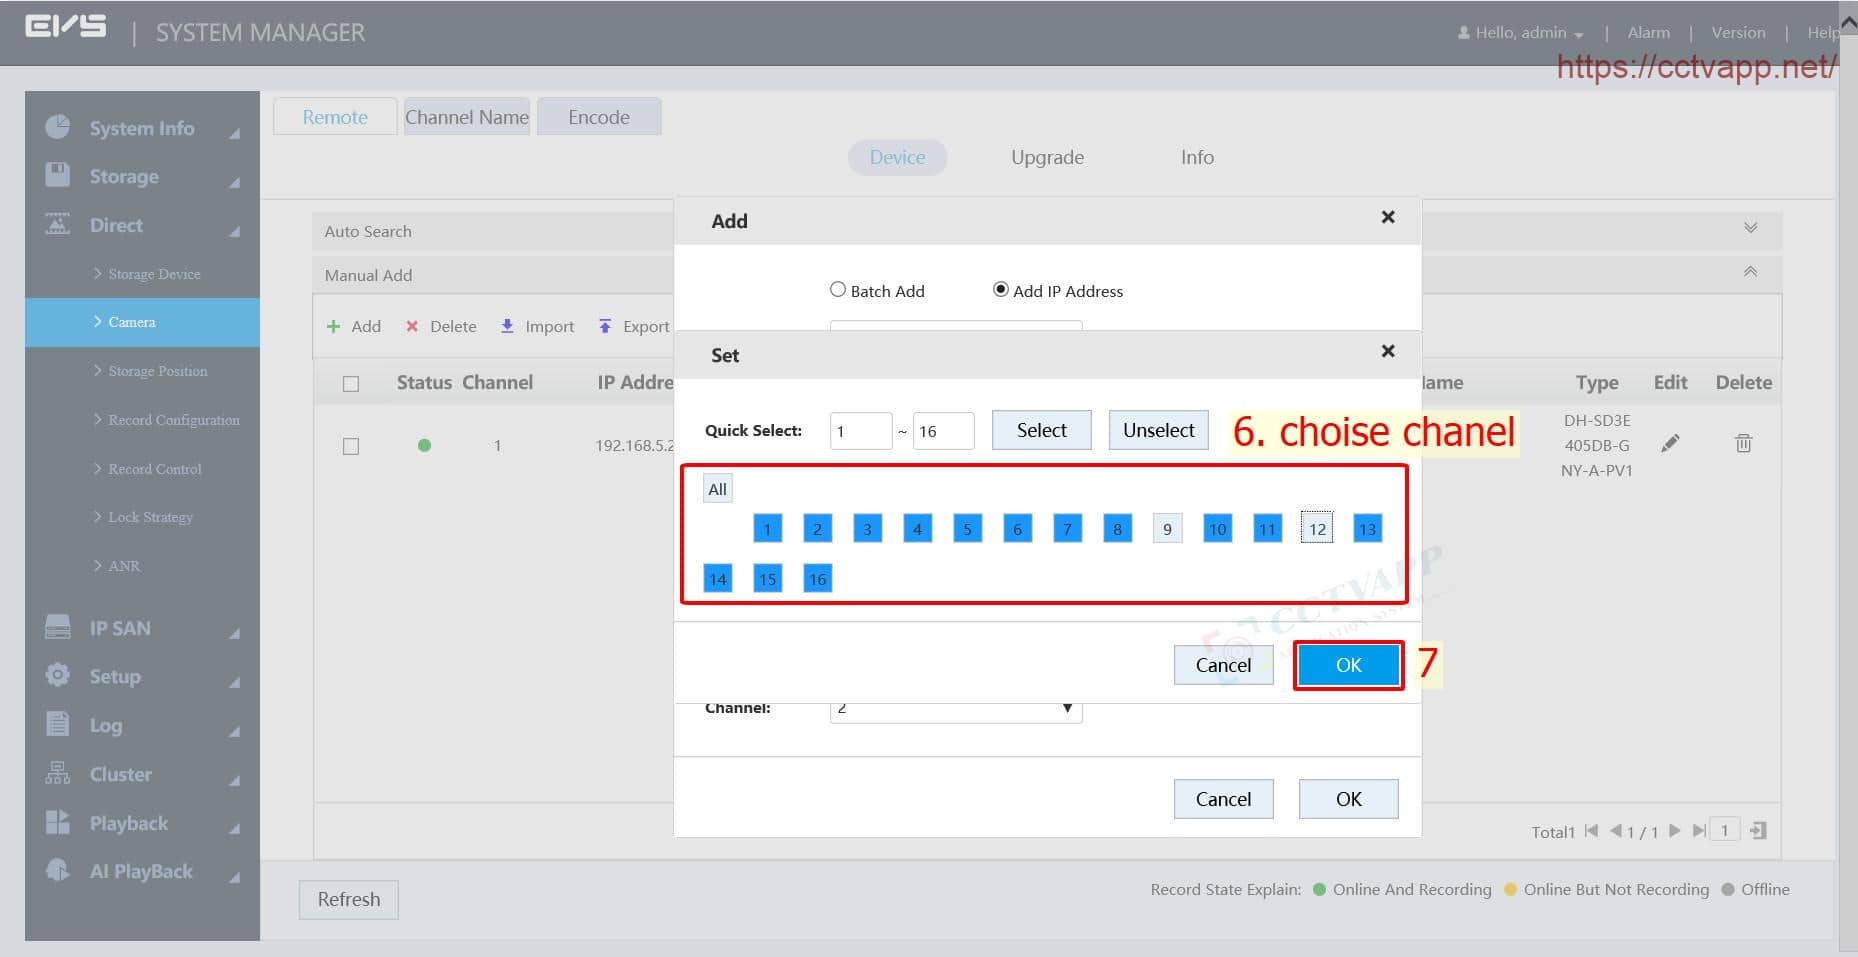
Similar to adding a Camera, you can add NVR, XVR, DVR, HCVR video recorders to EVS for storage. You can choose the channel you like:
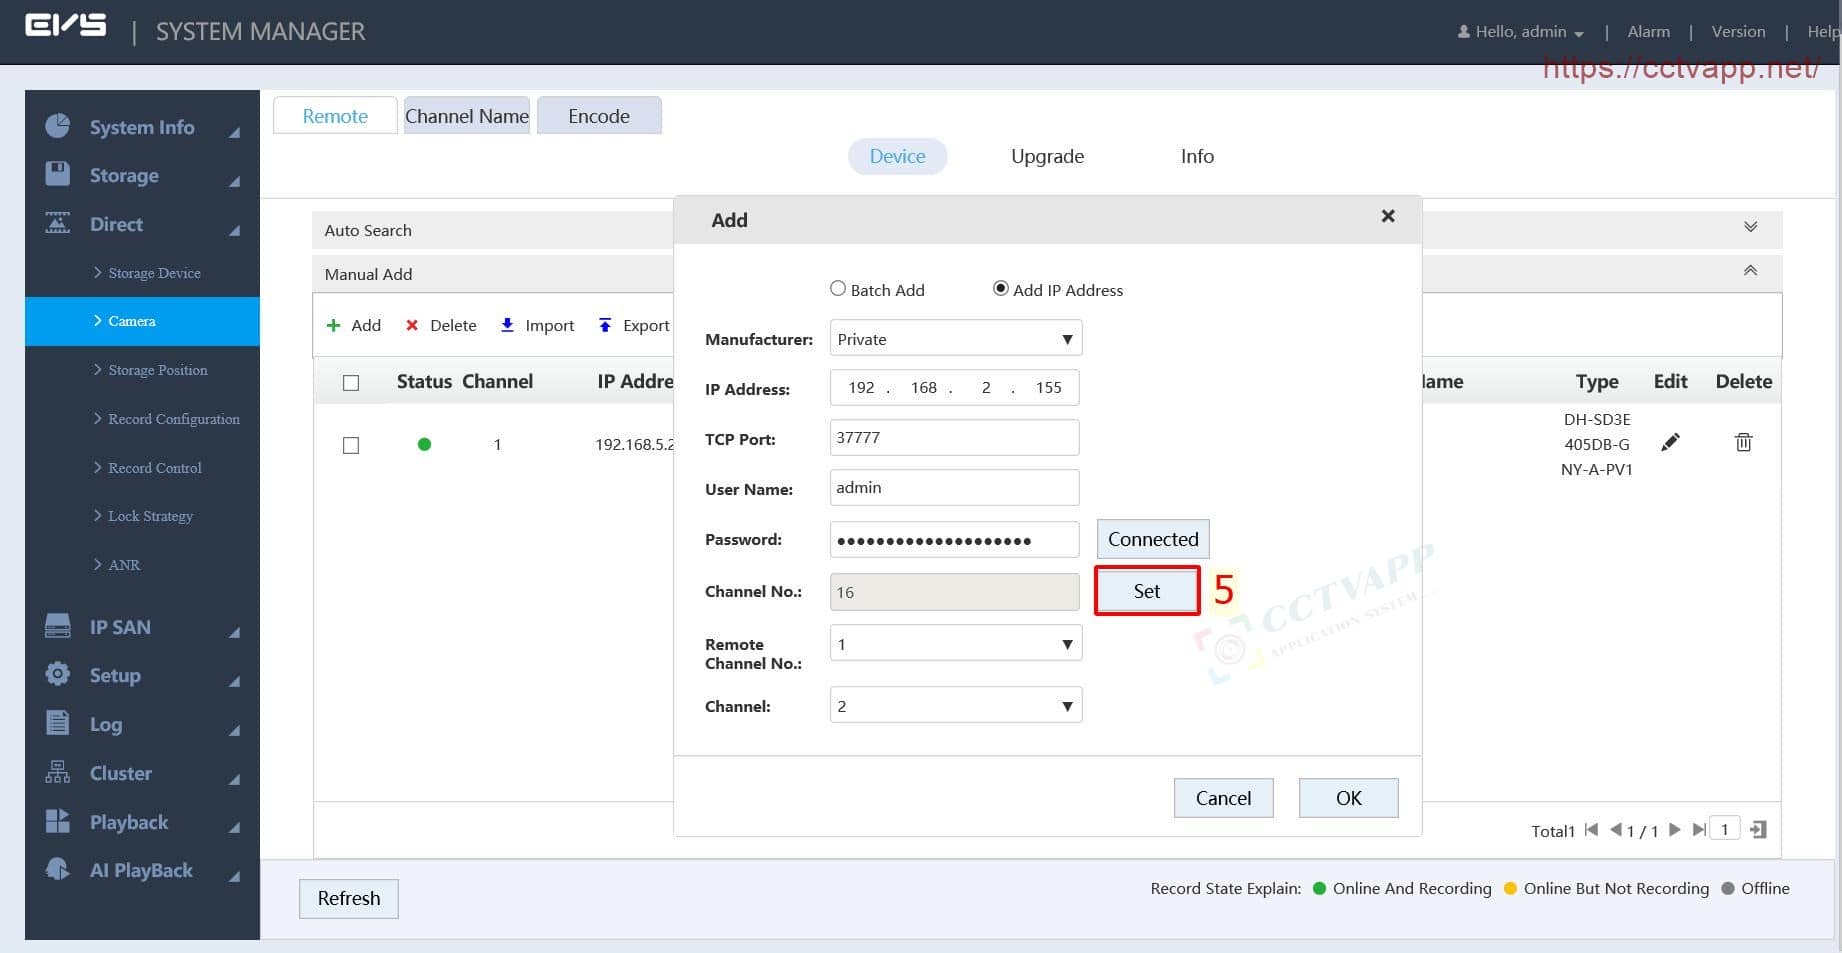
Select any channel to add to EVS:
3. Schedule recording and Stream
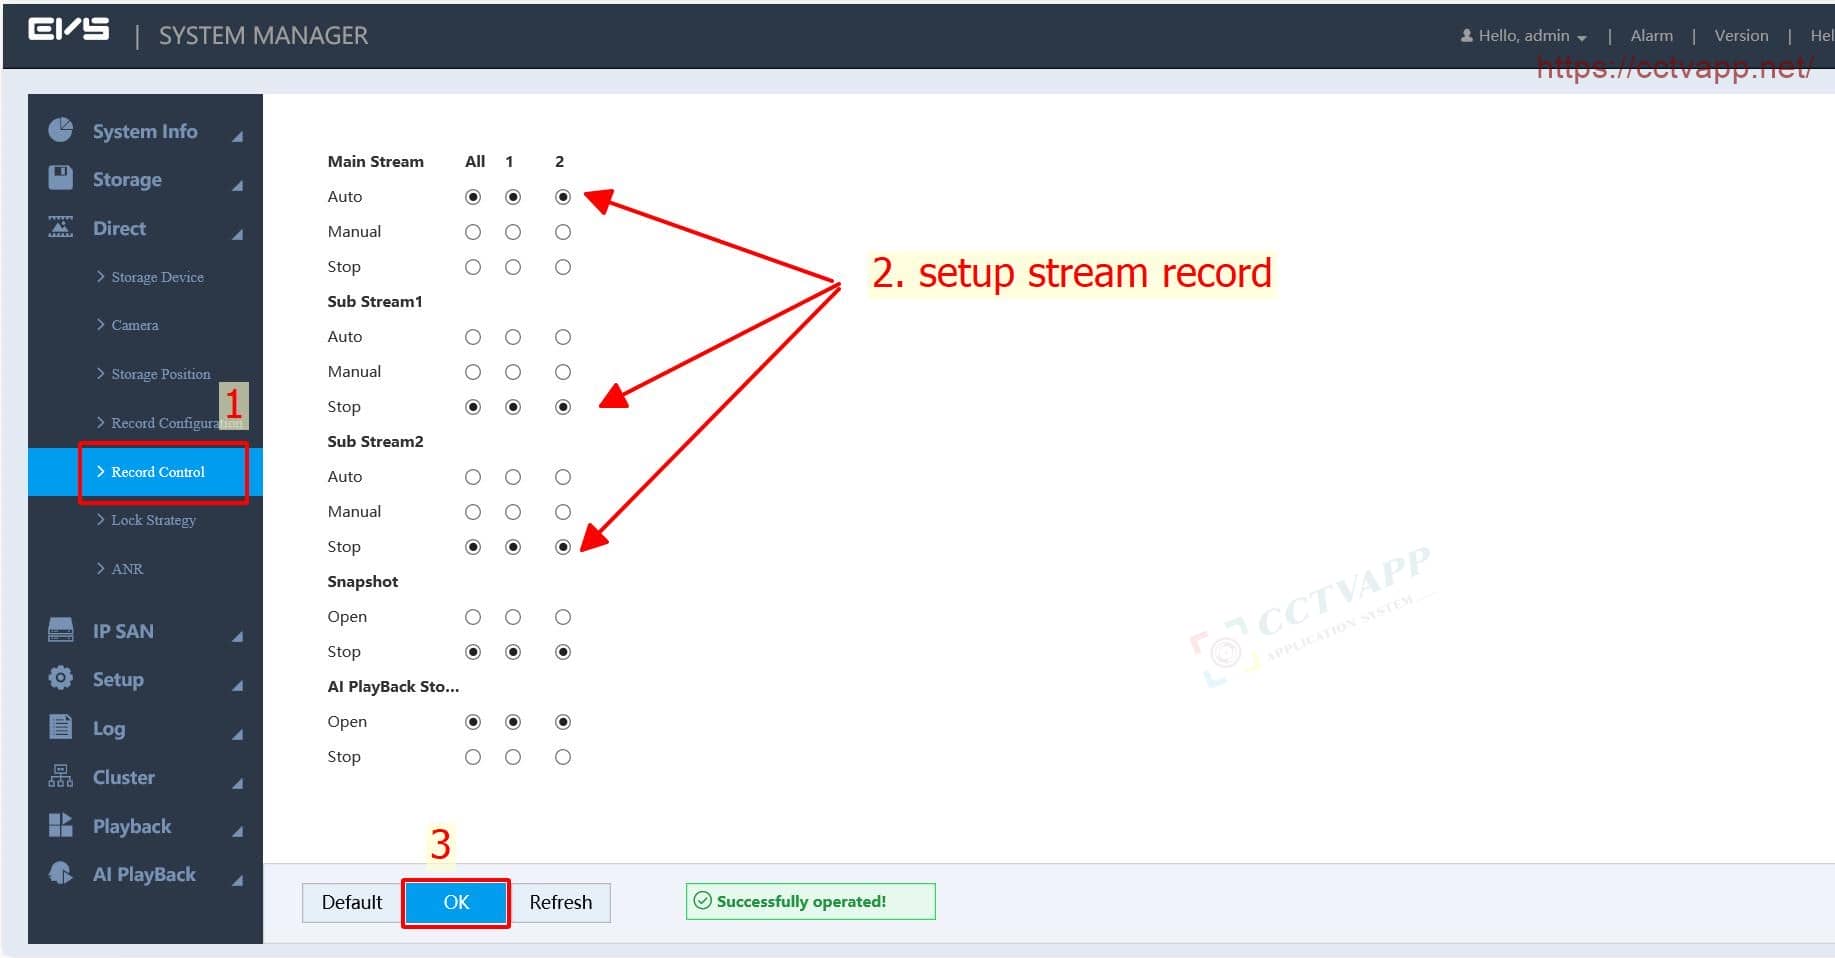
By default, EVS will record continuously 24/24 based on stream 1 (Mainstream). However, you can customize the recording schedule according to a specific time frame.
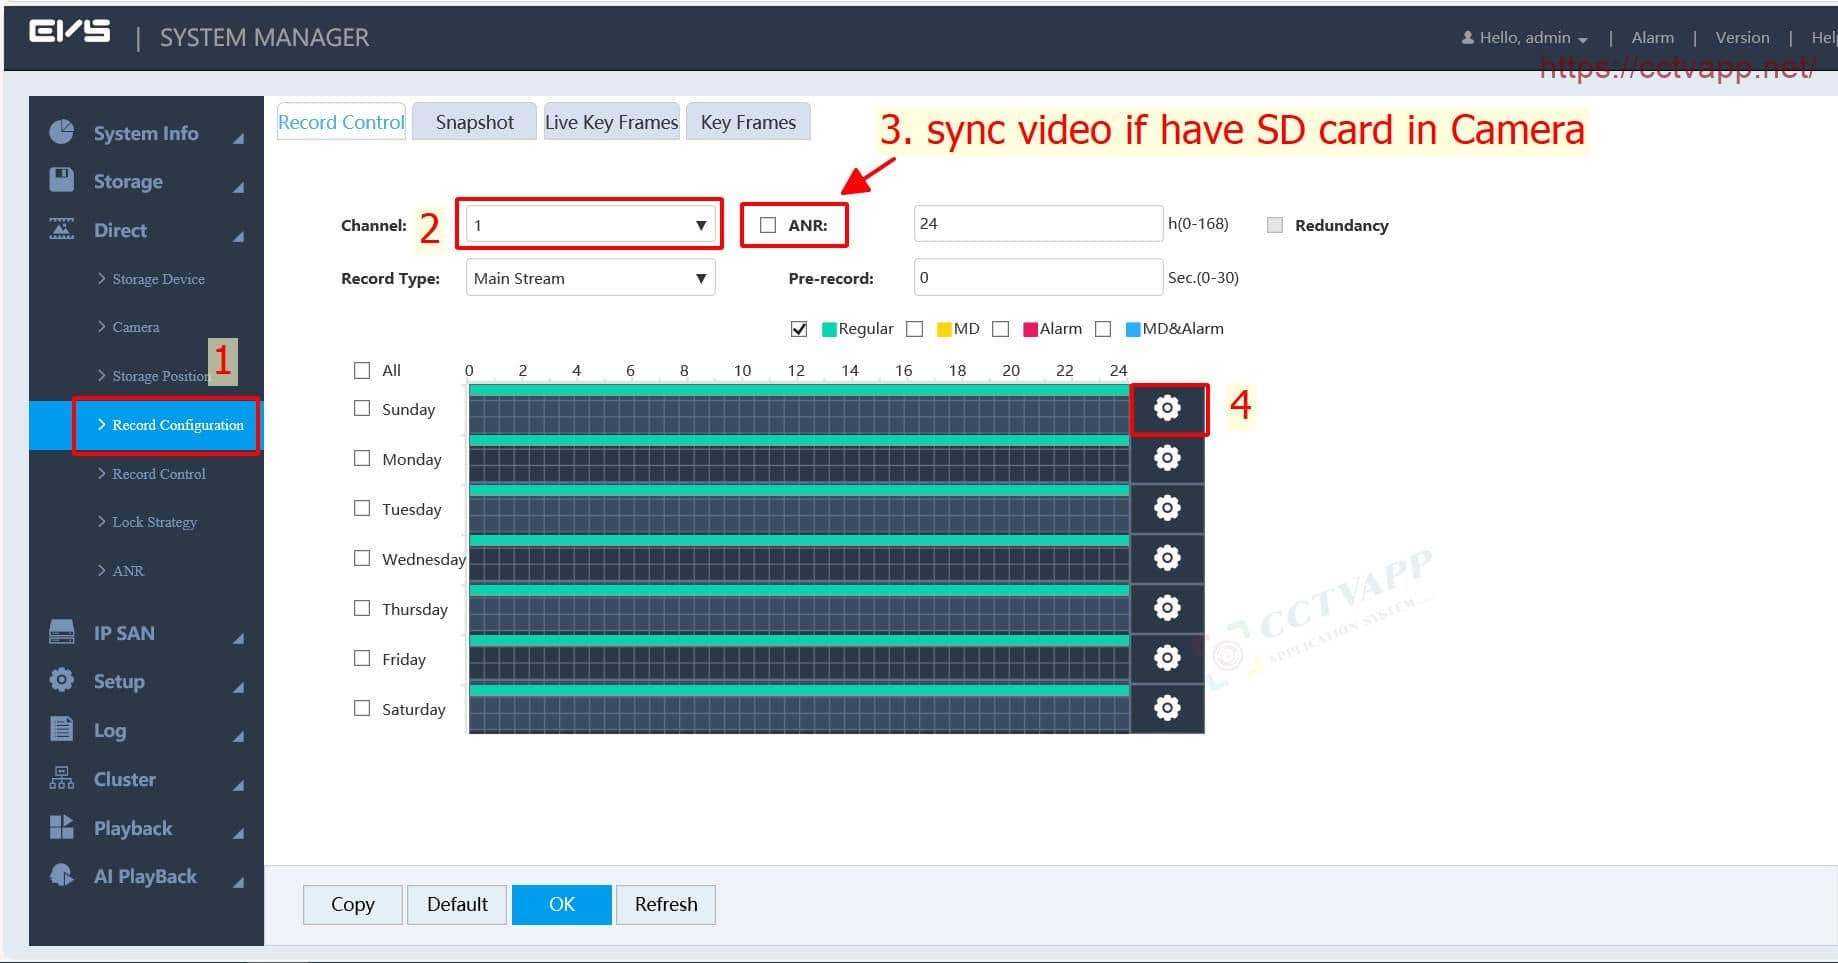
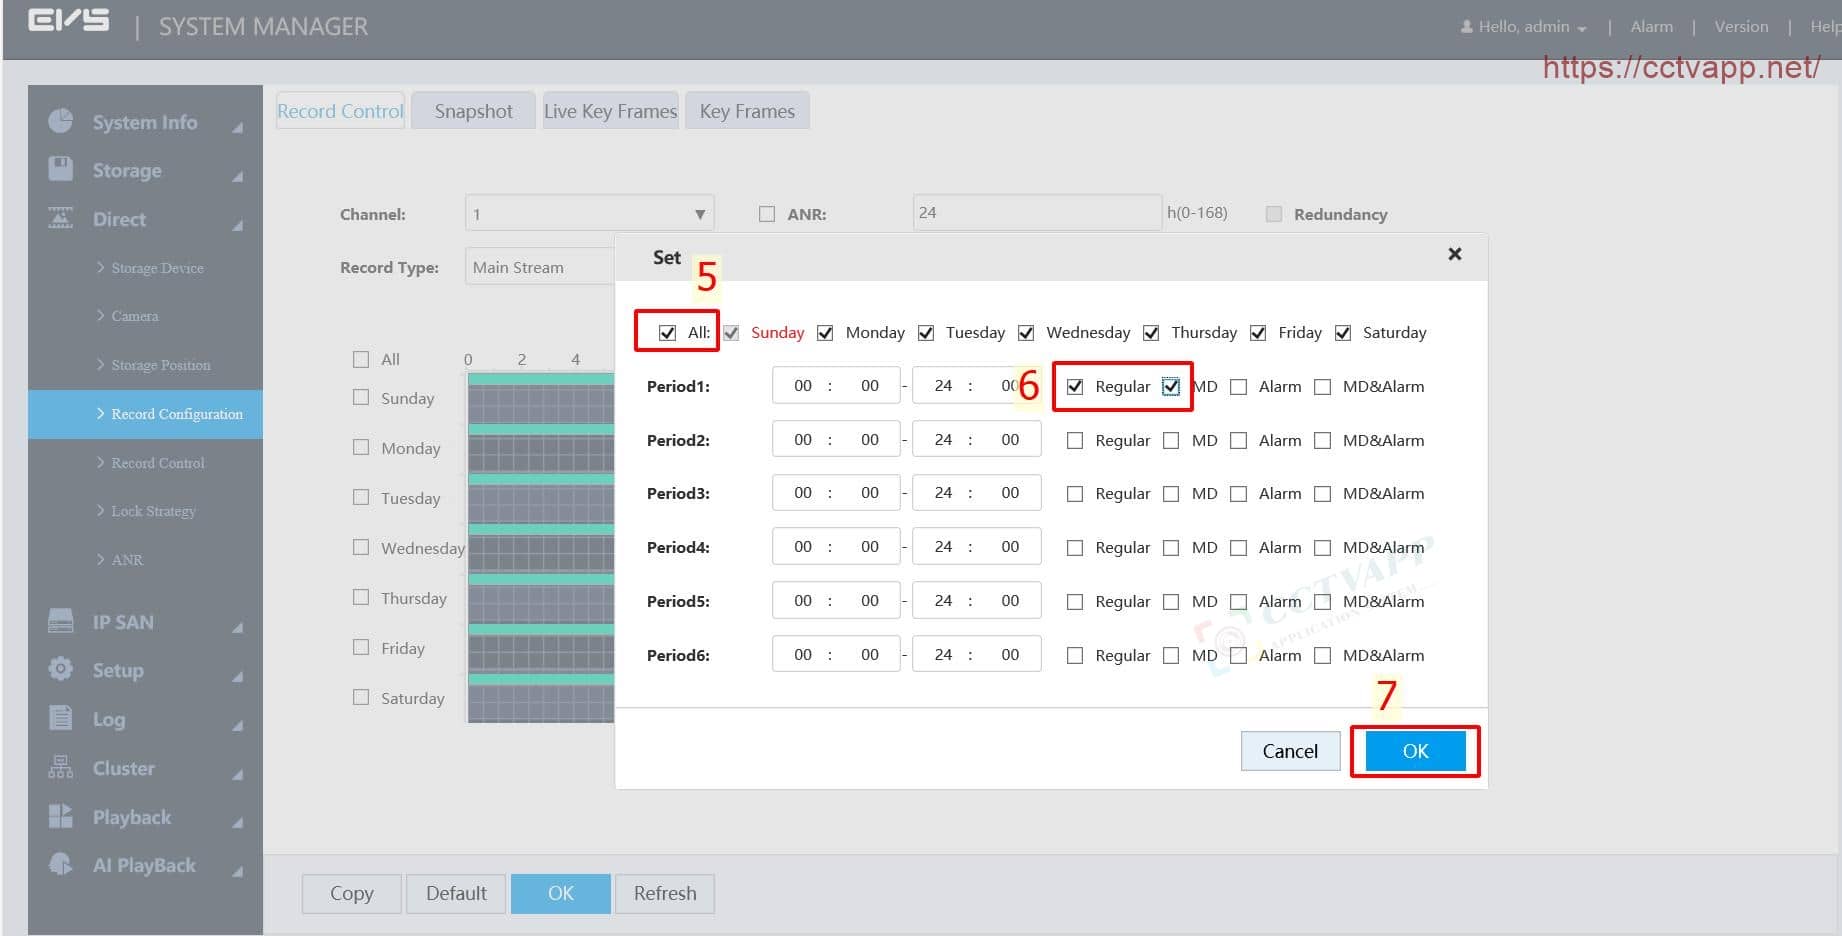
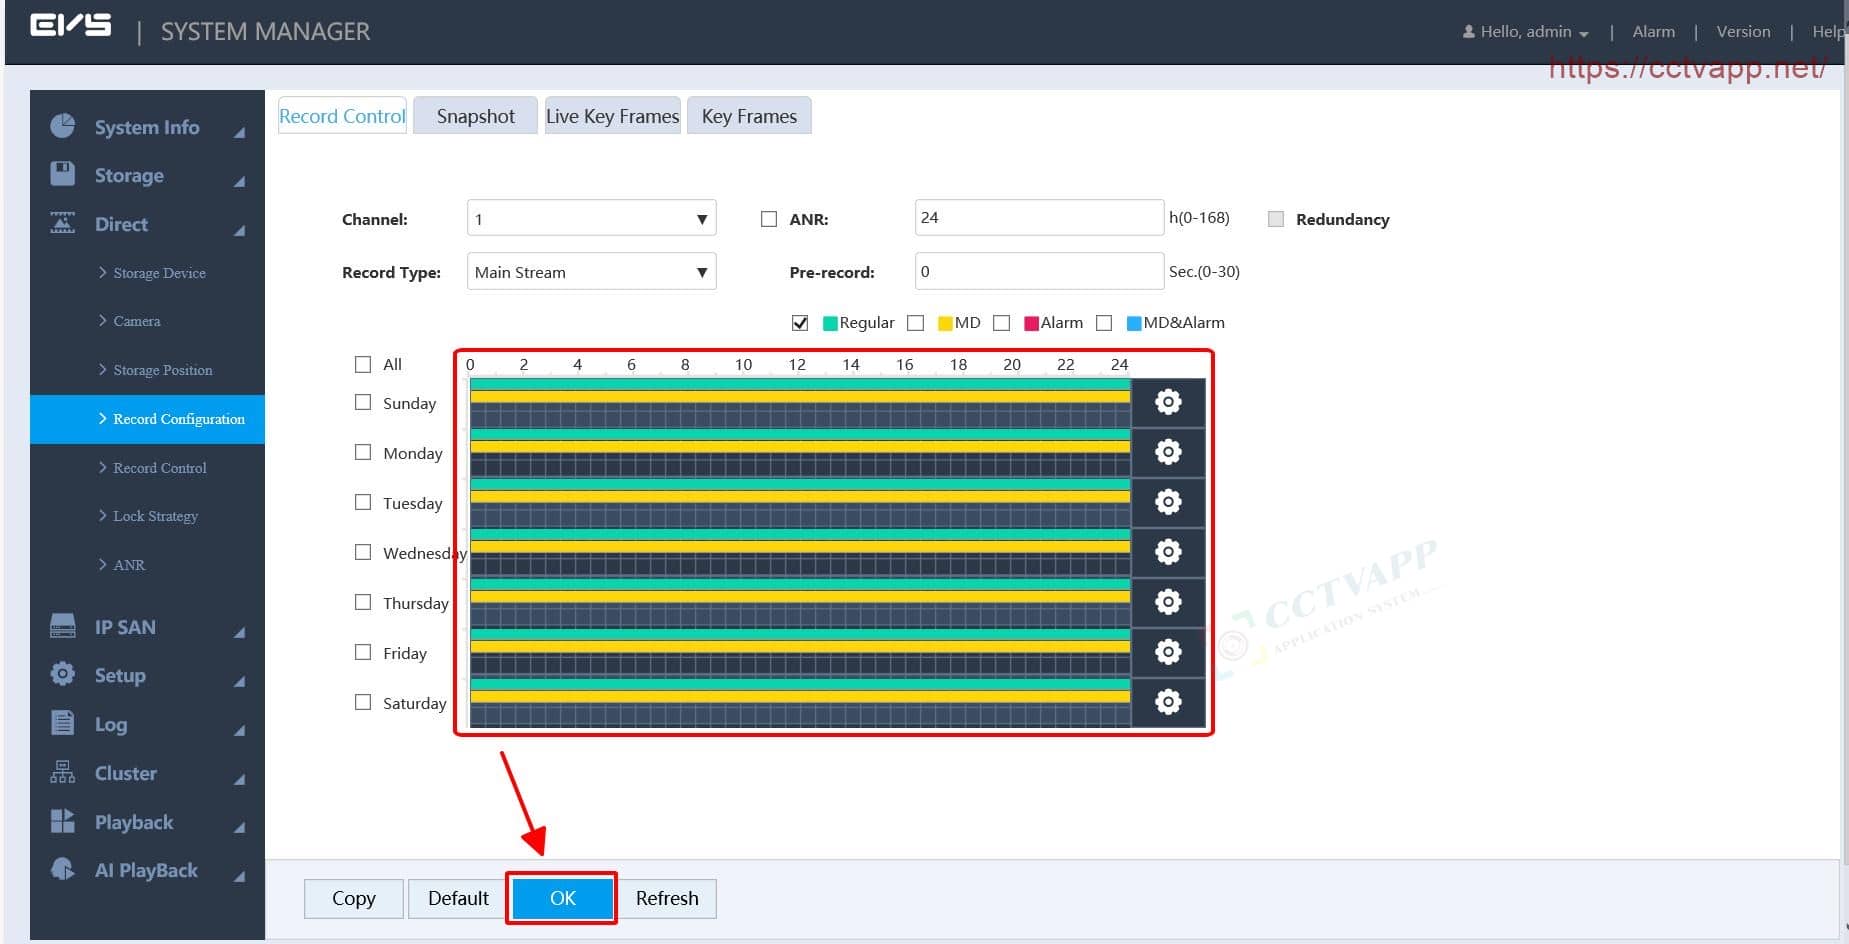
You can choose the recording stream as: Mainstream, substream 1, substream 2 (if available):
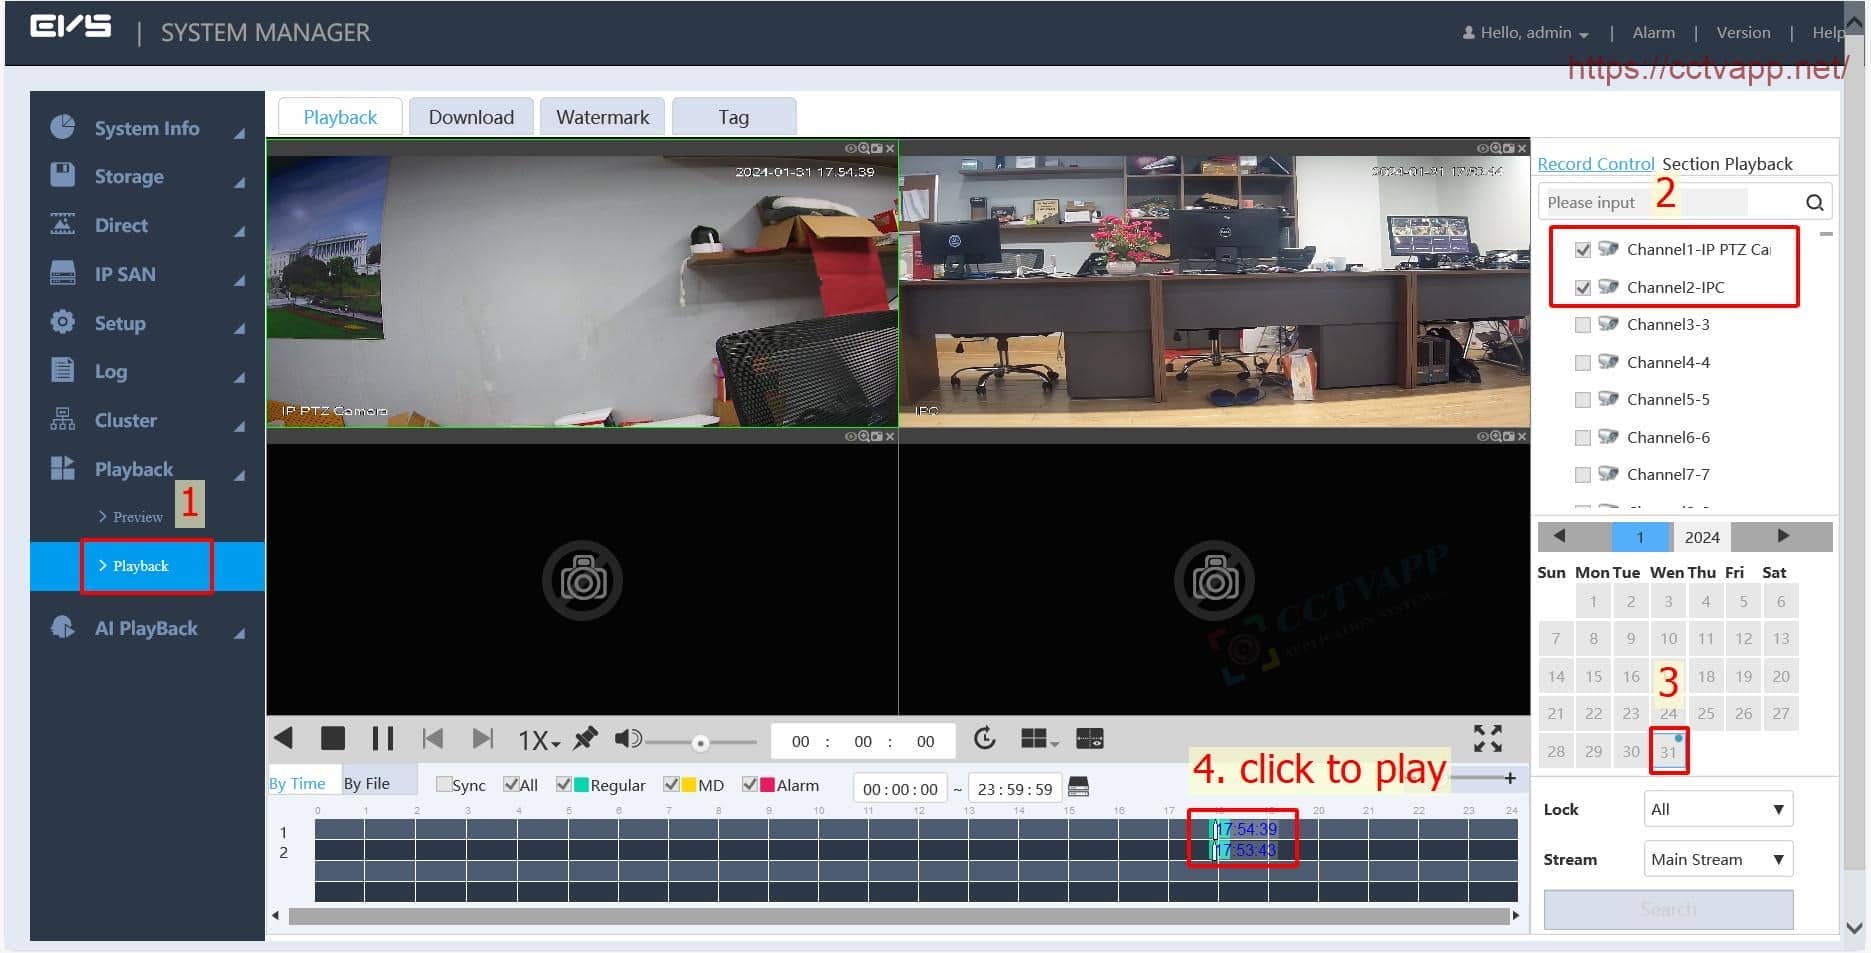
4. Review recordings and download recordings
To review the recording, in the browser, proceed as follows:
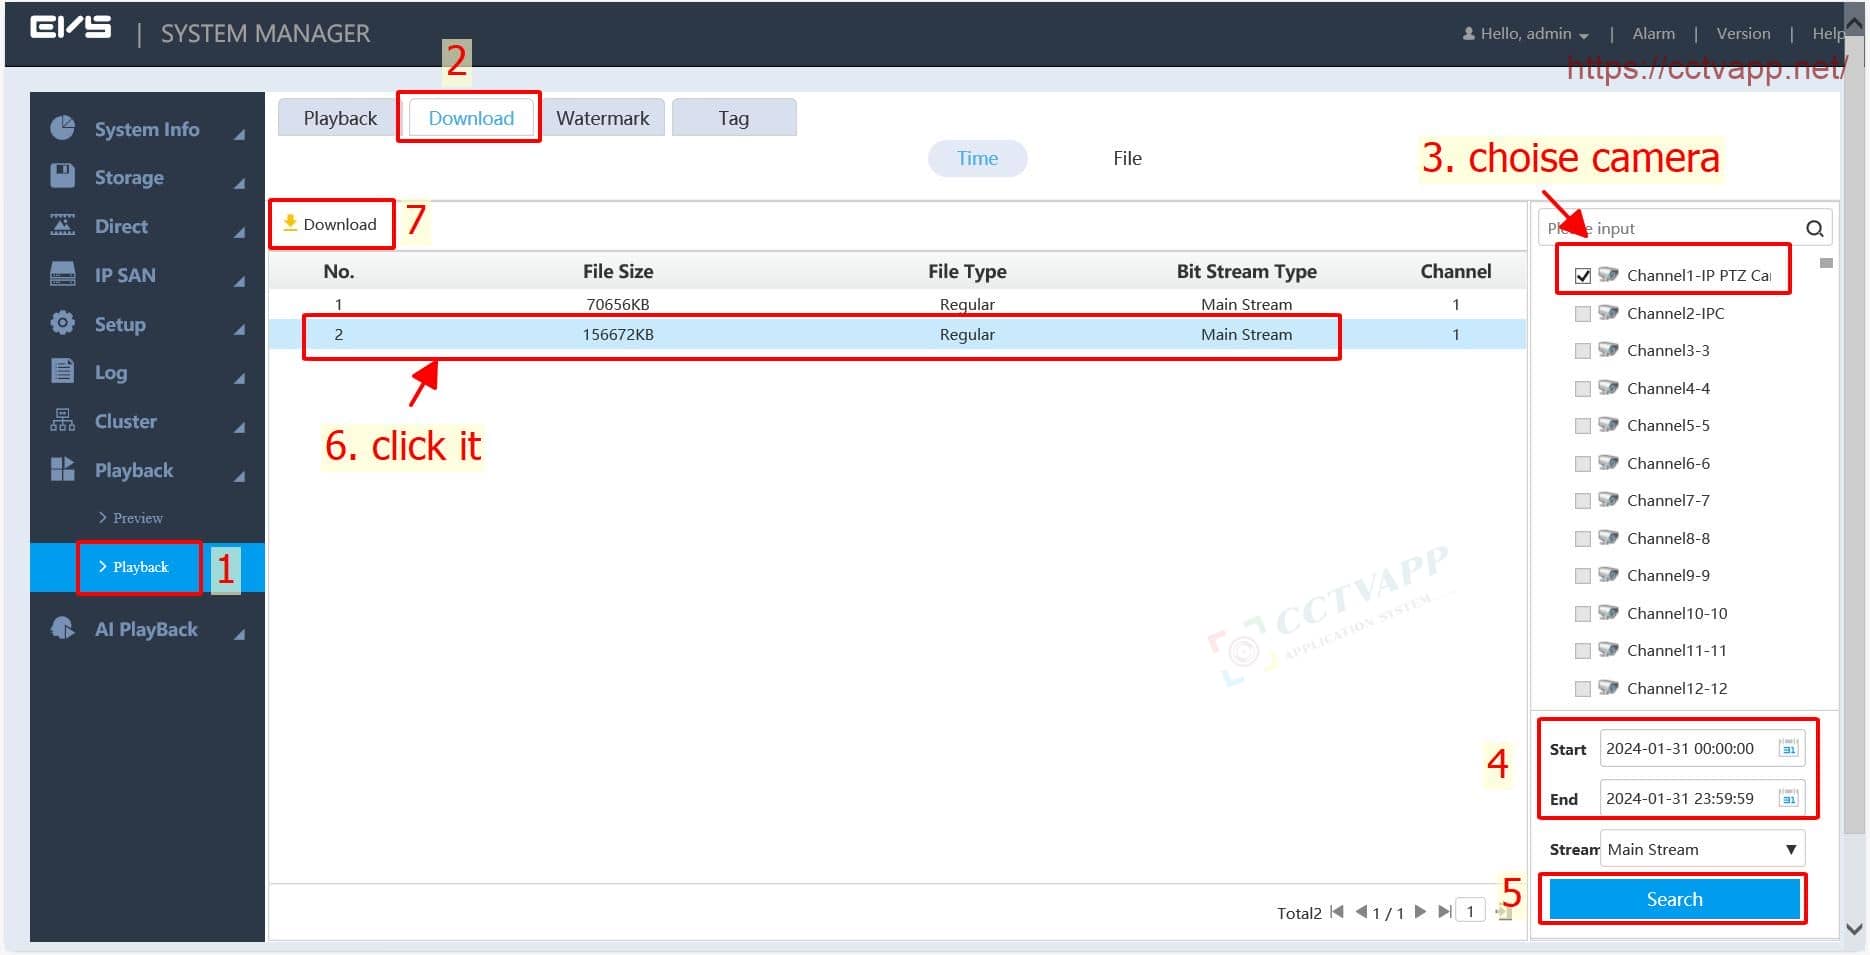
To download recorded data according to the specified time, operate as instructed below:
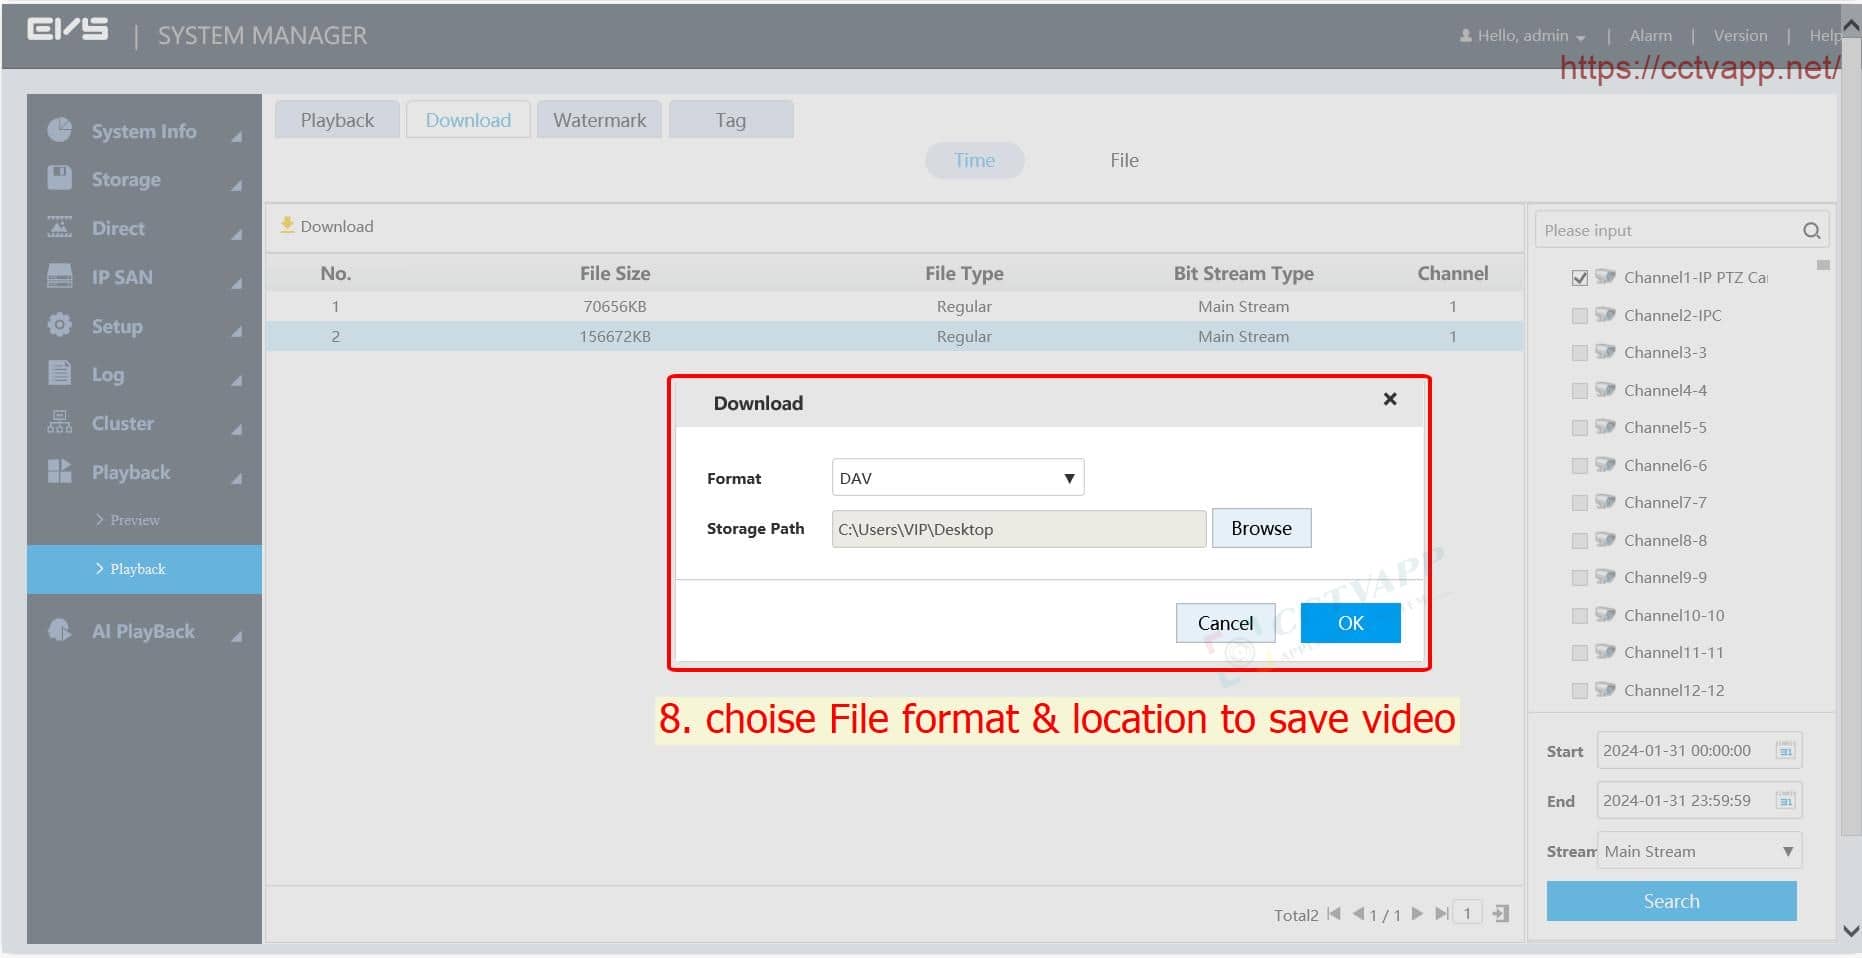
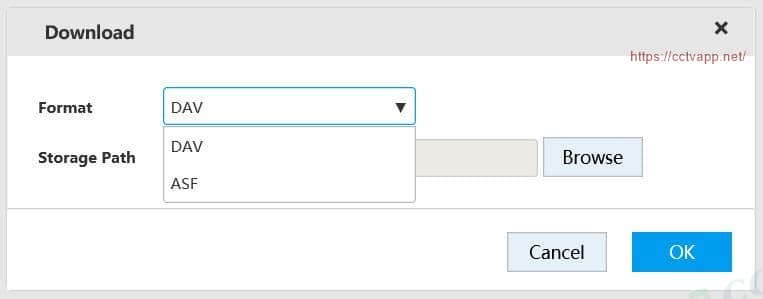
Select video format and save location, click OK to start downloading.
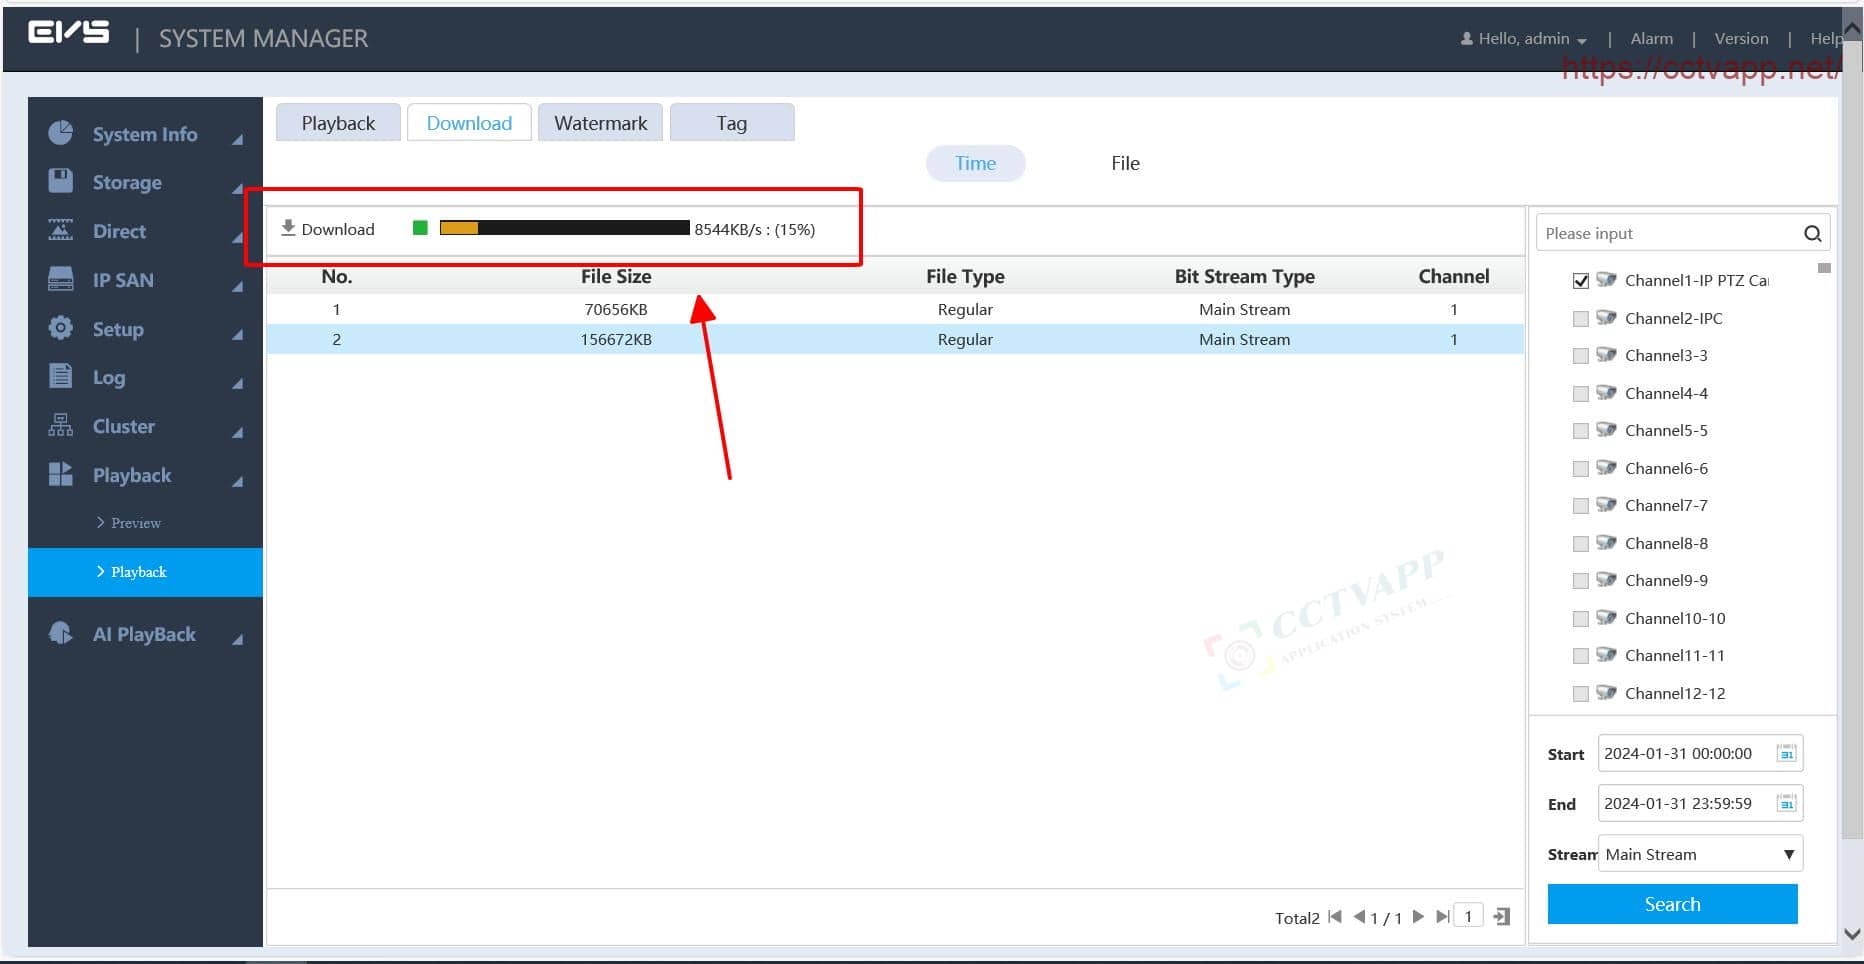
Video download is in progress.
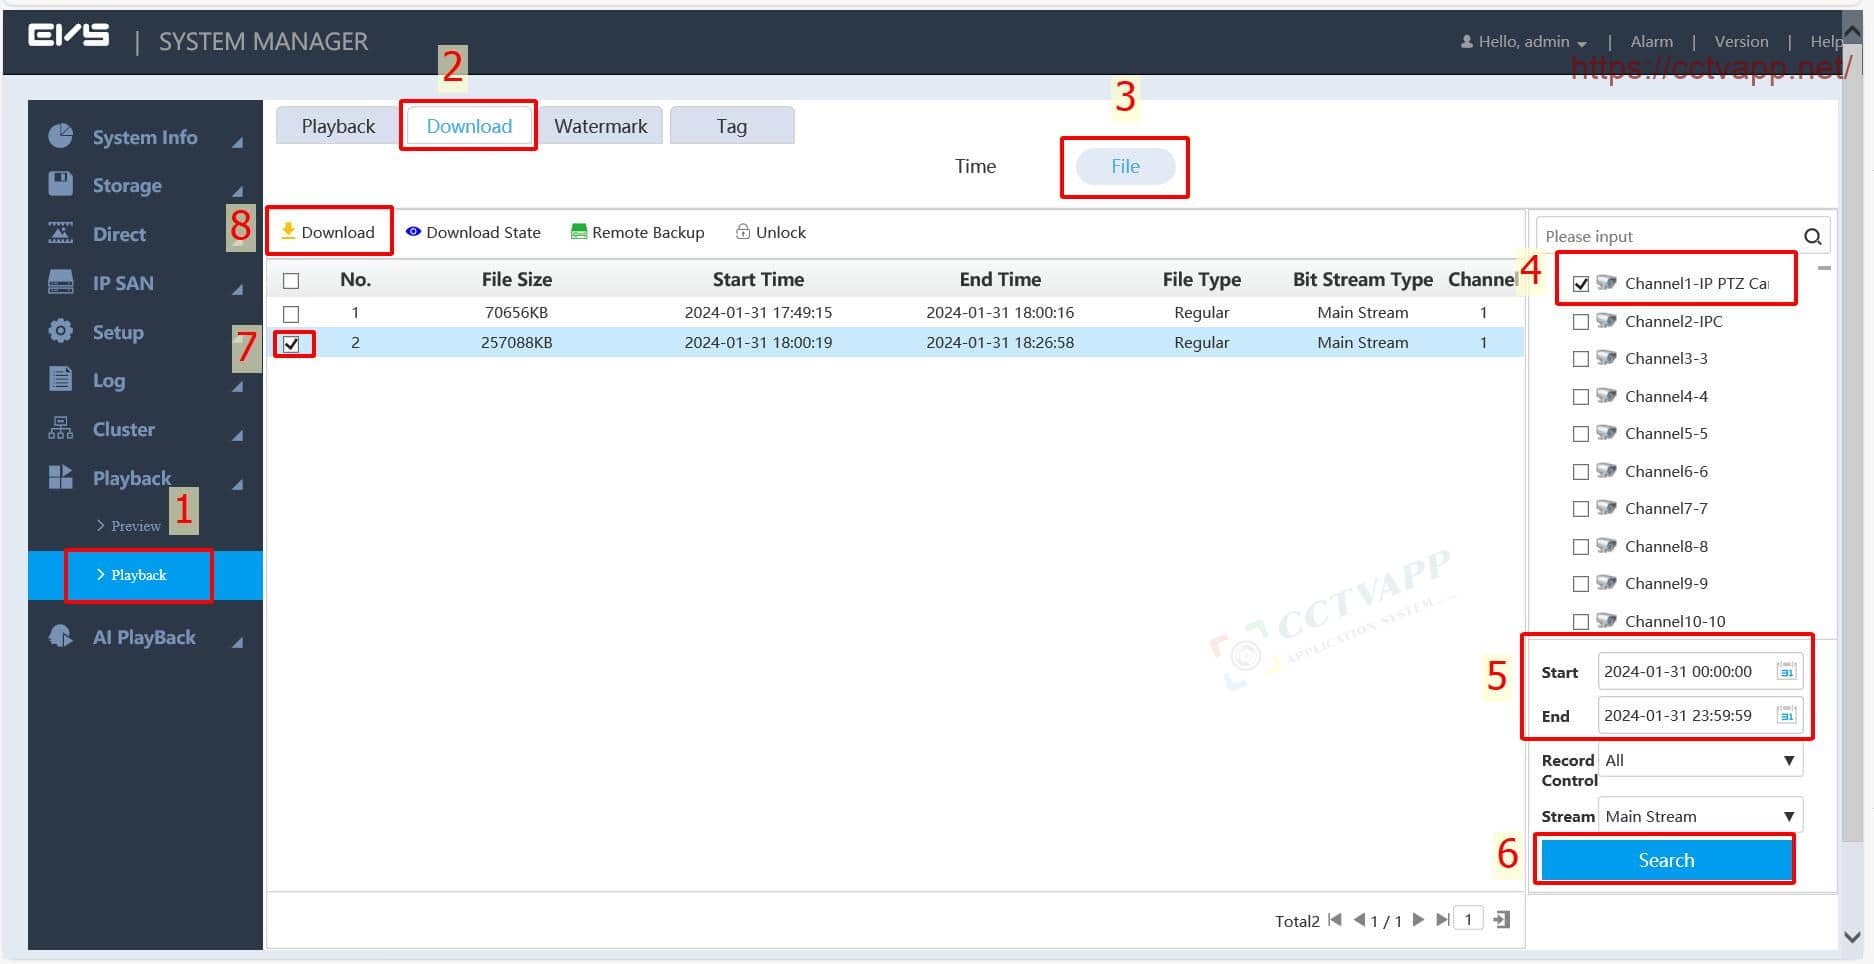
To download recorded data According to the file already created on EVS, proceed as instructed below:
Downloaded videos are supported in 2 formats: DAV and ASF. You can use the software VLC on your computer to play this video.
Thank you for following the article!!!










 Tiếng Việt