In this article, I will guide you how to set up and drag images from Hikvision recorders to Dahua recorders.
1. Setup on Hikvision DVR
- First, you need to change the authentication status on the recorder to Digest/basic as shown below:

- Remember the 2 Port parameters: HTTP (default is 80) and RTSP (default is 554). These are 2 ports used to connect to Dahua and recorders. You can change these 2 Ports as you like.
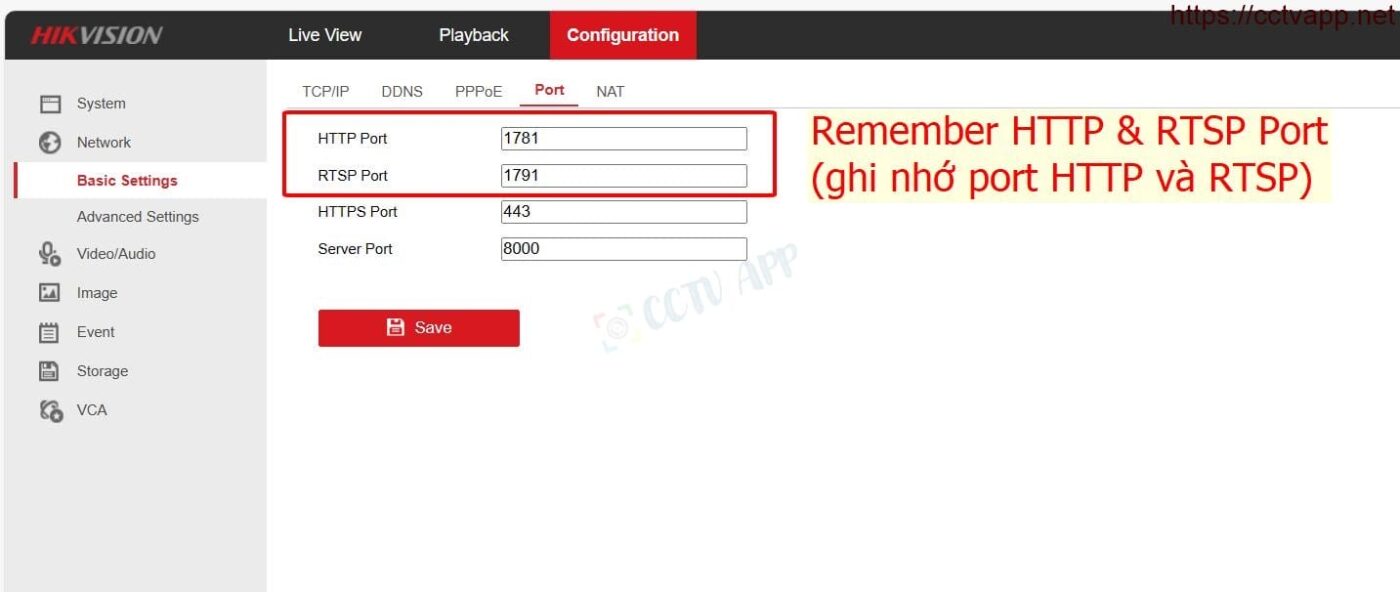
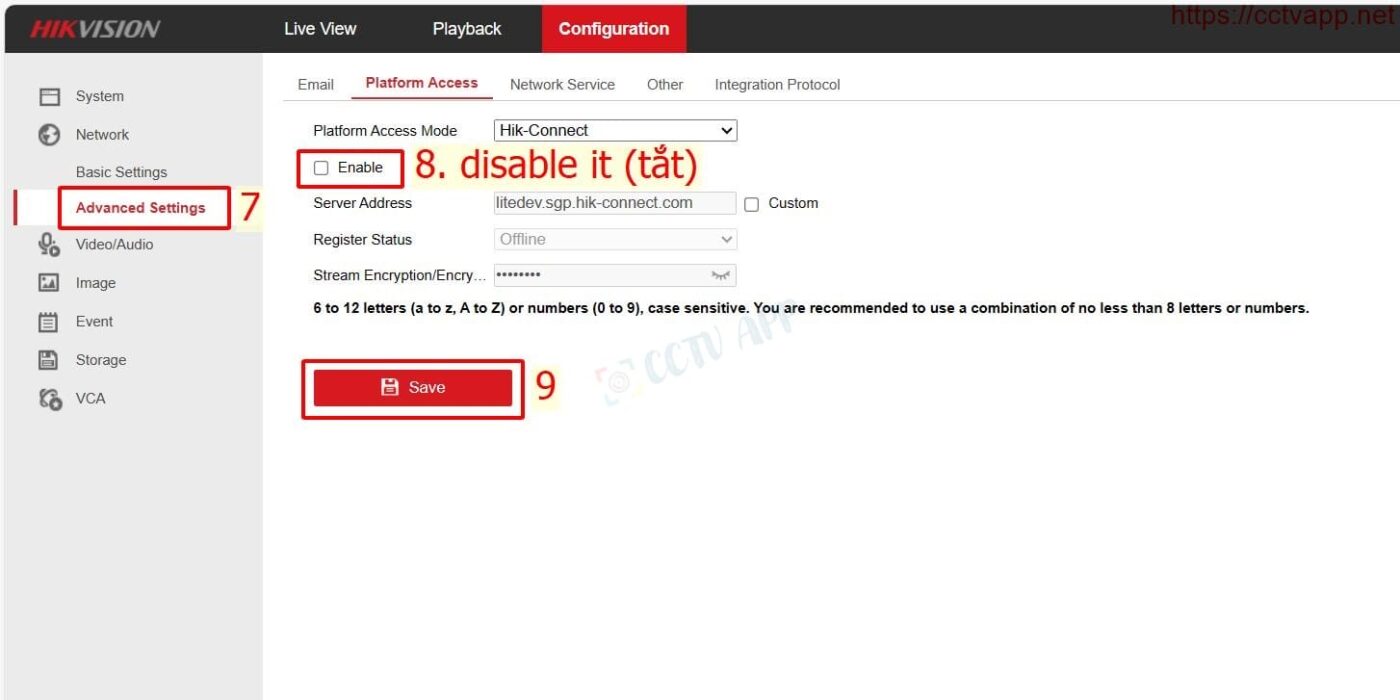
- On some Hikvision DVRs, I find that I need to turn off Hik-Connect to use it. You can turn this function on/off for testing.
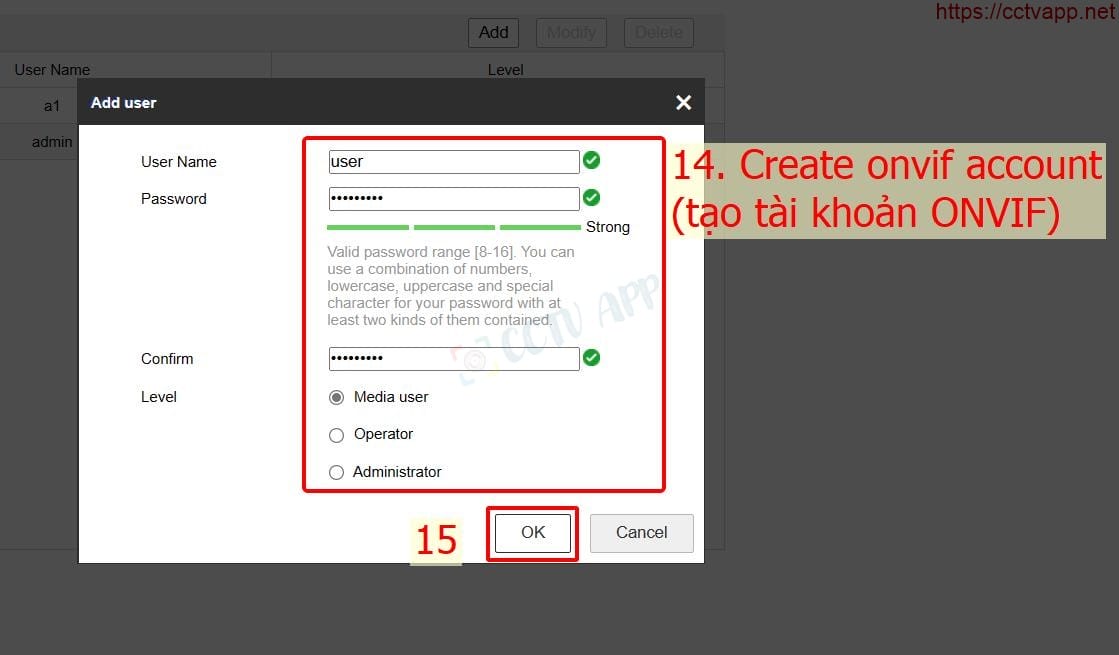
- Turn on ONVIF and create an ONVIF account:
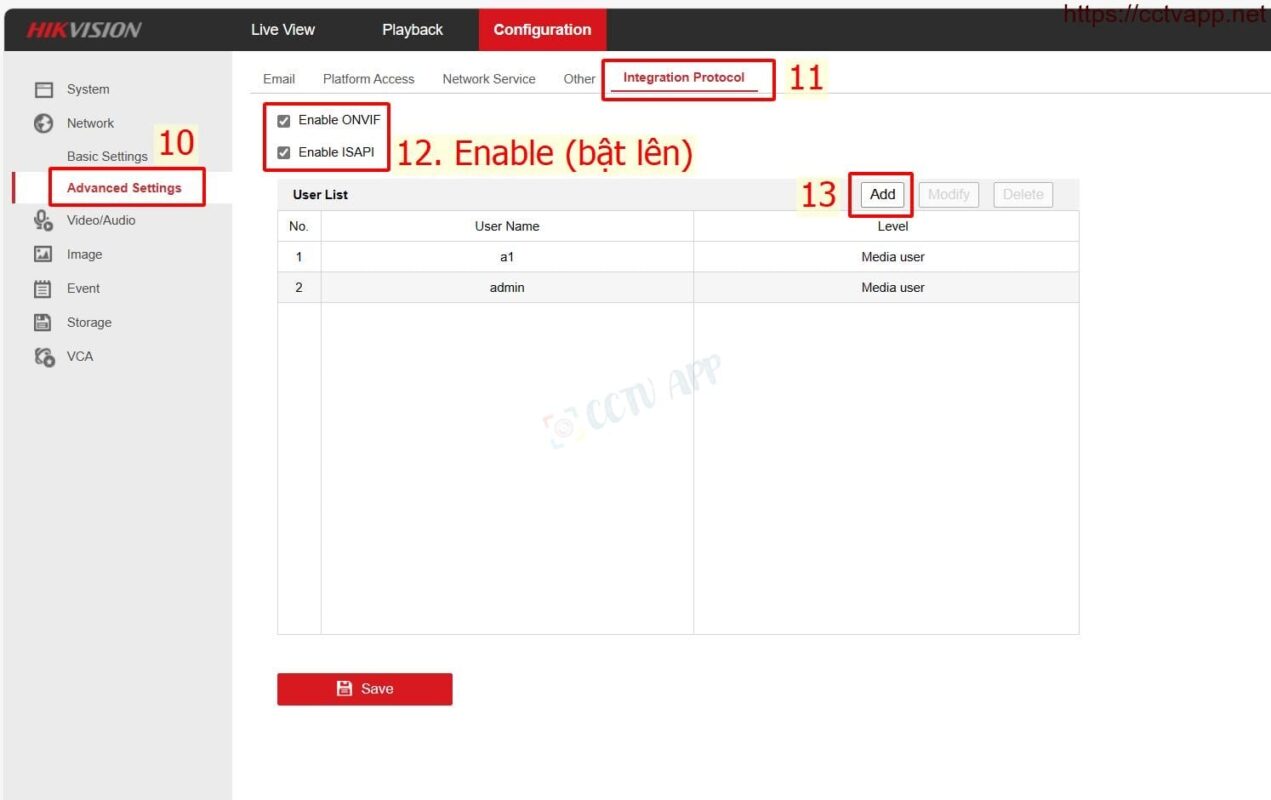
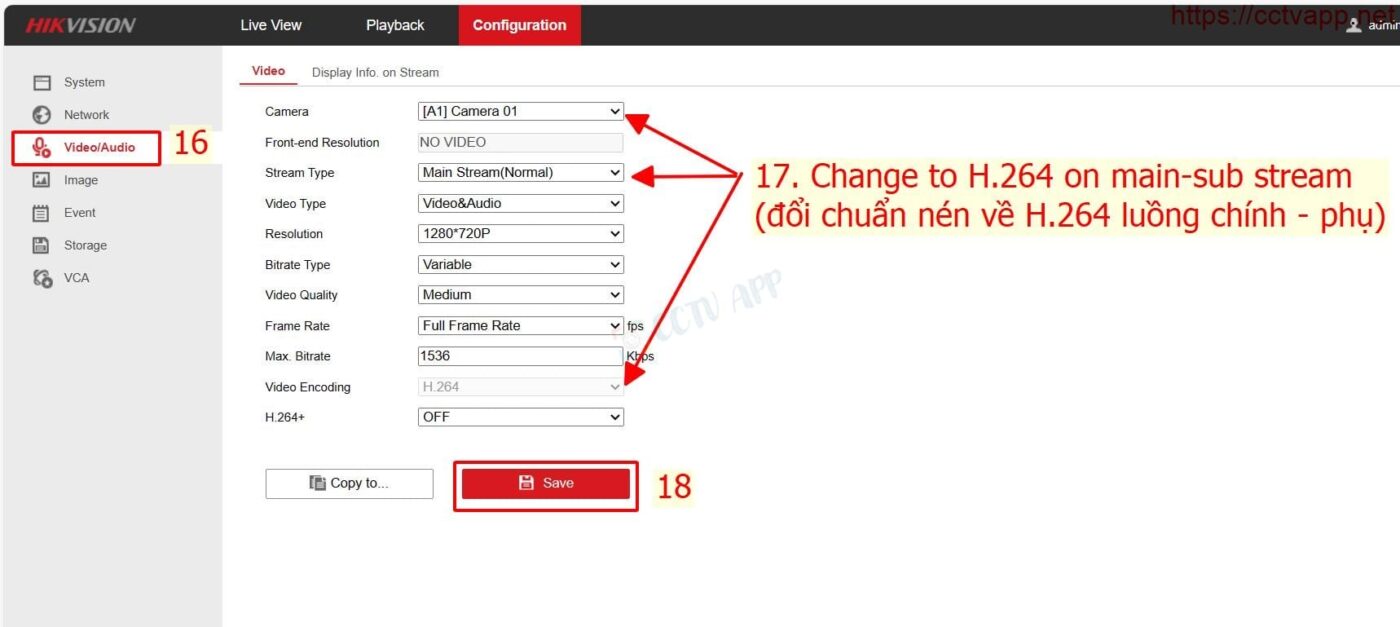
- Currently Hikvision and Dahua only support ONVIF version 2.4. Therefore, you need to change the compression standard to H.264 for both main/sub (main/sub) streams on all Camera channels that need to be downloaded.
2. Set domain name and open port for Hikvision
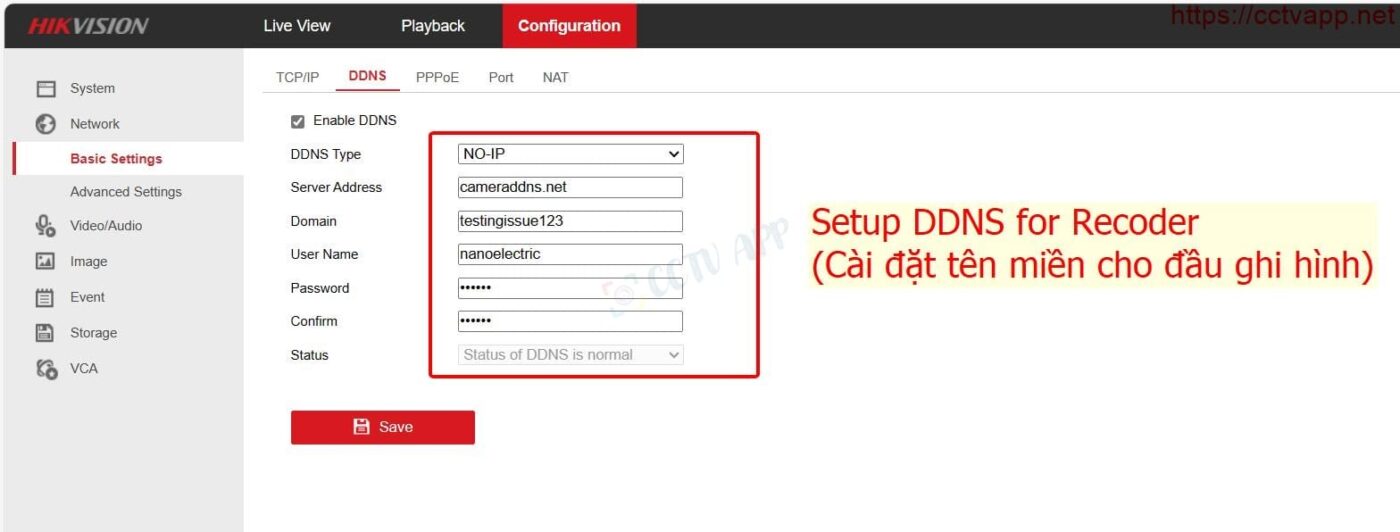
- To connect remotely using a domain name, you need to set a domain name for the system.
- Hikvision supports free domain names: https://cameraddns.net in Vietnam, or you can use paid domain names such as: DynDNS, No-IP, …
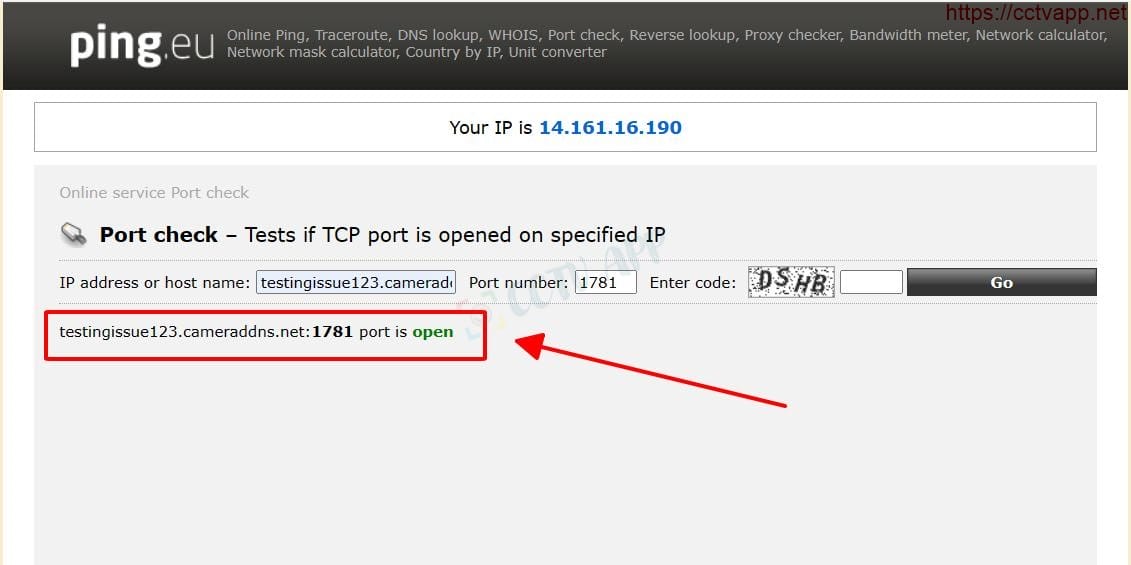
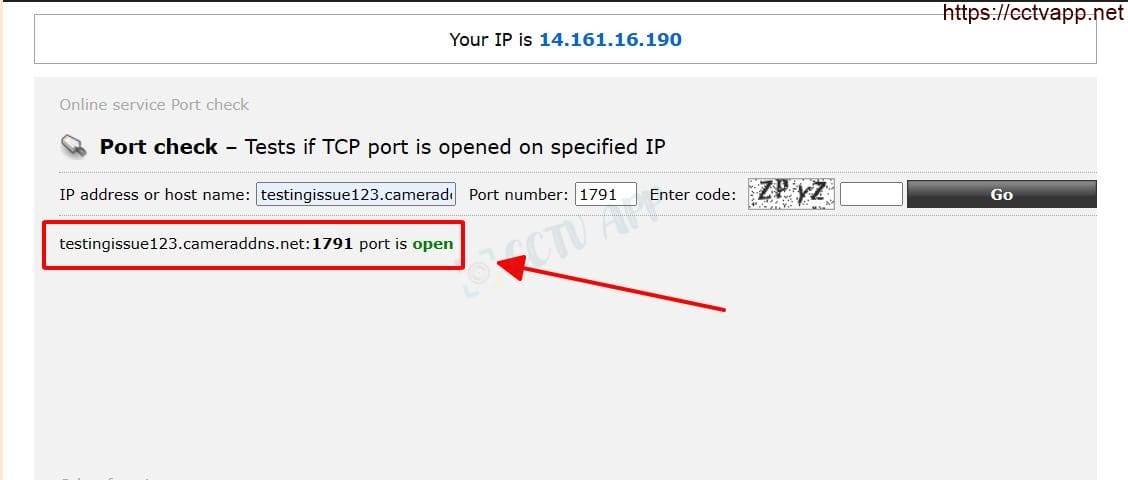
- Open Port for the video recorder on the network modem. You can refer to how to open Port on some common modems at here.
3. Add to Dahua recoder
- Manipulate as follows to add to the video recorder:
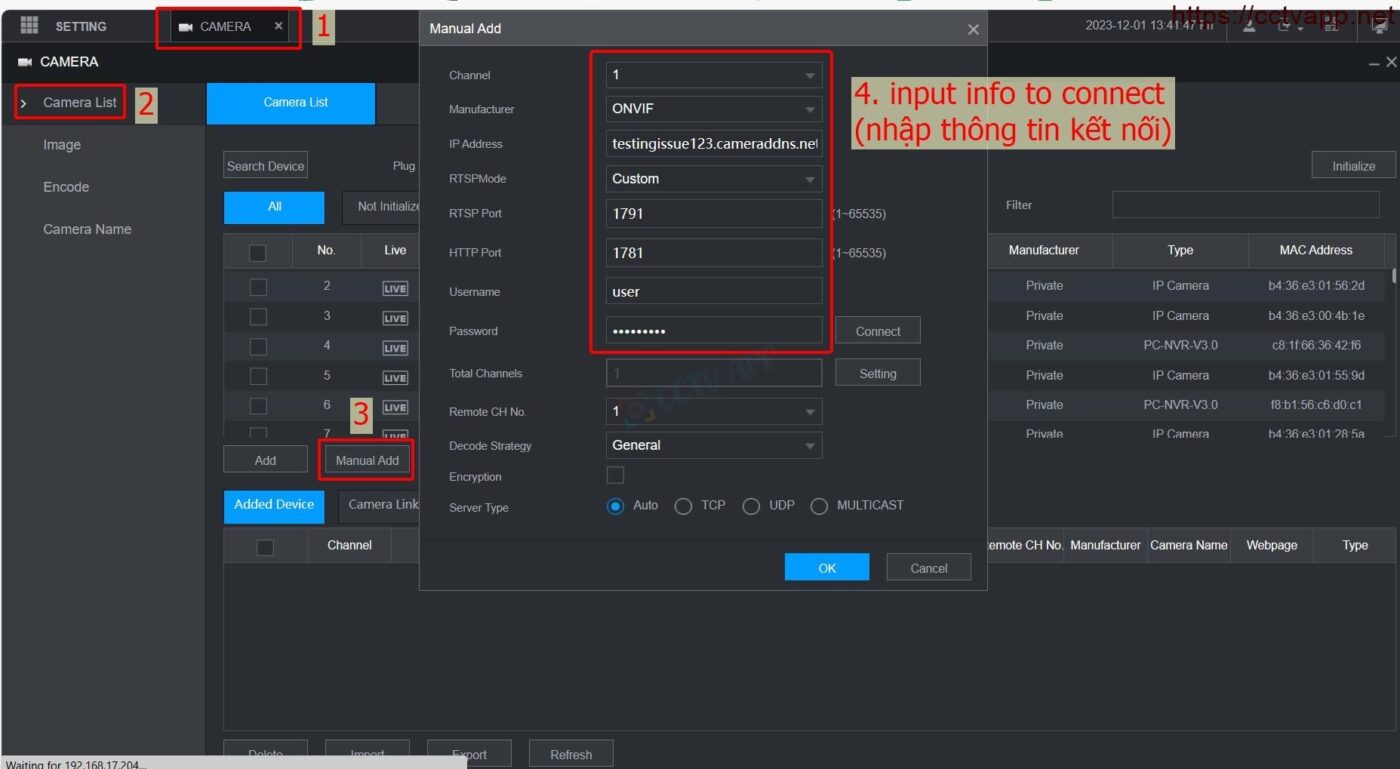
- You can customize the number of channels to pull as follows:
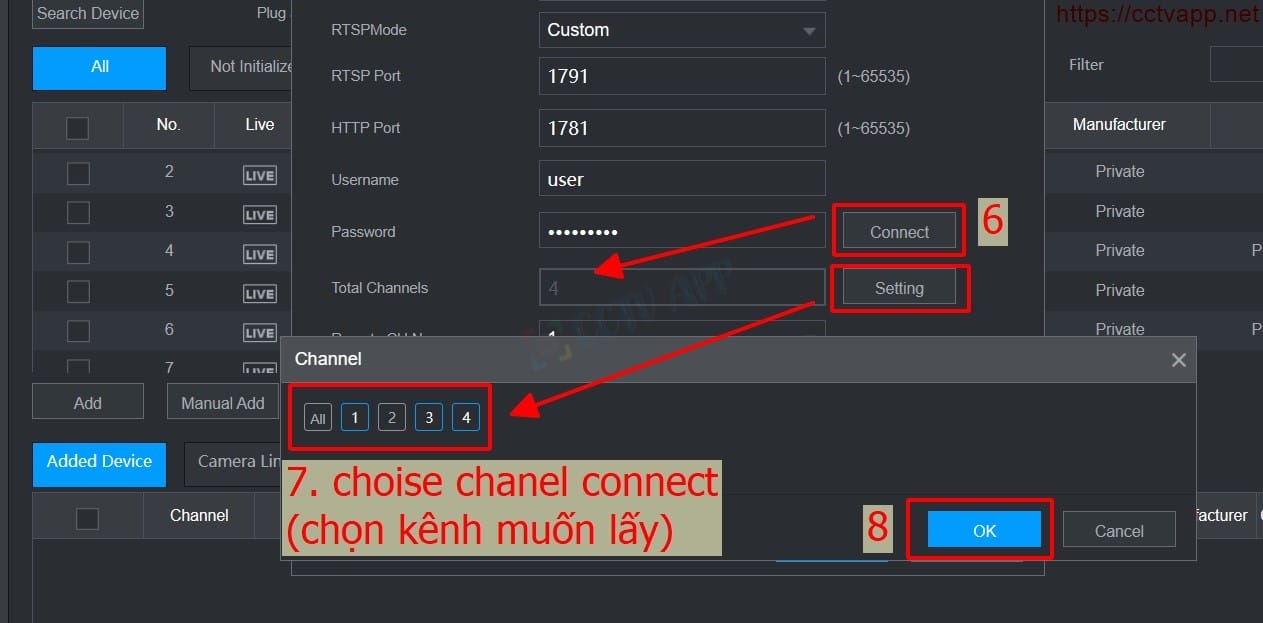
- For example, in the picture, I am pulling channels 1, 3, 4 from the Hikvision DVR to the Dahua DVR.
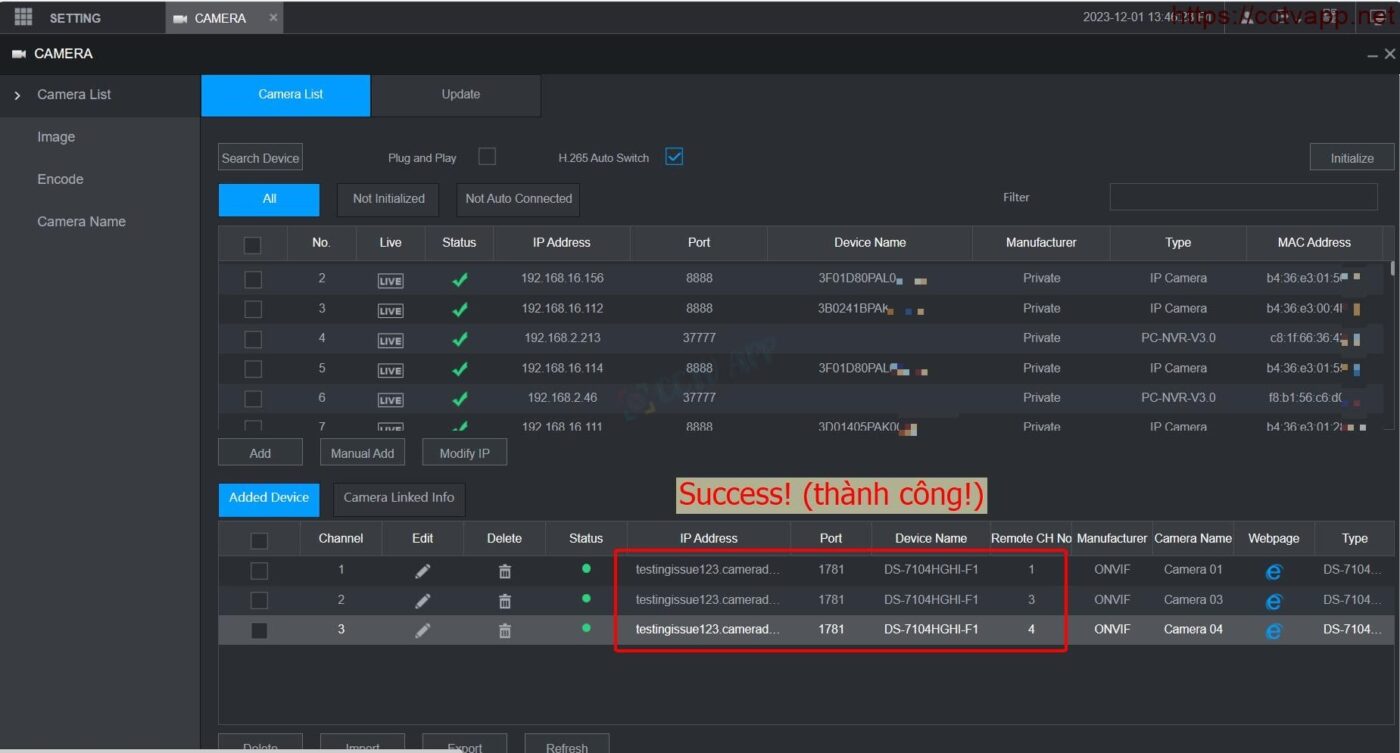
4. Important note
When adding a Camera from a Hikvision recorder to a Dahua recorder, there are the following notes:
- Some video recorders can only push back to channel 1 (cannot customize multiple channels or select any channel)
- Compression standard needs to be set to H.264 and create an ONVIF account before connecting
- Can support remote connection by domain name. However, in rare cases, only connecting using Static IP is supported.
Thank you for following the article!!!









 Tiếng Việt