

In this article, I will show you how to use the basic KX-F70M Video Wall kit. Includes installation, initialization and split mode.
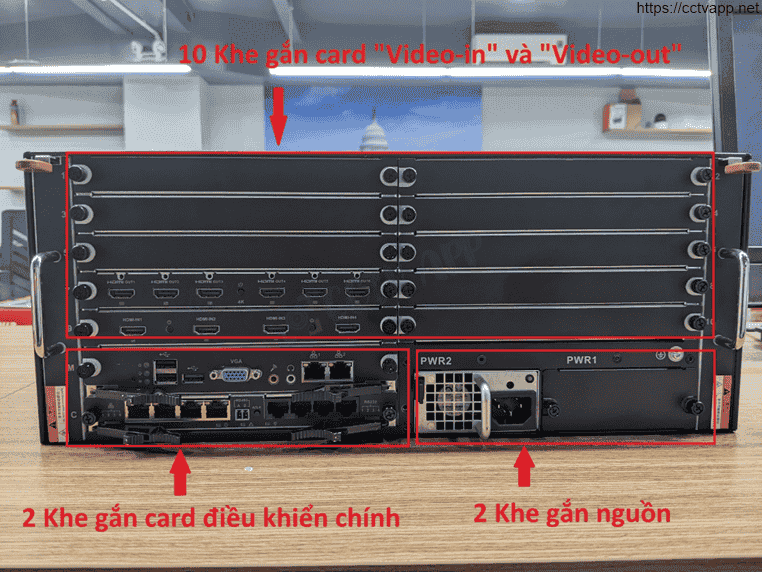
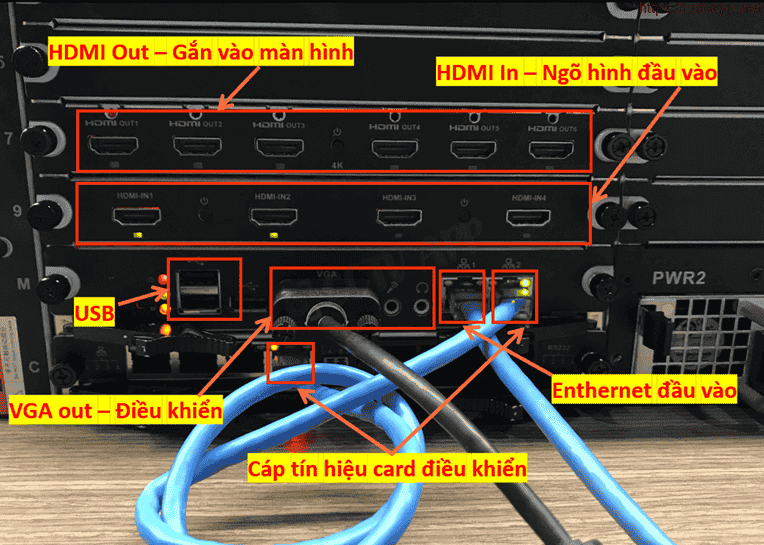
1. Install the main control card, and the video card in/out
Install the control cards and video cards as shown below.


2. Device initialization
There are 2 ways to initialize the device: Direct operation on the monitor attached to VGA-out and web browser:
a. VGA-out screen operation:
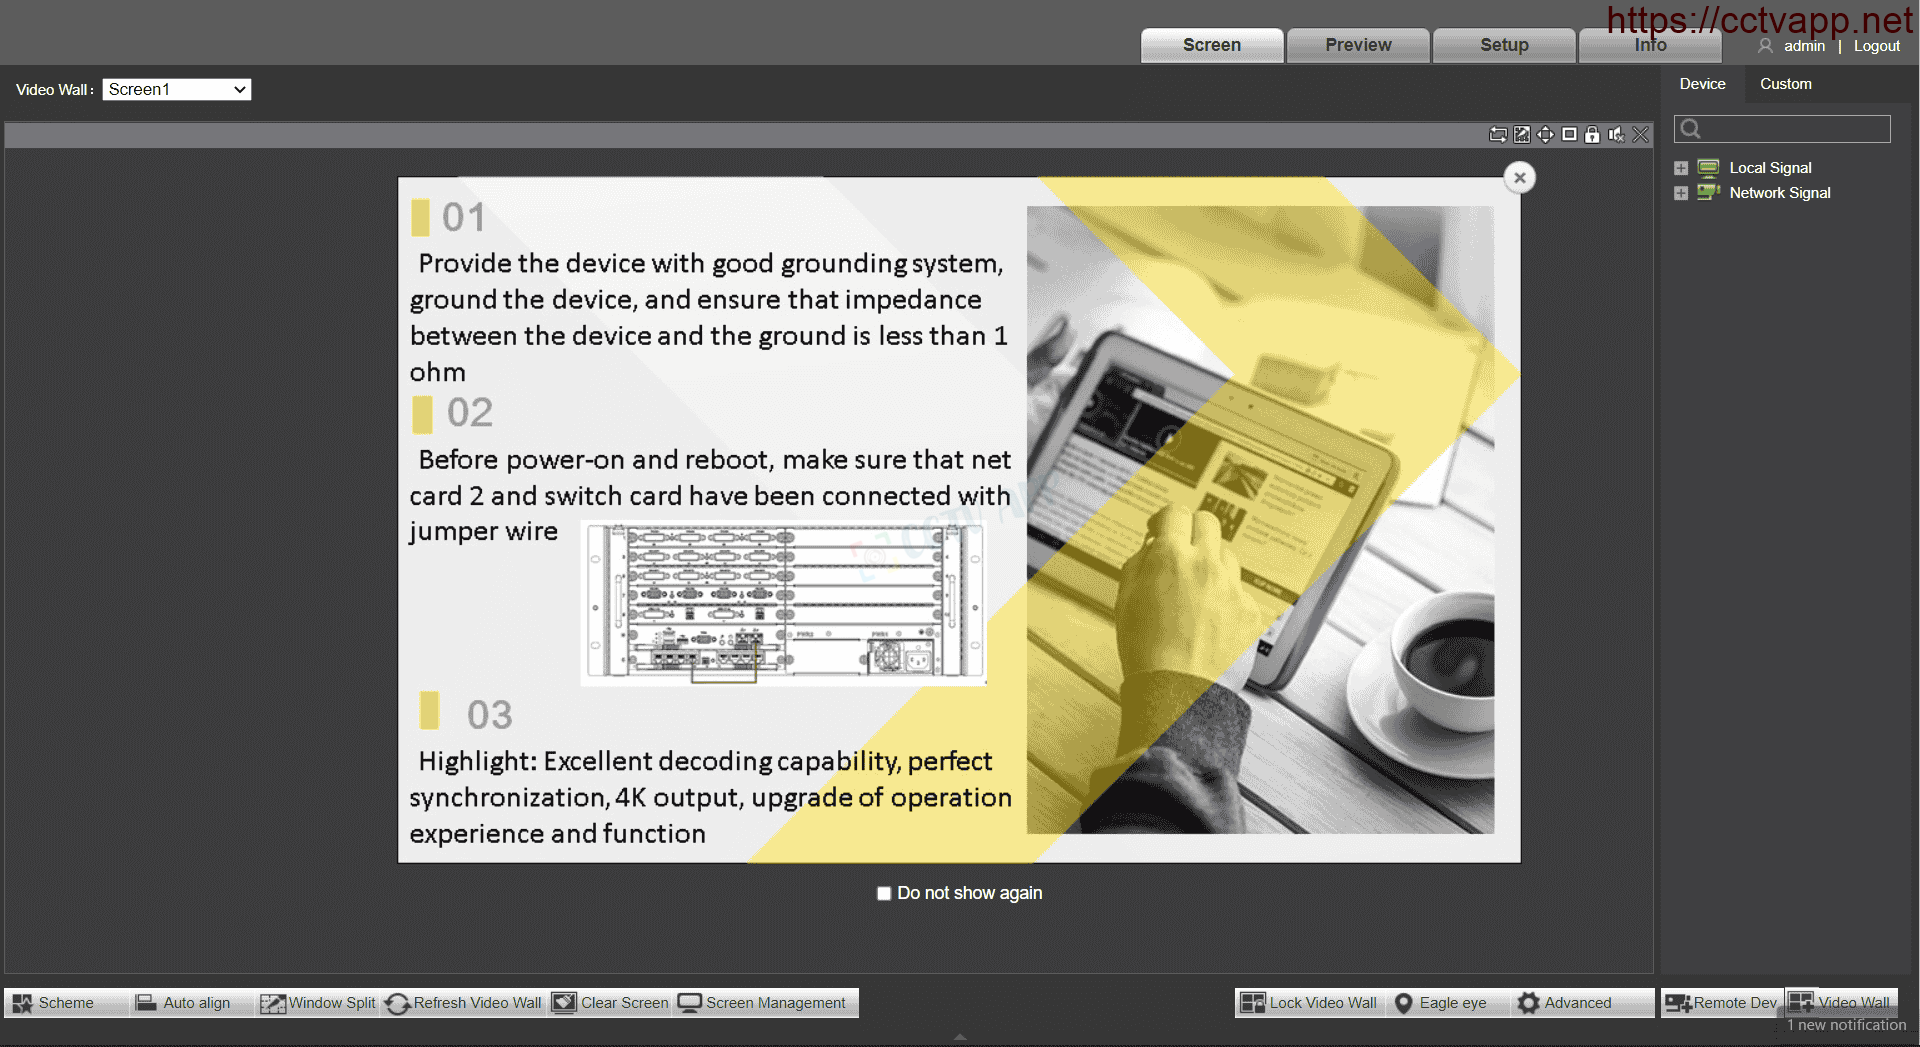
Starting the device for the first time will look like this:

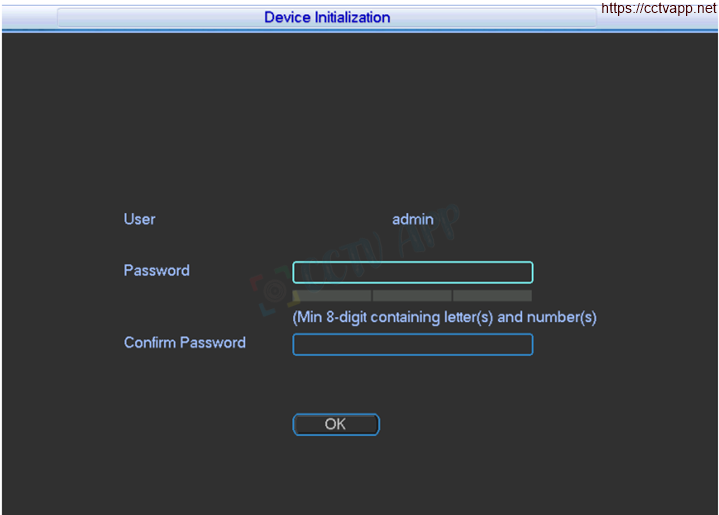
Set admin password. Password must consist of 8 to 32 non-blank characters and contain at least two types of characters between uppercase, lowercase, numbers and special characters (excluding ‘”;: &). Confirmed password must be the same .
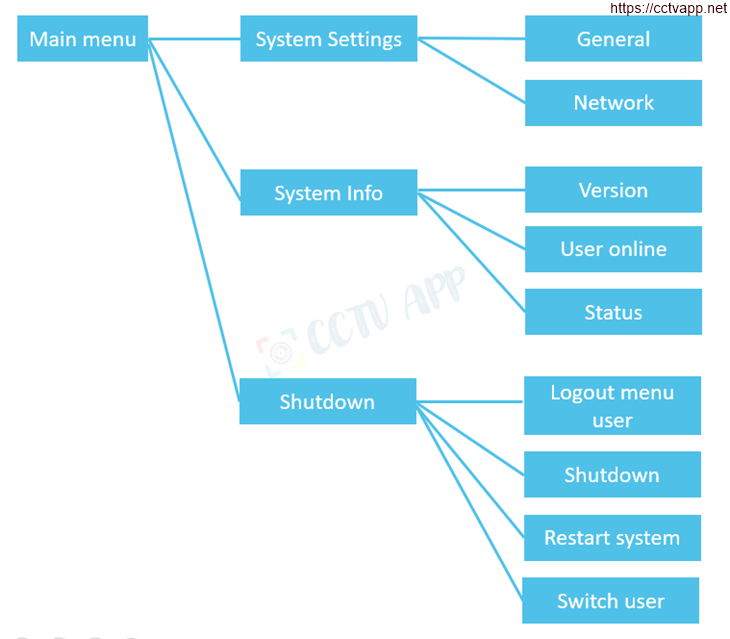
The structure of the control interface on VGA-Out is as follows:

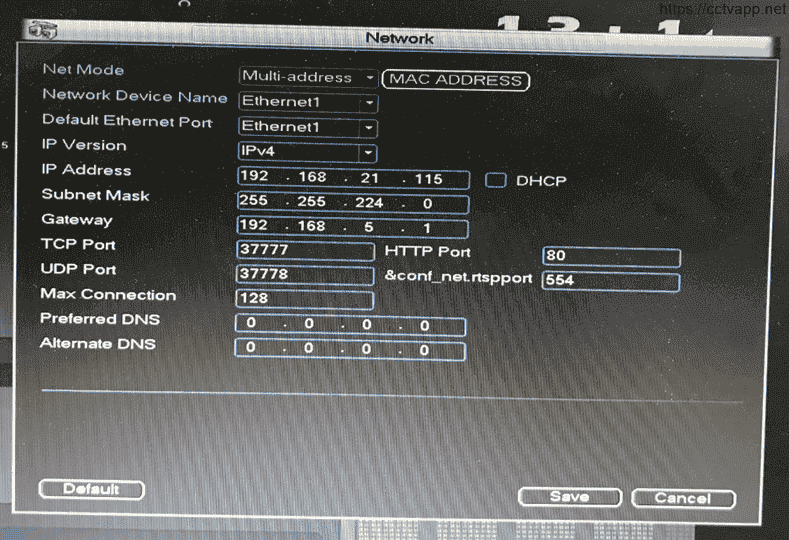
After logging in to the Main Menu, select: System Settings -> Network to set the device’s IP address

b. Initialization in the browser:
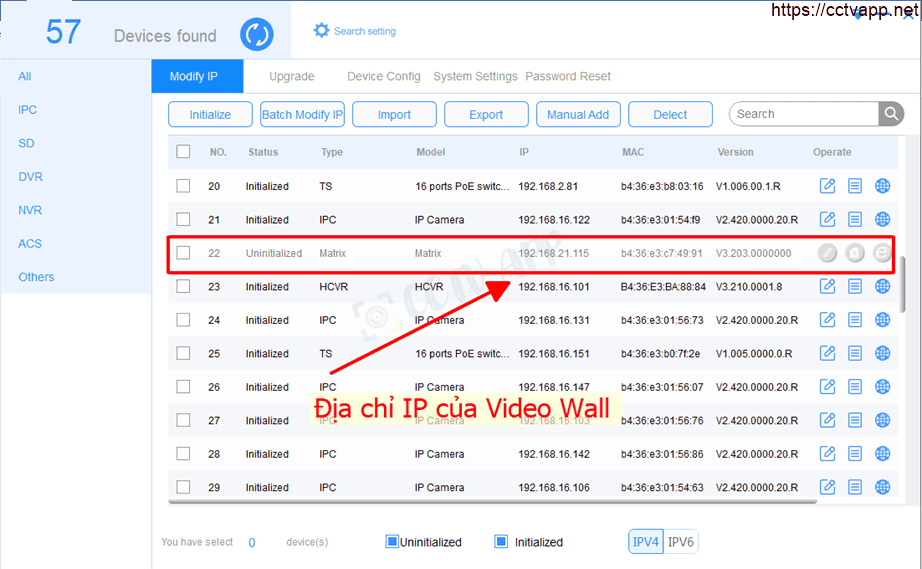
Use Configtool to find the IP address of Video Wall (Matrix)

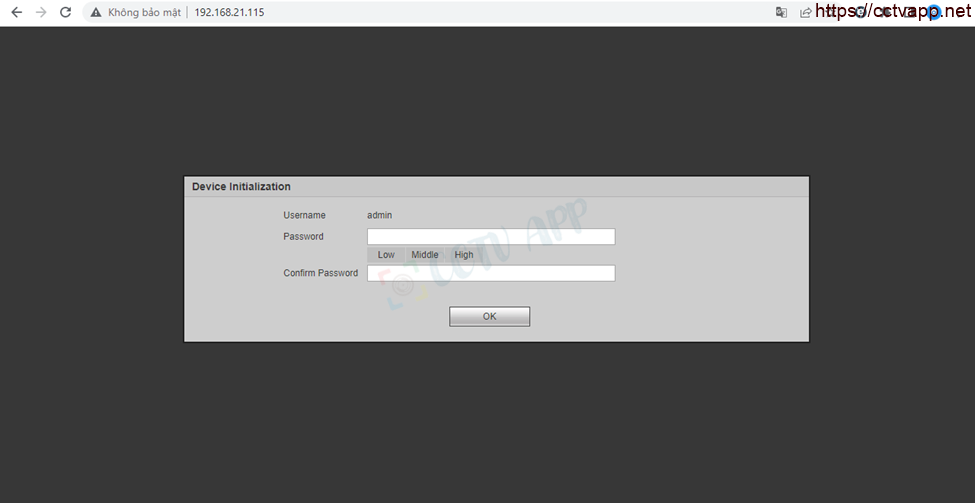
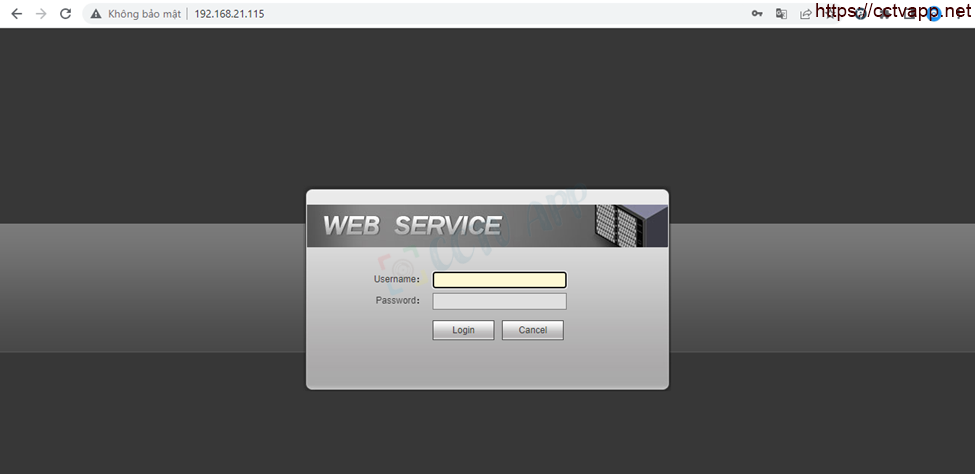
Login Video Wall’s IP address on browser to generate password:

Login interface on Video Wall:

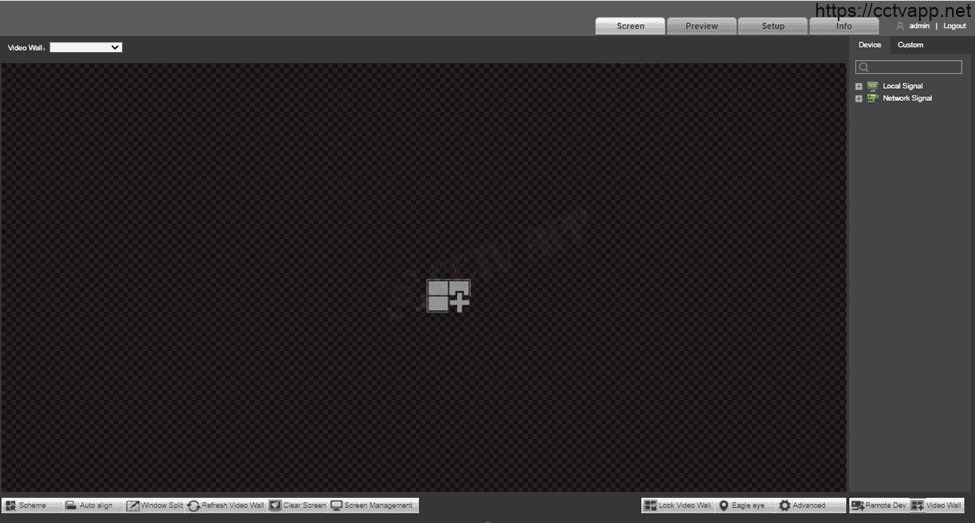
Main interface of the device:

3. Add Camera, DVR to VideoWall
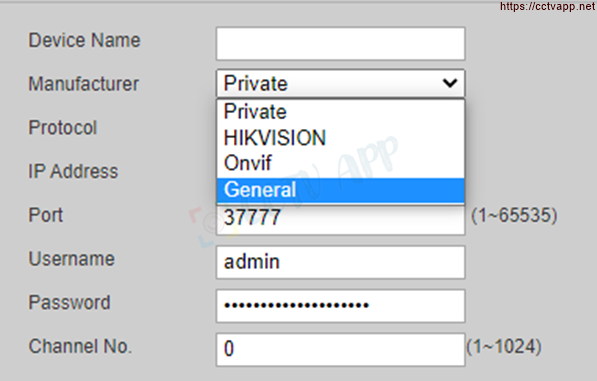
First login to the device, select: Setup -> Signal Management -> Network Sign -> Manual Add and follow the instructions below

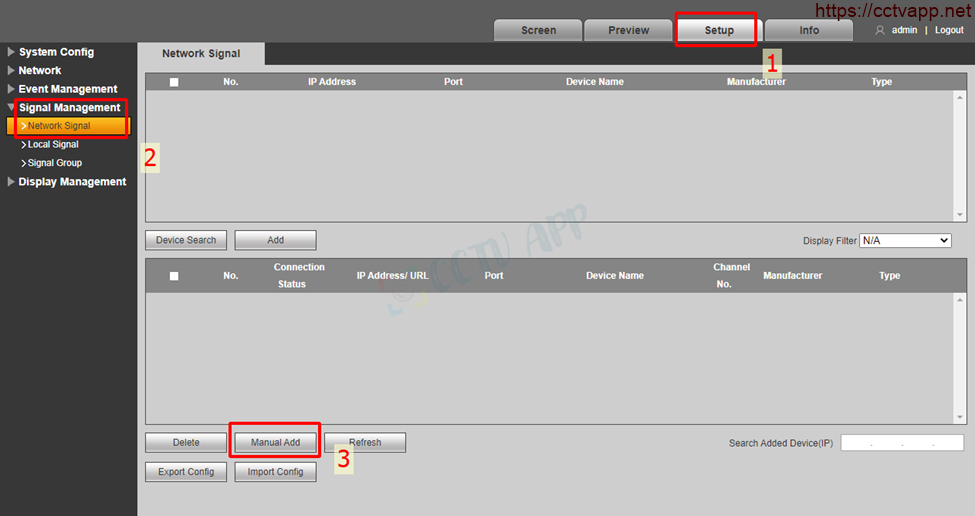

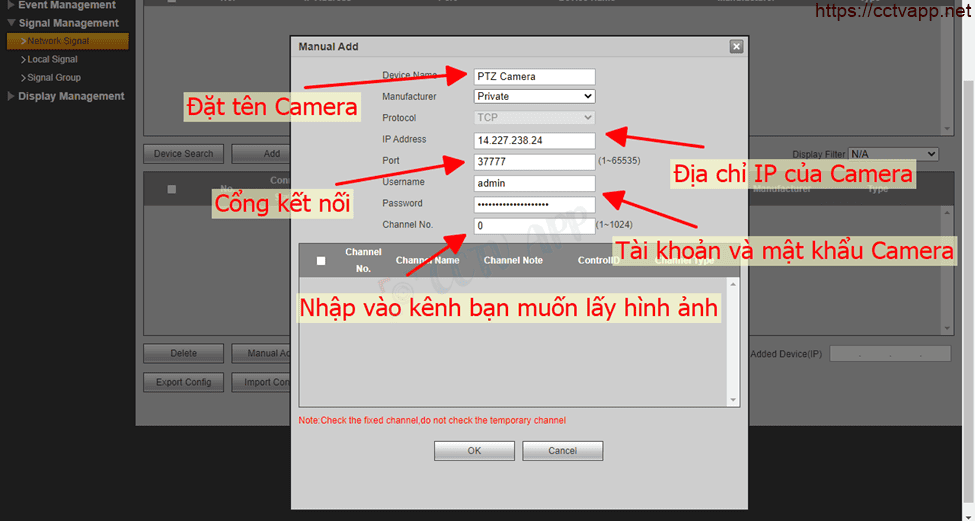

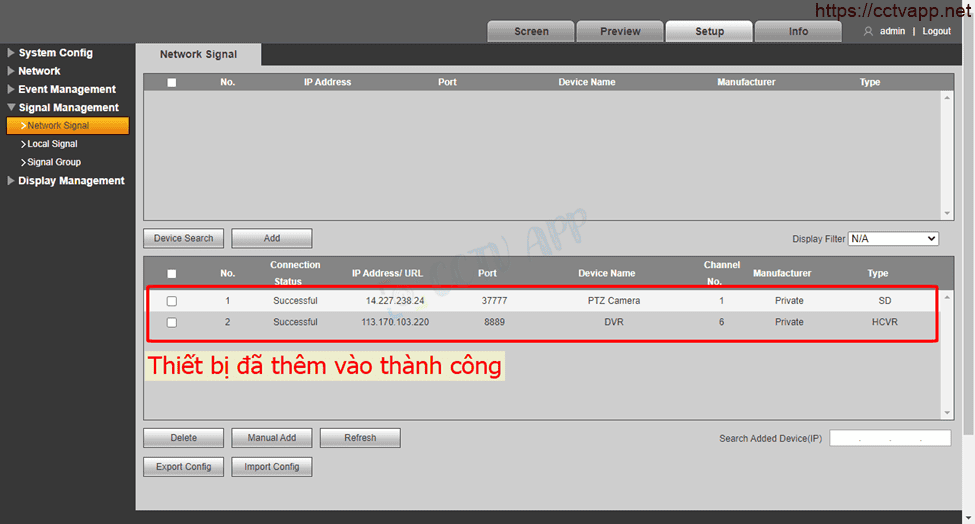
Video Wall supports device connection by protocol: Private (IPC device, Recoder of KBVision), Onvif, Hikvision, General (Dahua). Only support for IPlocal or IPwan (don’t support domain name)

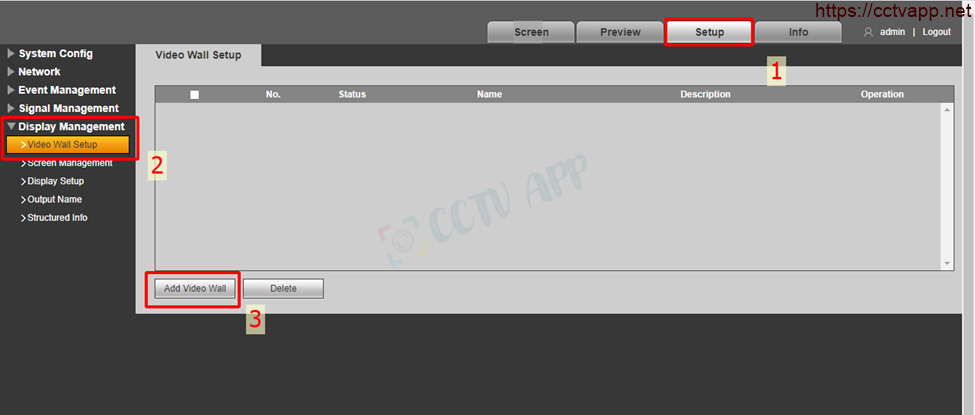
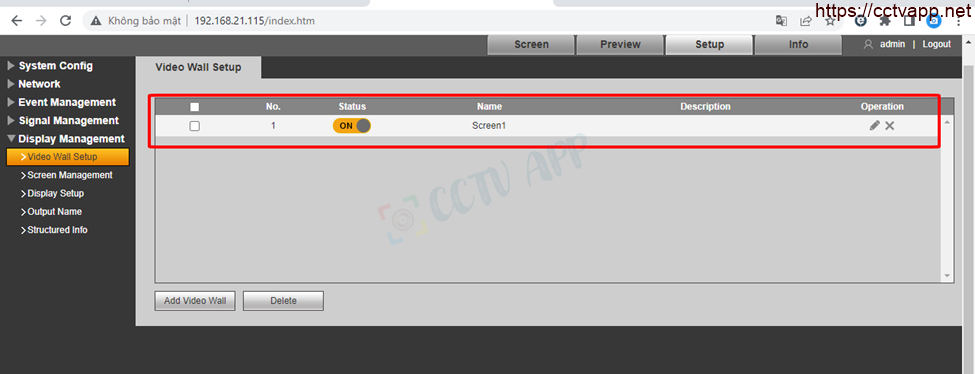
4. Create a “Video Wall” and add a Camera to display
a. Create a “Video Wall”
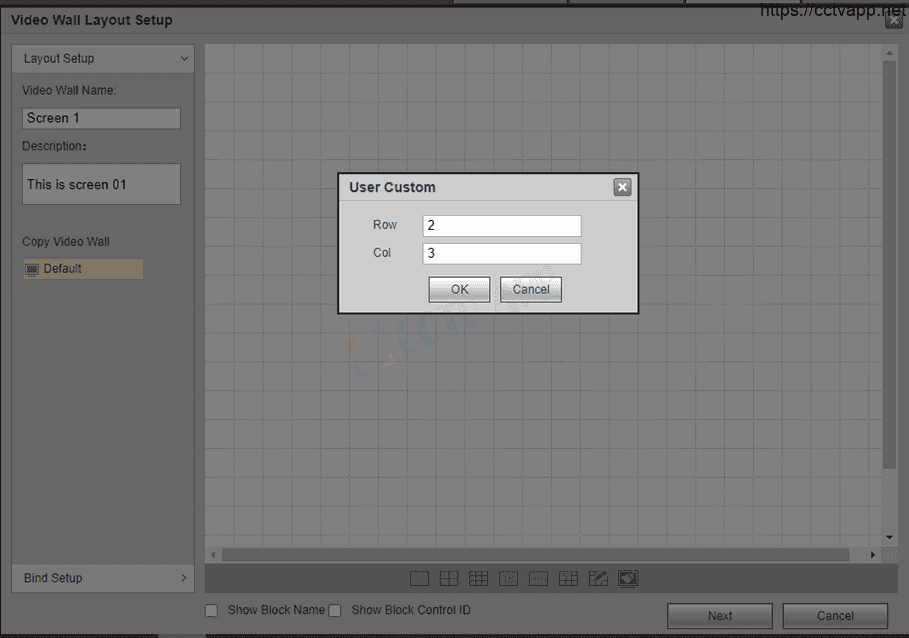
Select: Setup -> Display Management -> Video Wall Setup -> Add Video Wall and set the following parameters:


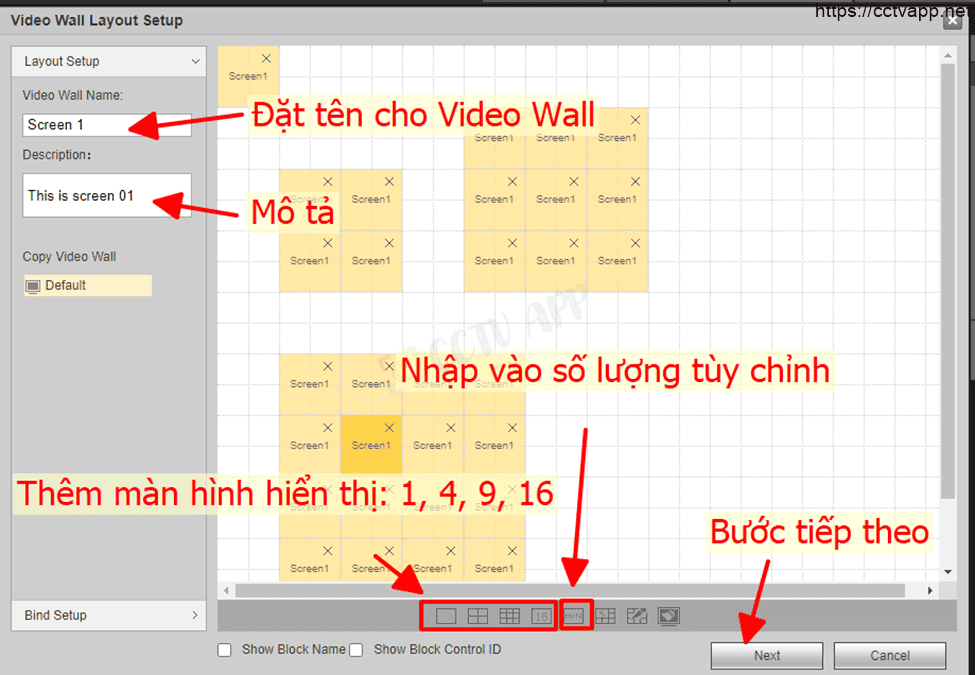
Custom screen number input interface:


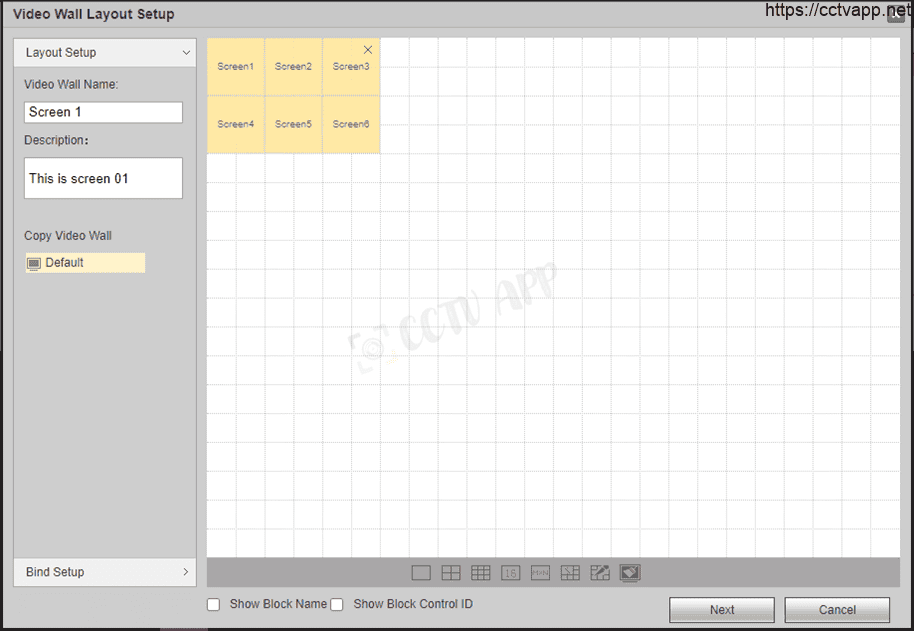
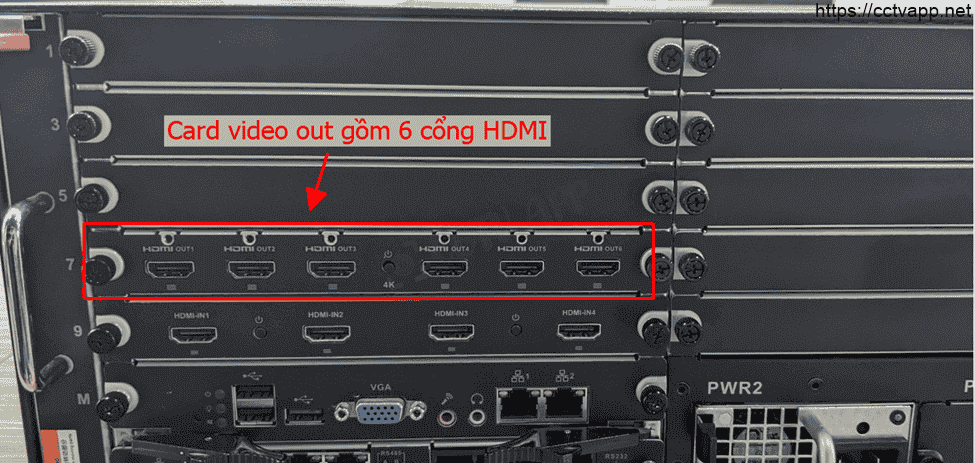
Next step, we need to create link from newly created screen and port HDMI out on video card out . Here I use Video out card with 6 HDMI ports so I will create 6 monitors to display it.


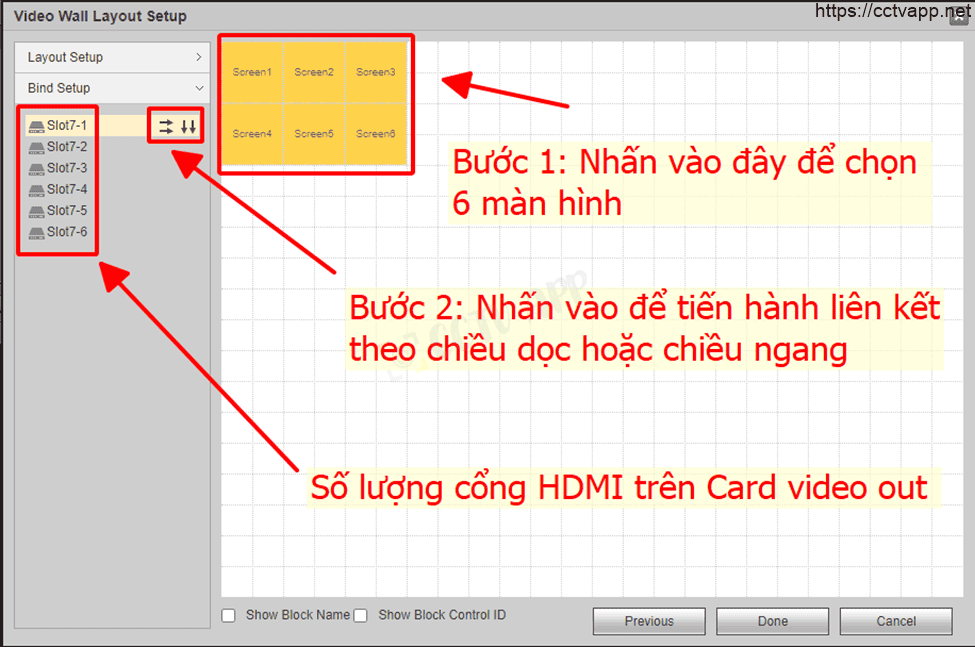
When the HDMI out link is completed on the Video Out Card, the interface will be as follows, can add many different types of links.

b. Add Camera to the screen to display.
After you have finished creating the Video Wall display screen as in the previous step. Select Screen to proceed with adding Camera and display.

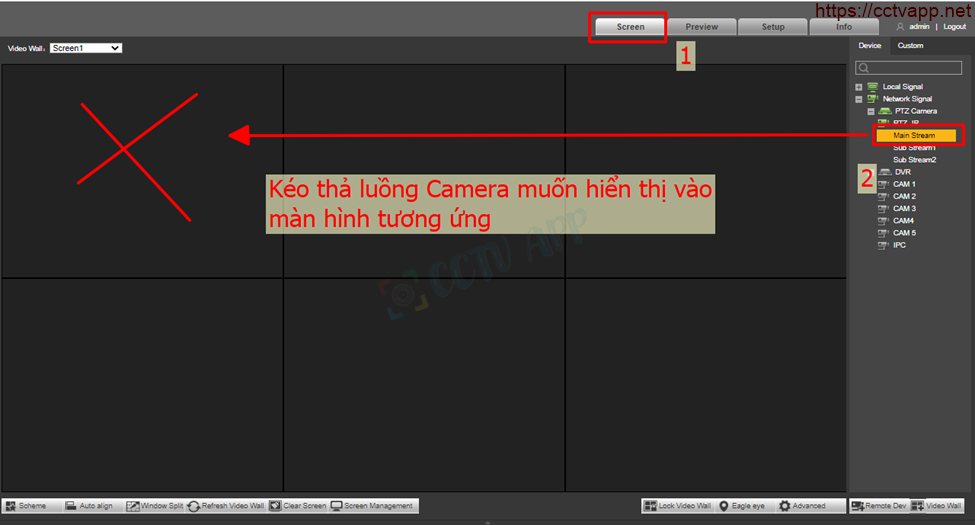

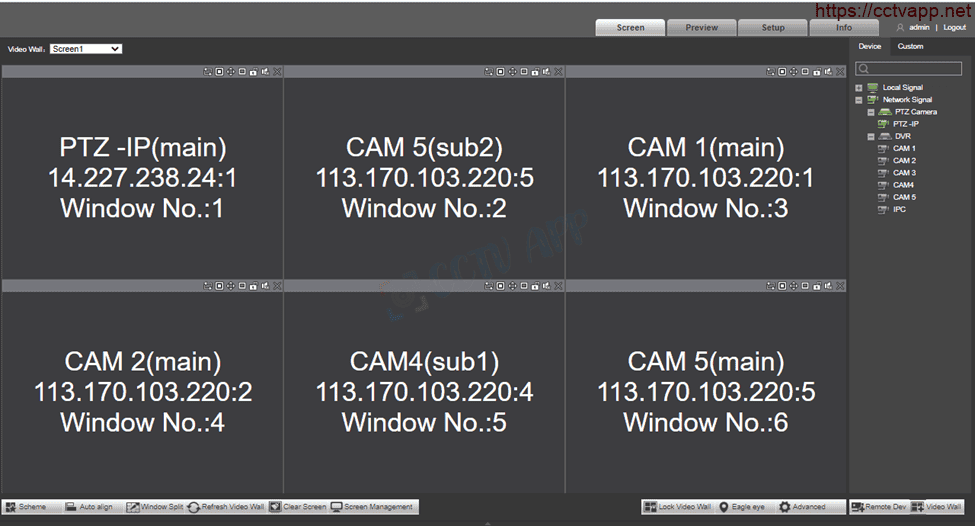
So according to the picture above, 6 HDMI out screens will display the content of 6 different Cameras.
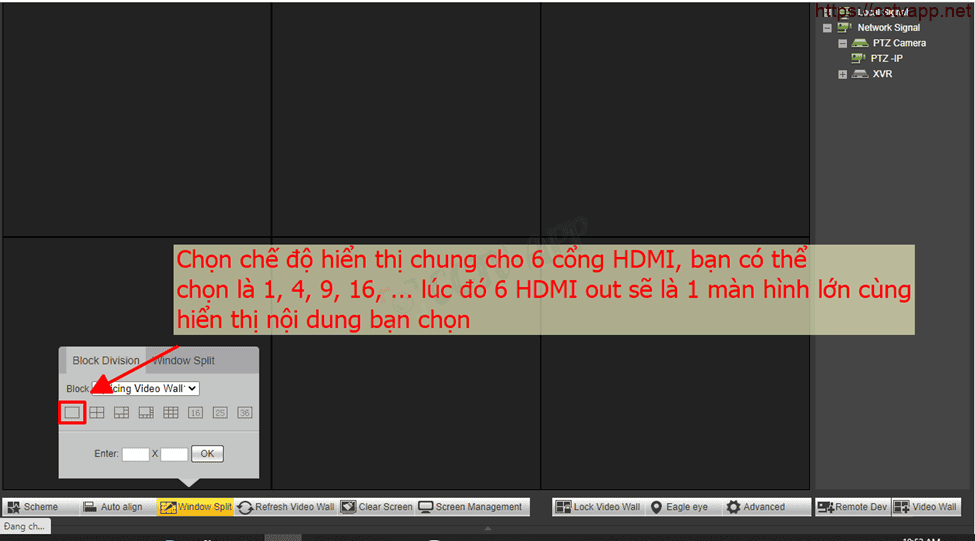
In case you want 6 screens to display 1 Camera, do the following:

The above is the basic user guide for Video Wall. Good luck with your installation.
Thank you for following the article.